How to Transfer USDC from an Avalanche L1 to C-Chain via the Bridge App?
How to Transfer USDC from an Avalanche L1 to C-Chain via the Bridge App?
Prerequisites
- A USDC interchain exchange/bridge must already be established between Avalanche C-Chain and the L1. Refer to How to Set Up an Interchain Transfer for USDC Between Avalanche C-Chain and an L1?
- Your wallet must have the USDC token to be transferred.
- Your wallet must contain AVAX tokens and gas tokens of the L1 to cover transaction fees.
Step-by-Step Transfer Instructions
-
Go to bridge.avacloud.io and connect your Core Extension wallet. Make sure you’re on the correct Testnet or Mainnet.
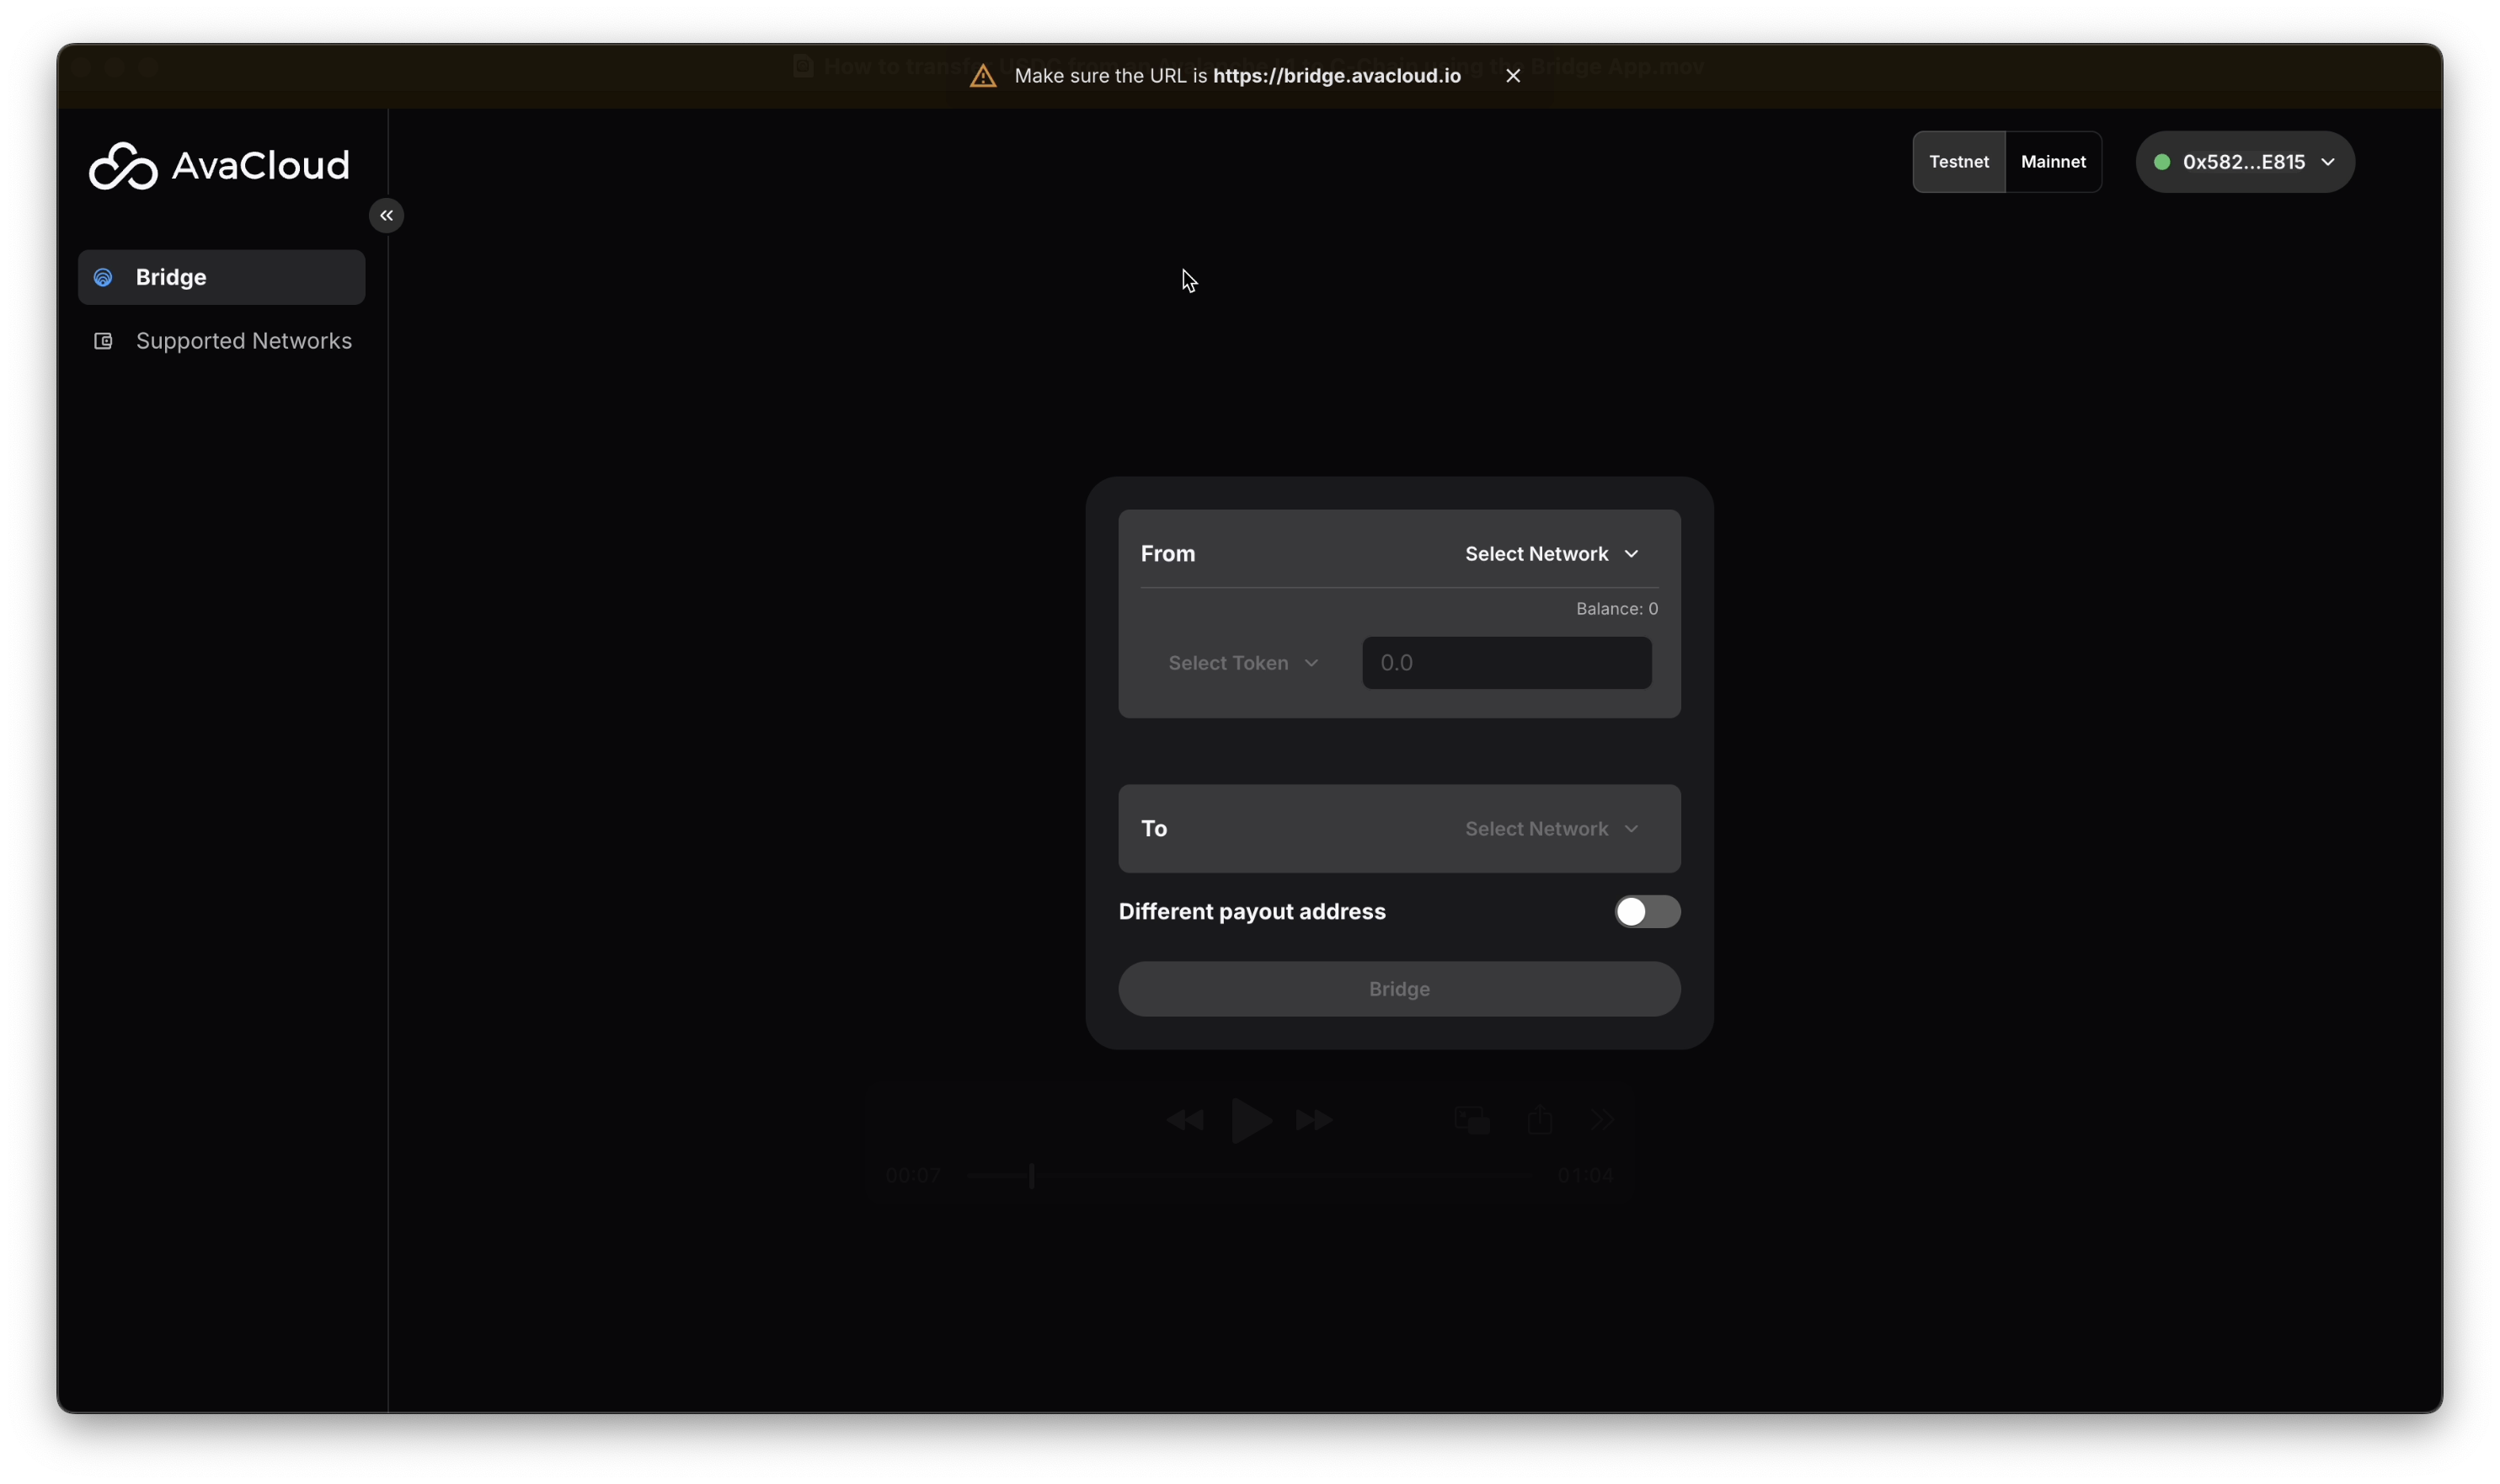
-
Under the
Fromsection, clickSelect Network(top right) and choose your Avalanche L1 (e.g., qr1016t1tp).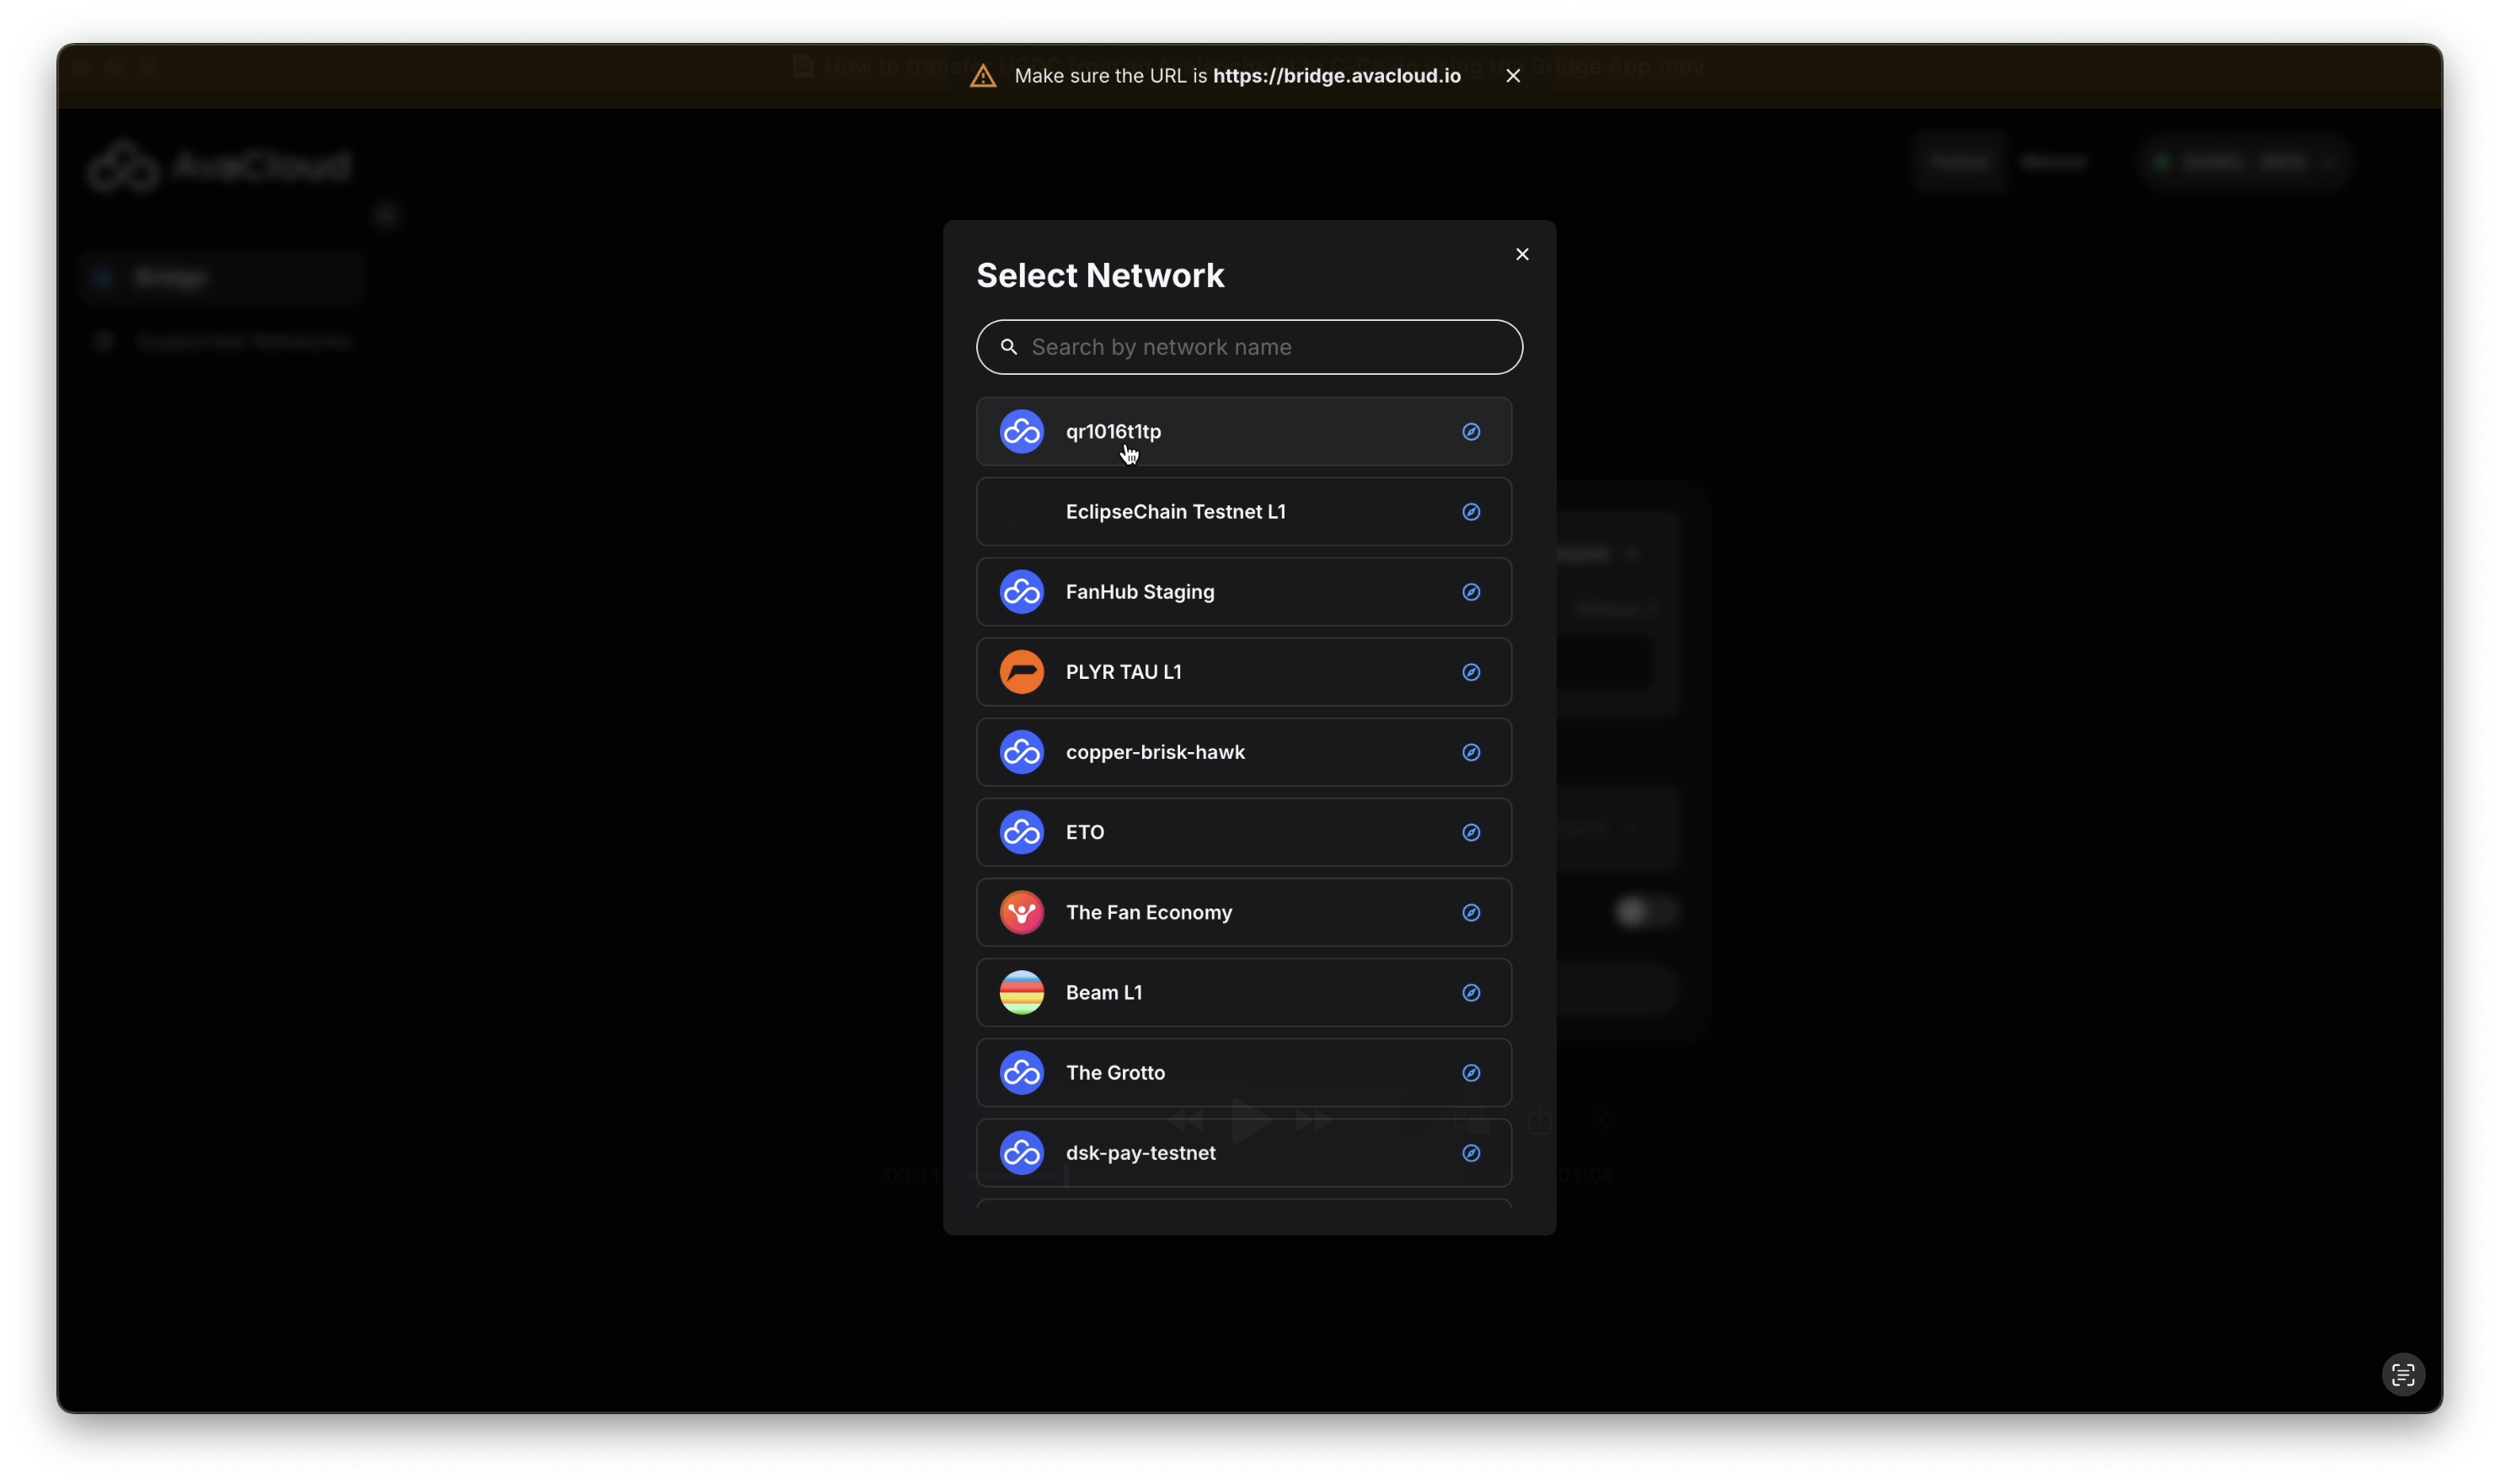
-
After clicking on
Select Tokenbutton, pick USDC as the token and enter the amount you want to transfer.
The amount can be specified anytime.

-
In the
Tosection, clickSelect Networkand chooseAvalanche C-Chainas the destination.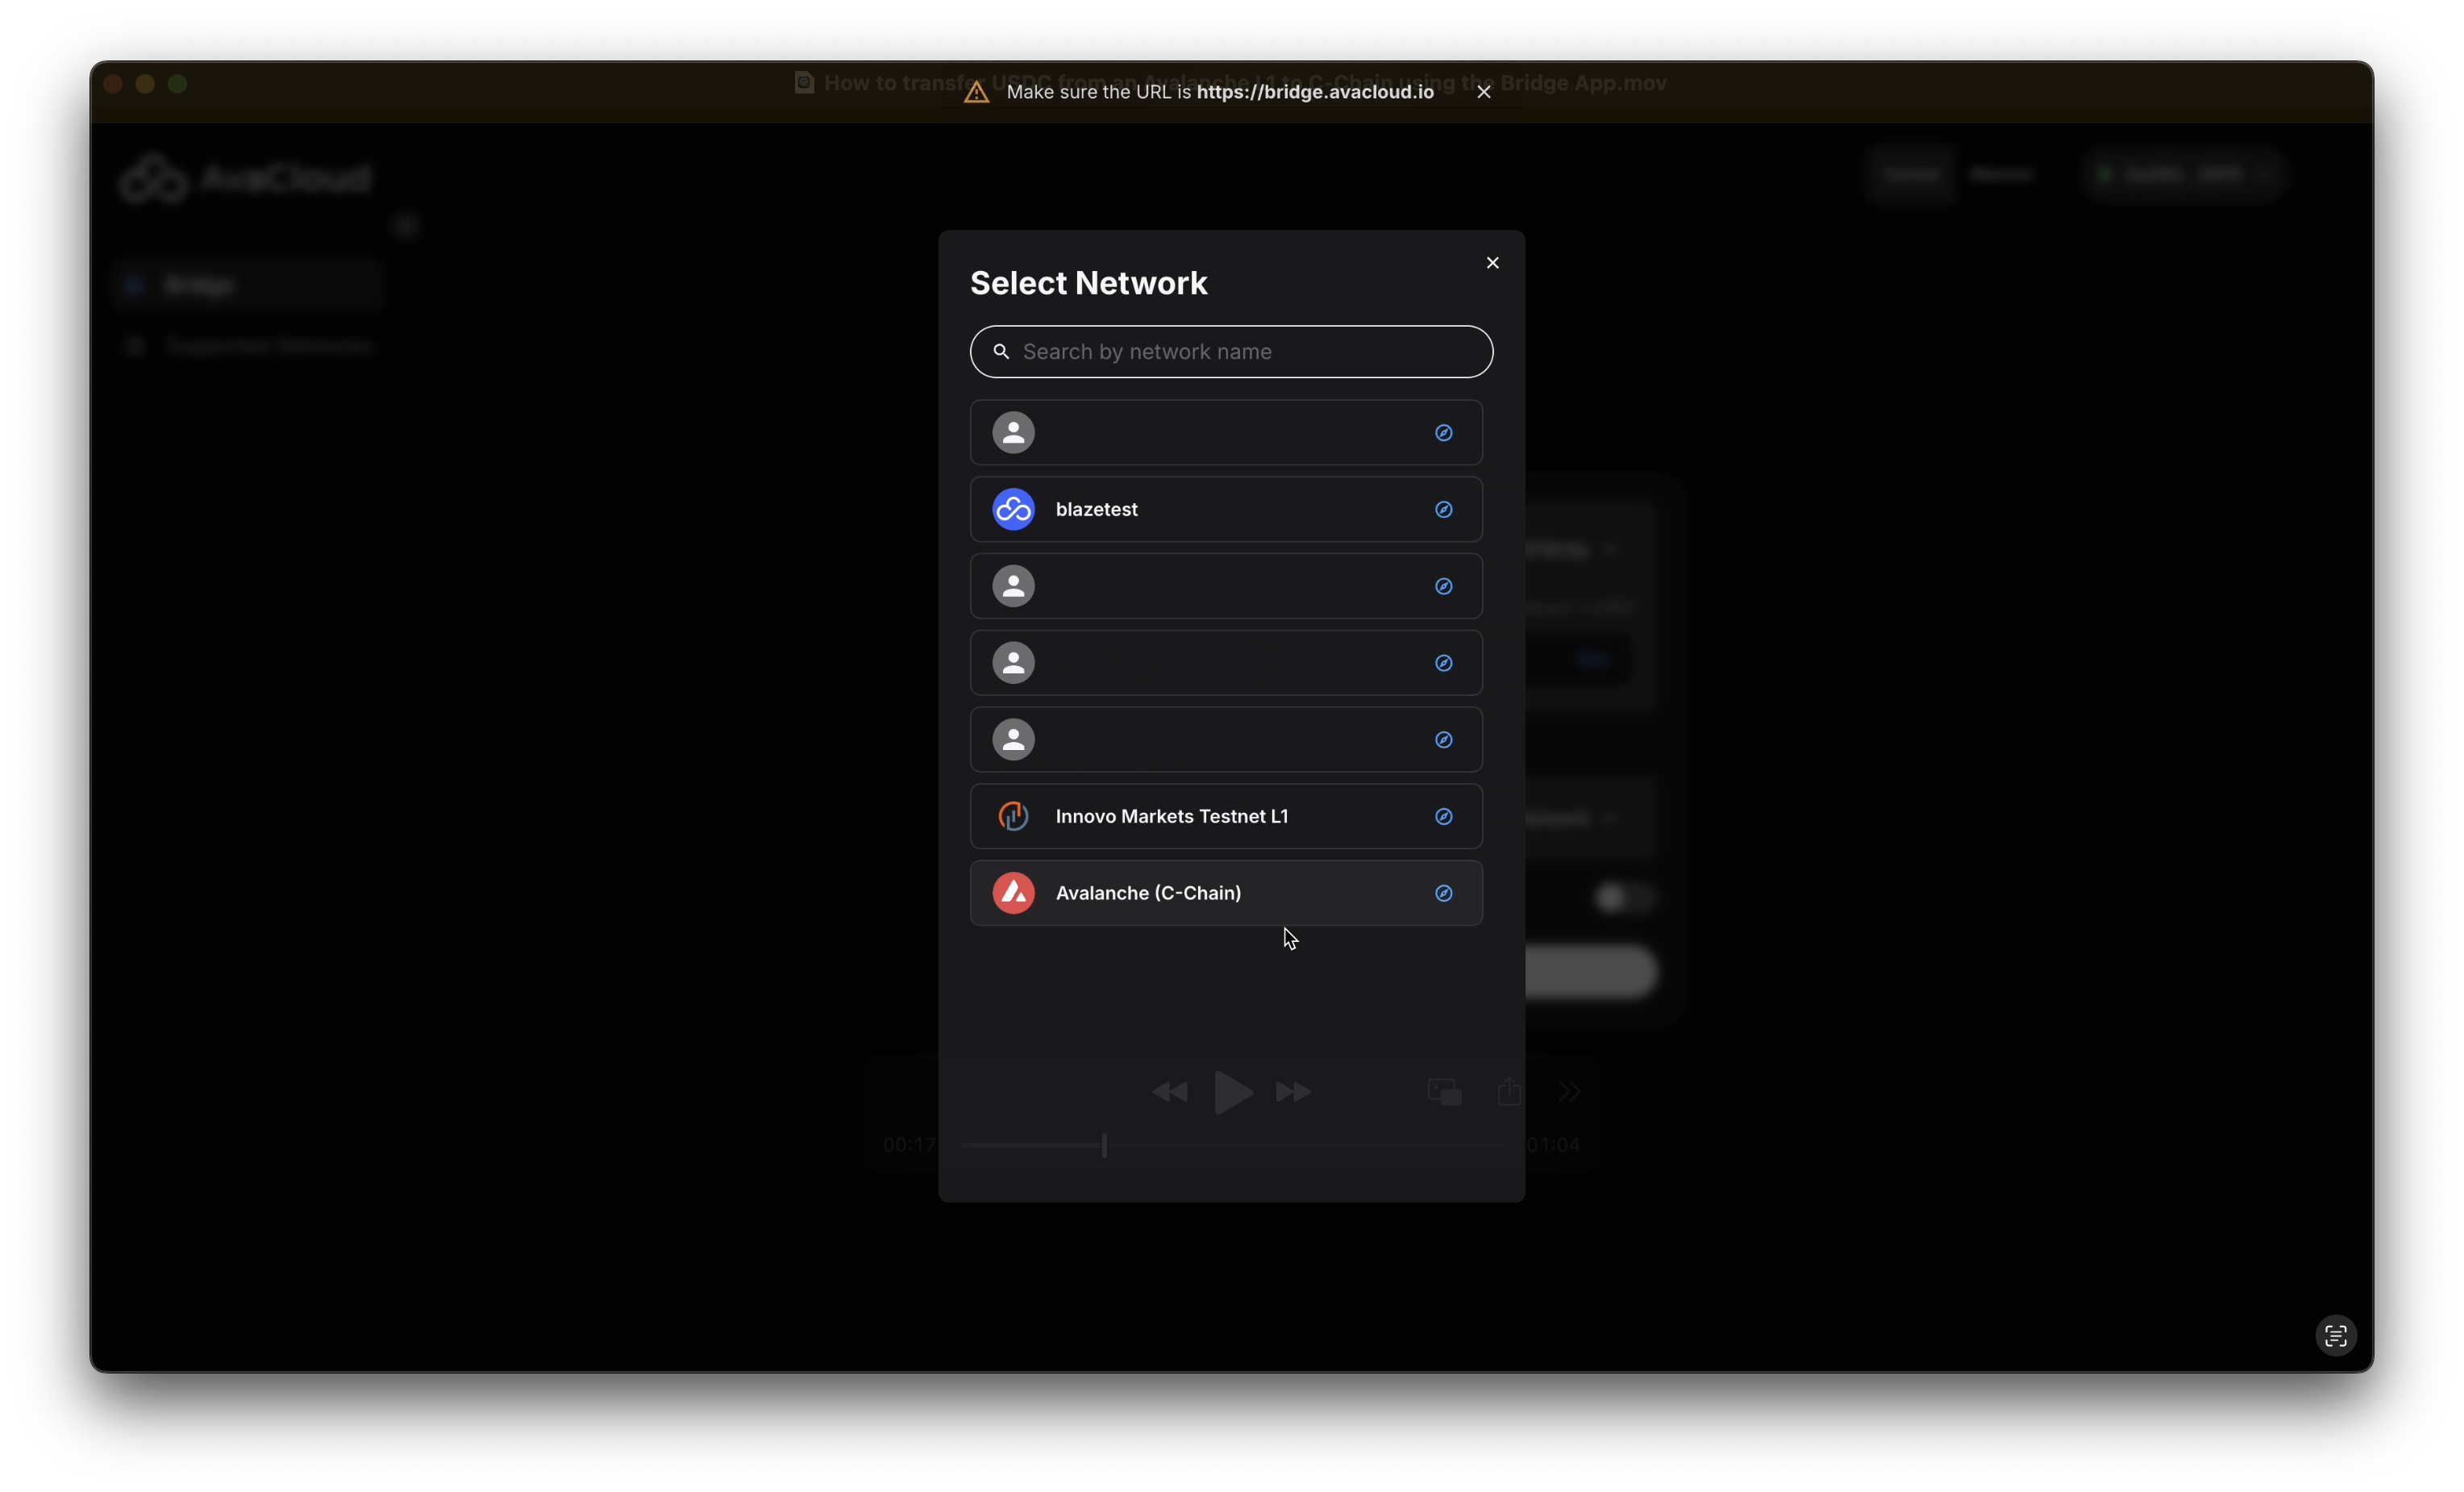
-
In this example, as we are currently on the
Avalanche C-Chain, we would need to switch toqr1016t1tpfirst after clicking on theSwitch networkbutton.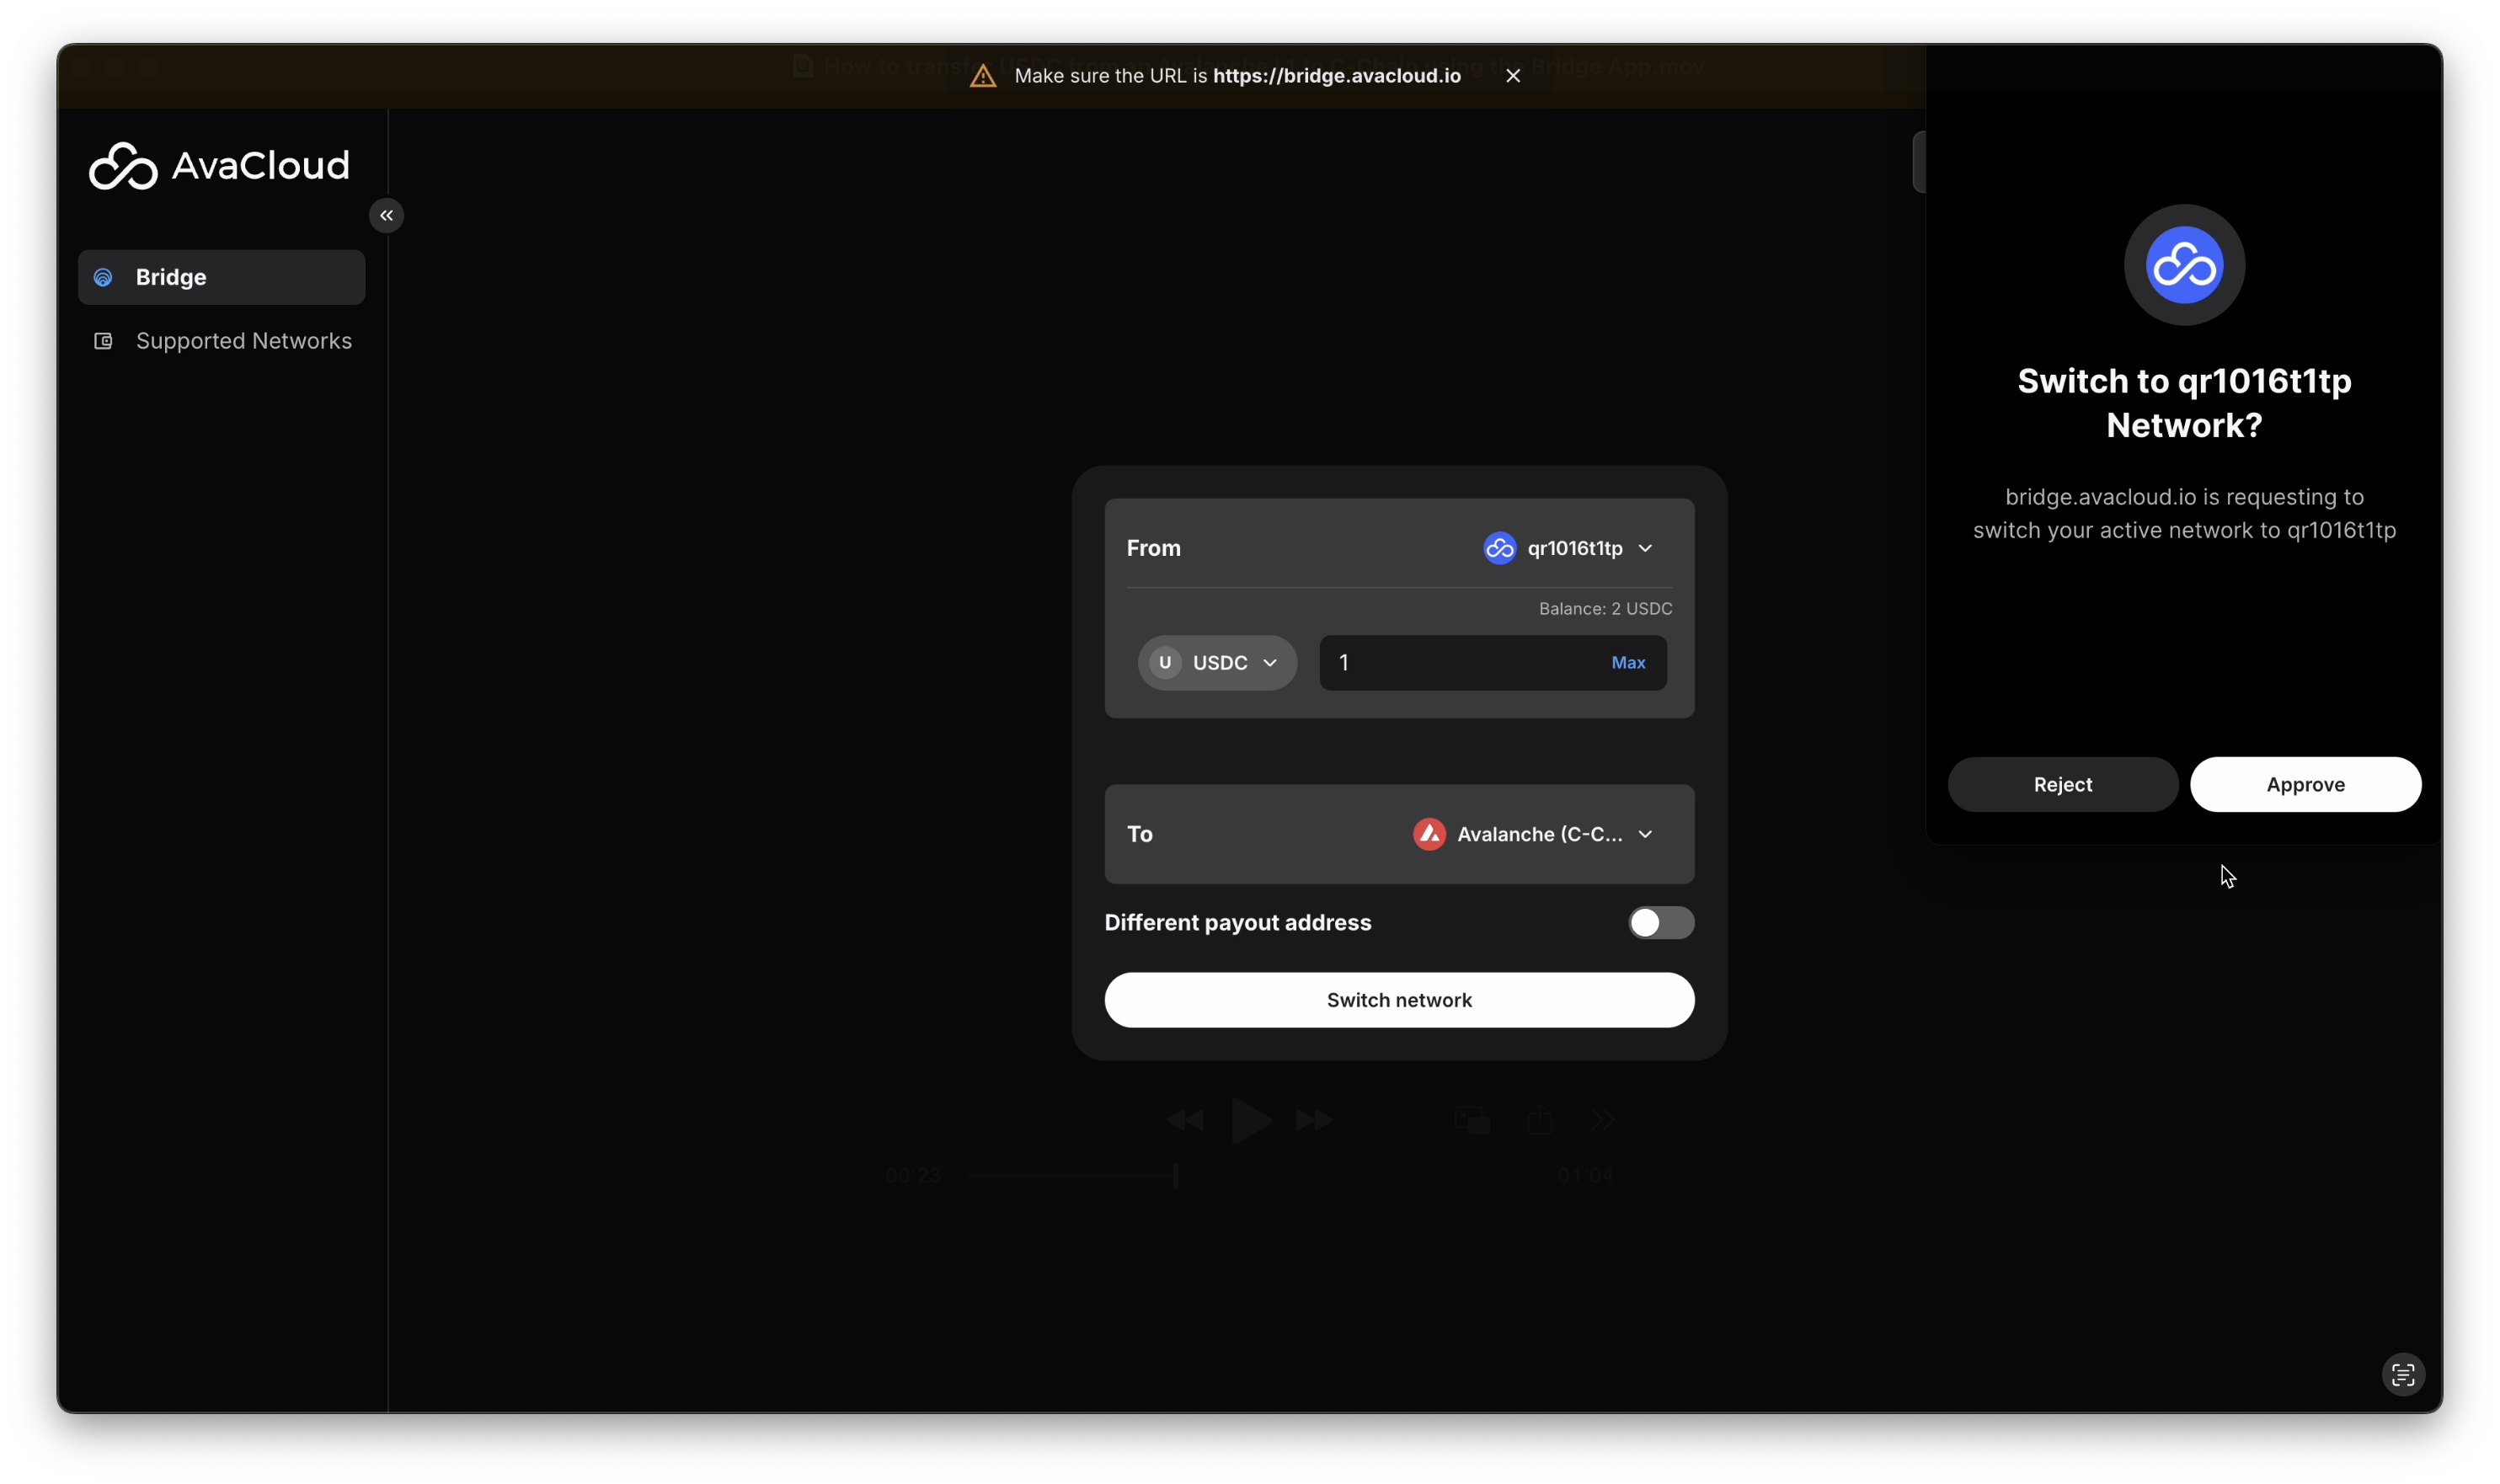
-
Click the
Bridgebutton to initiate the transfer.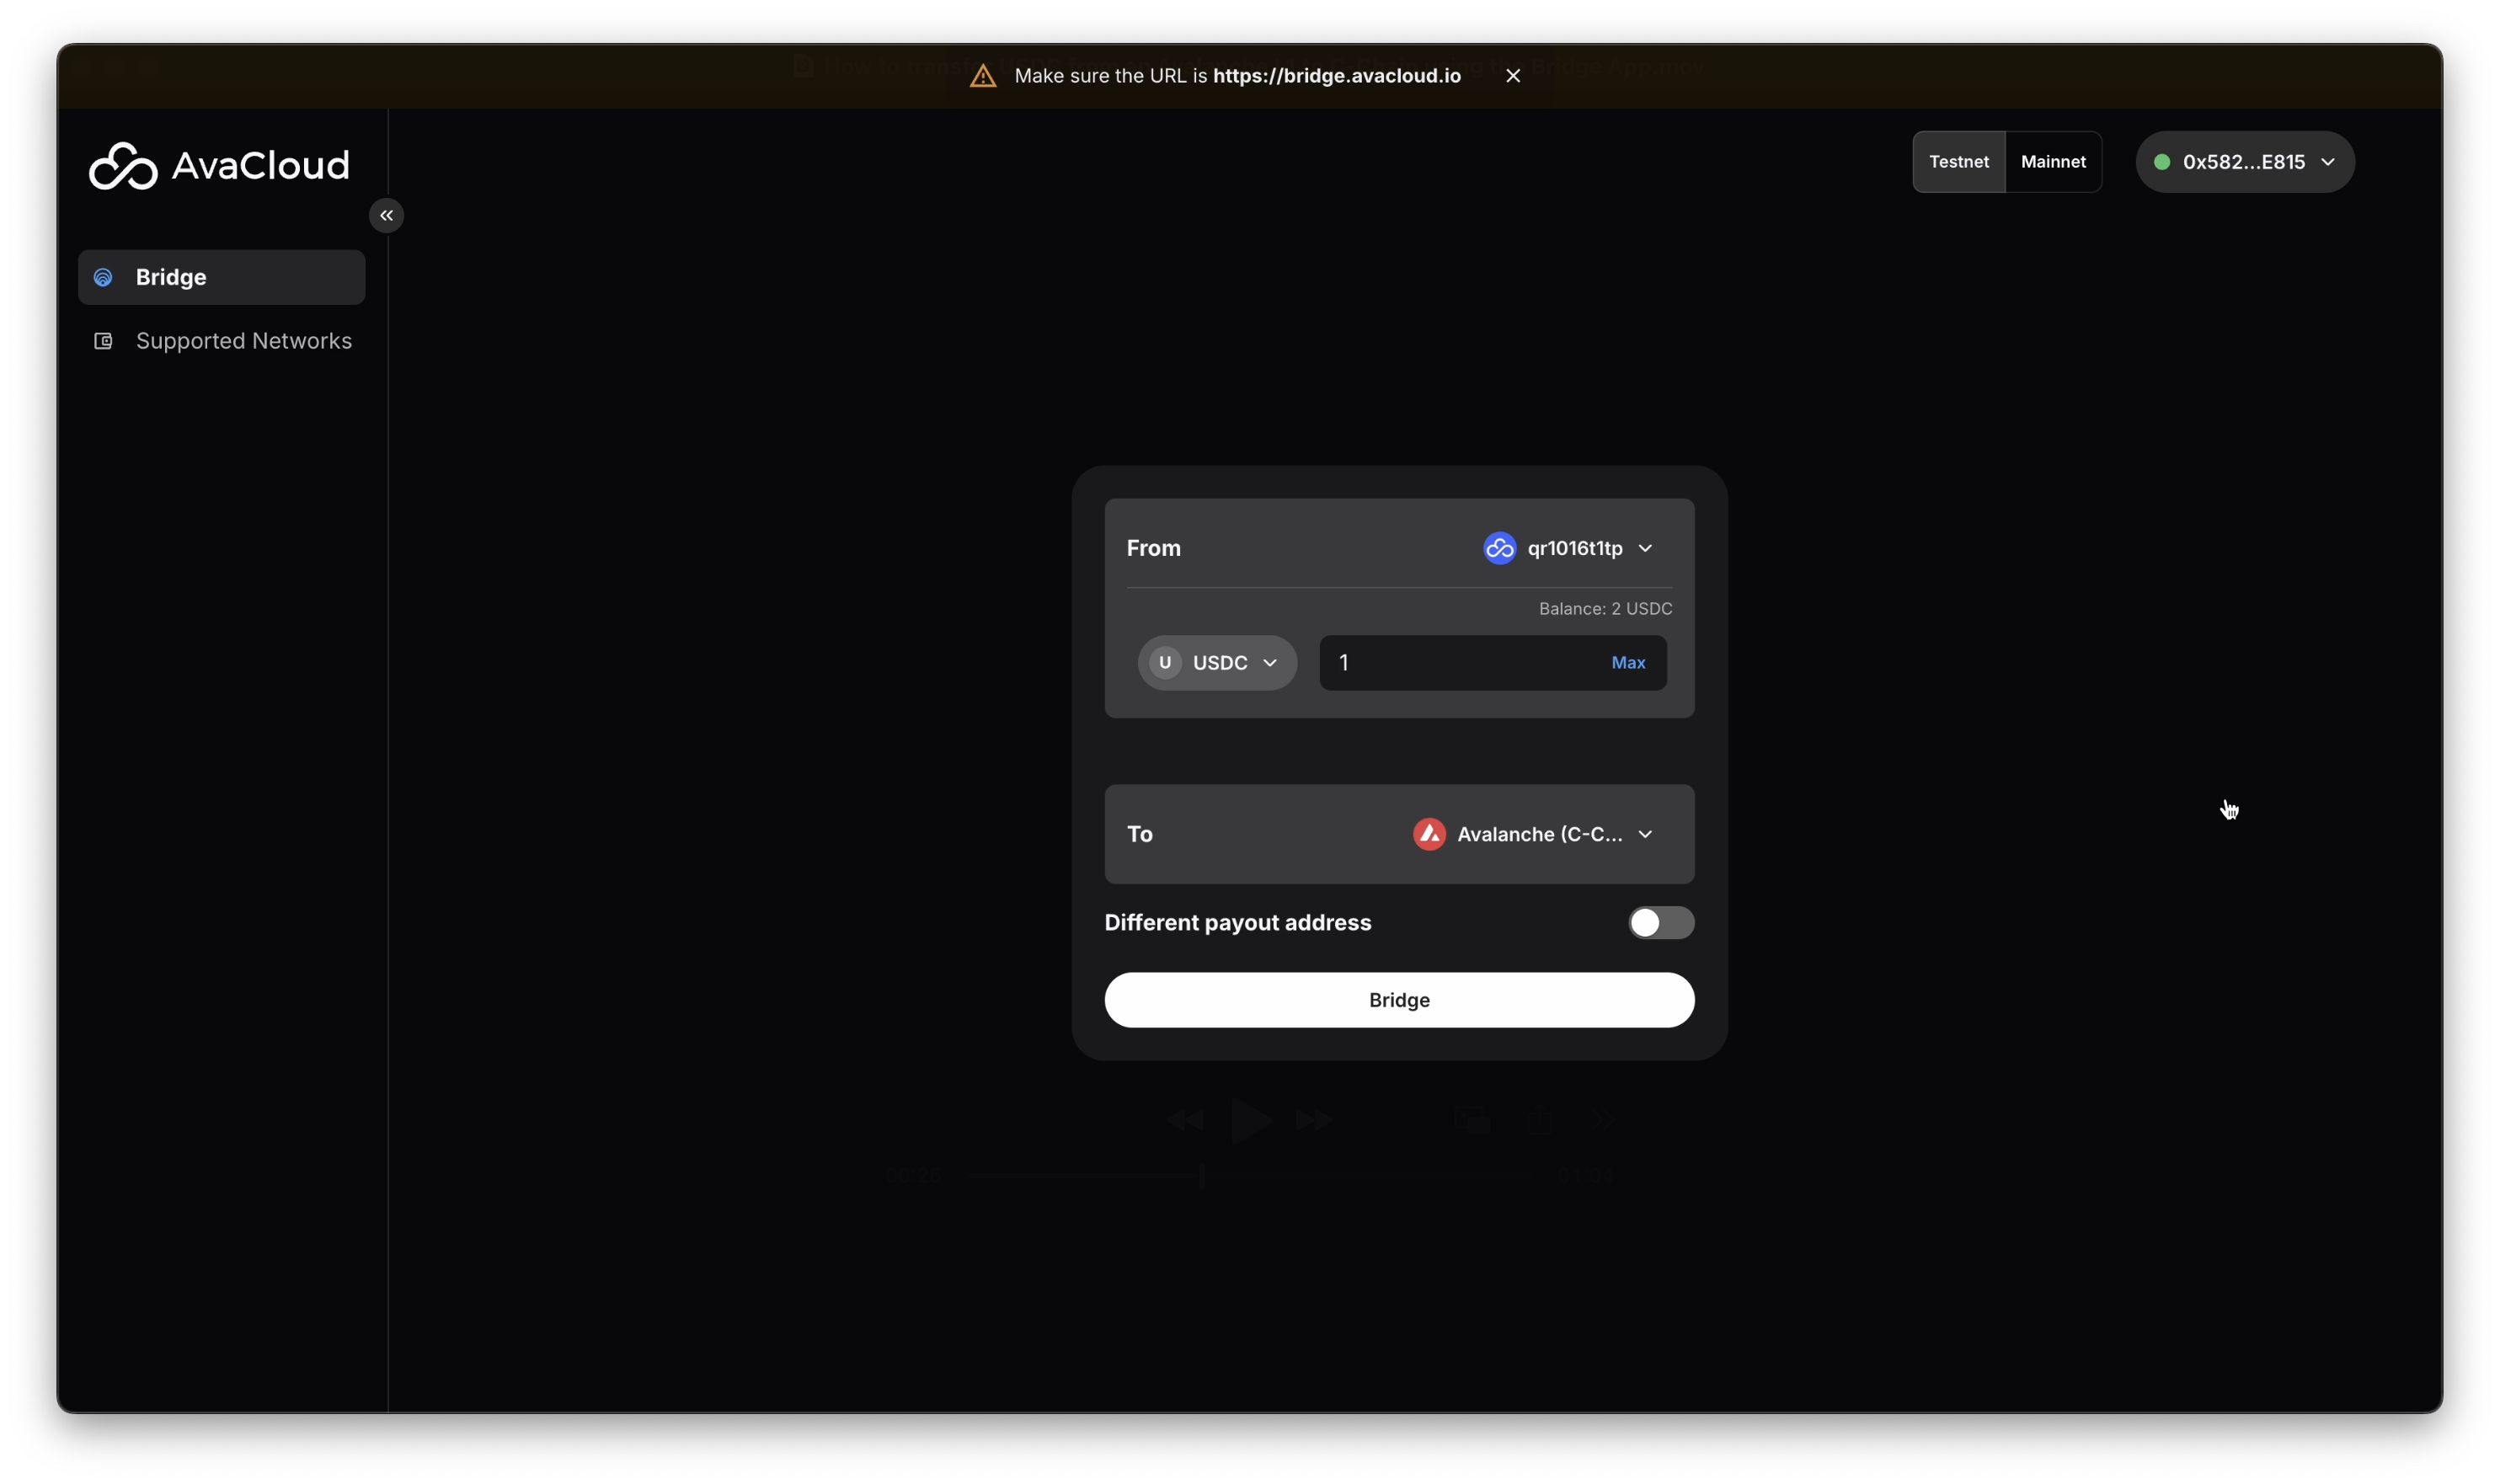
-
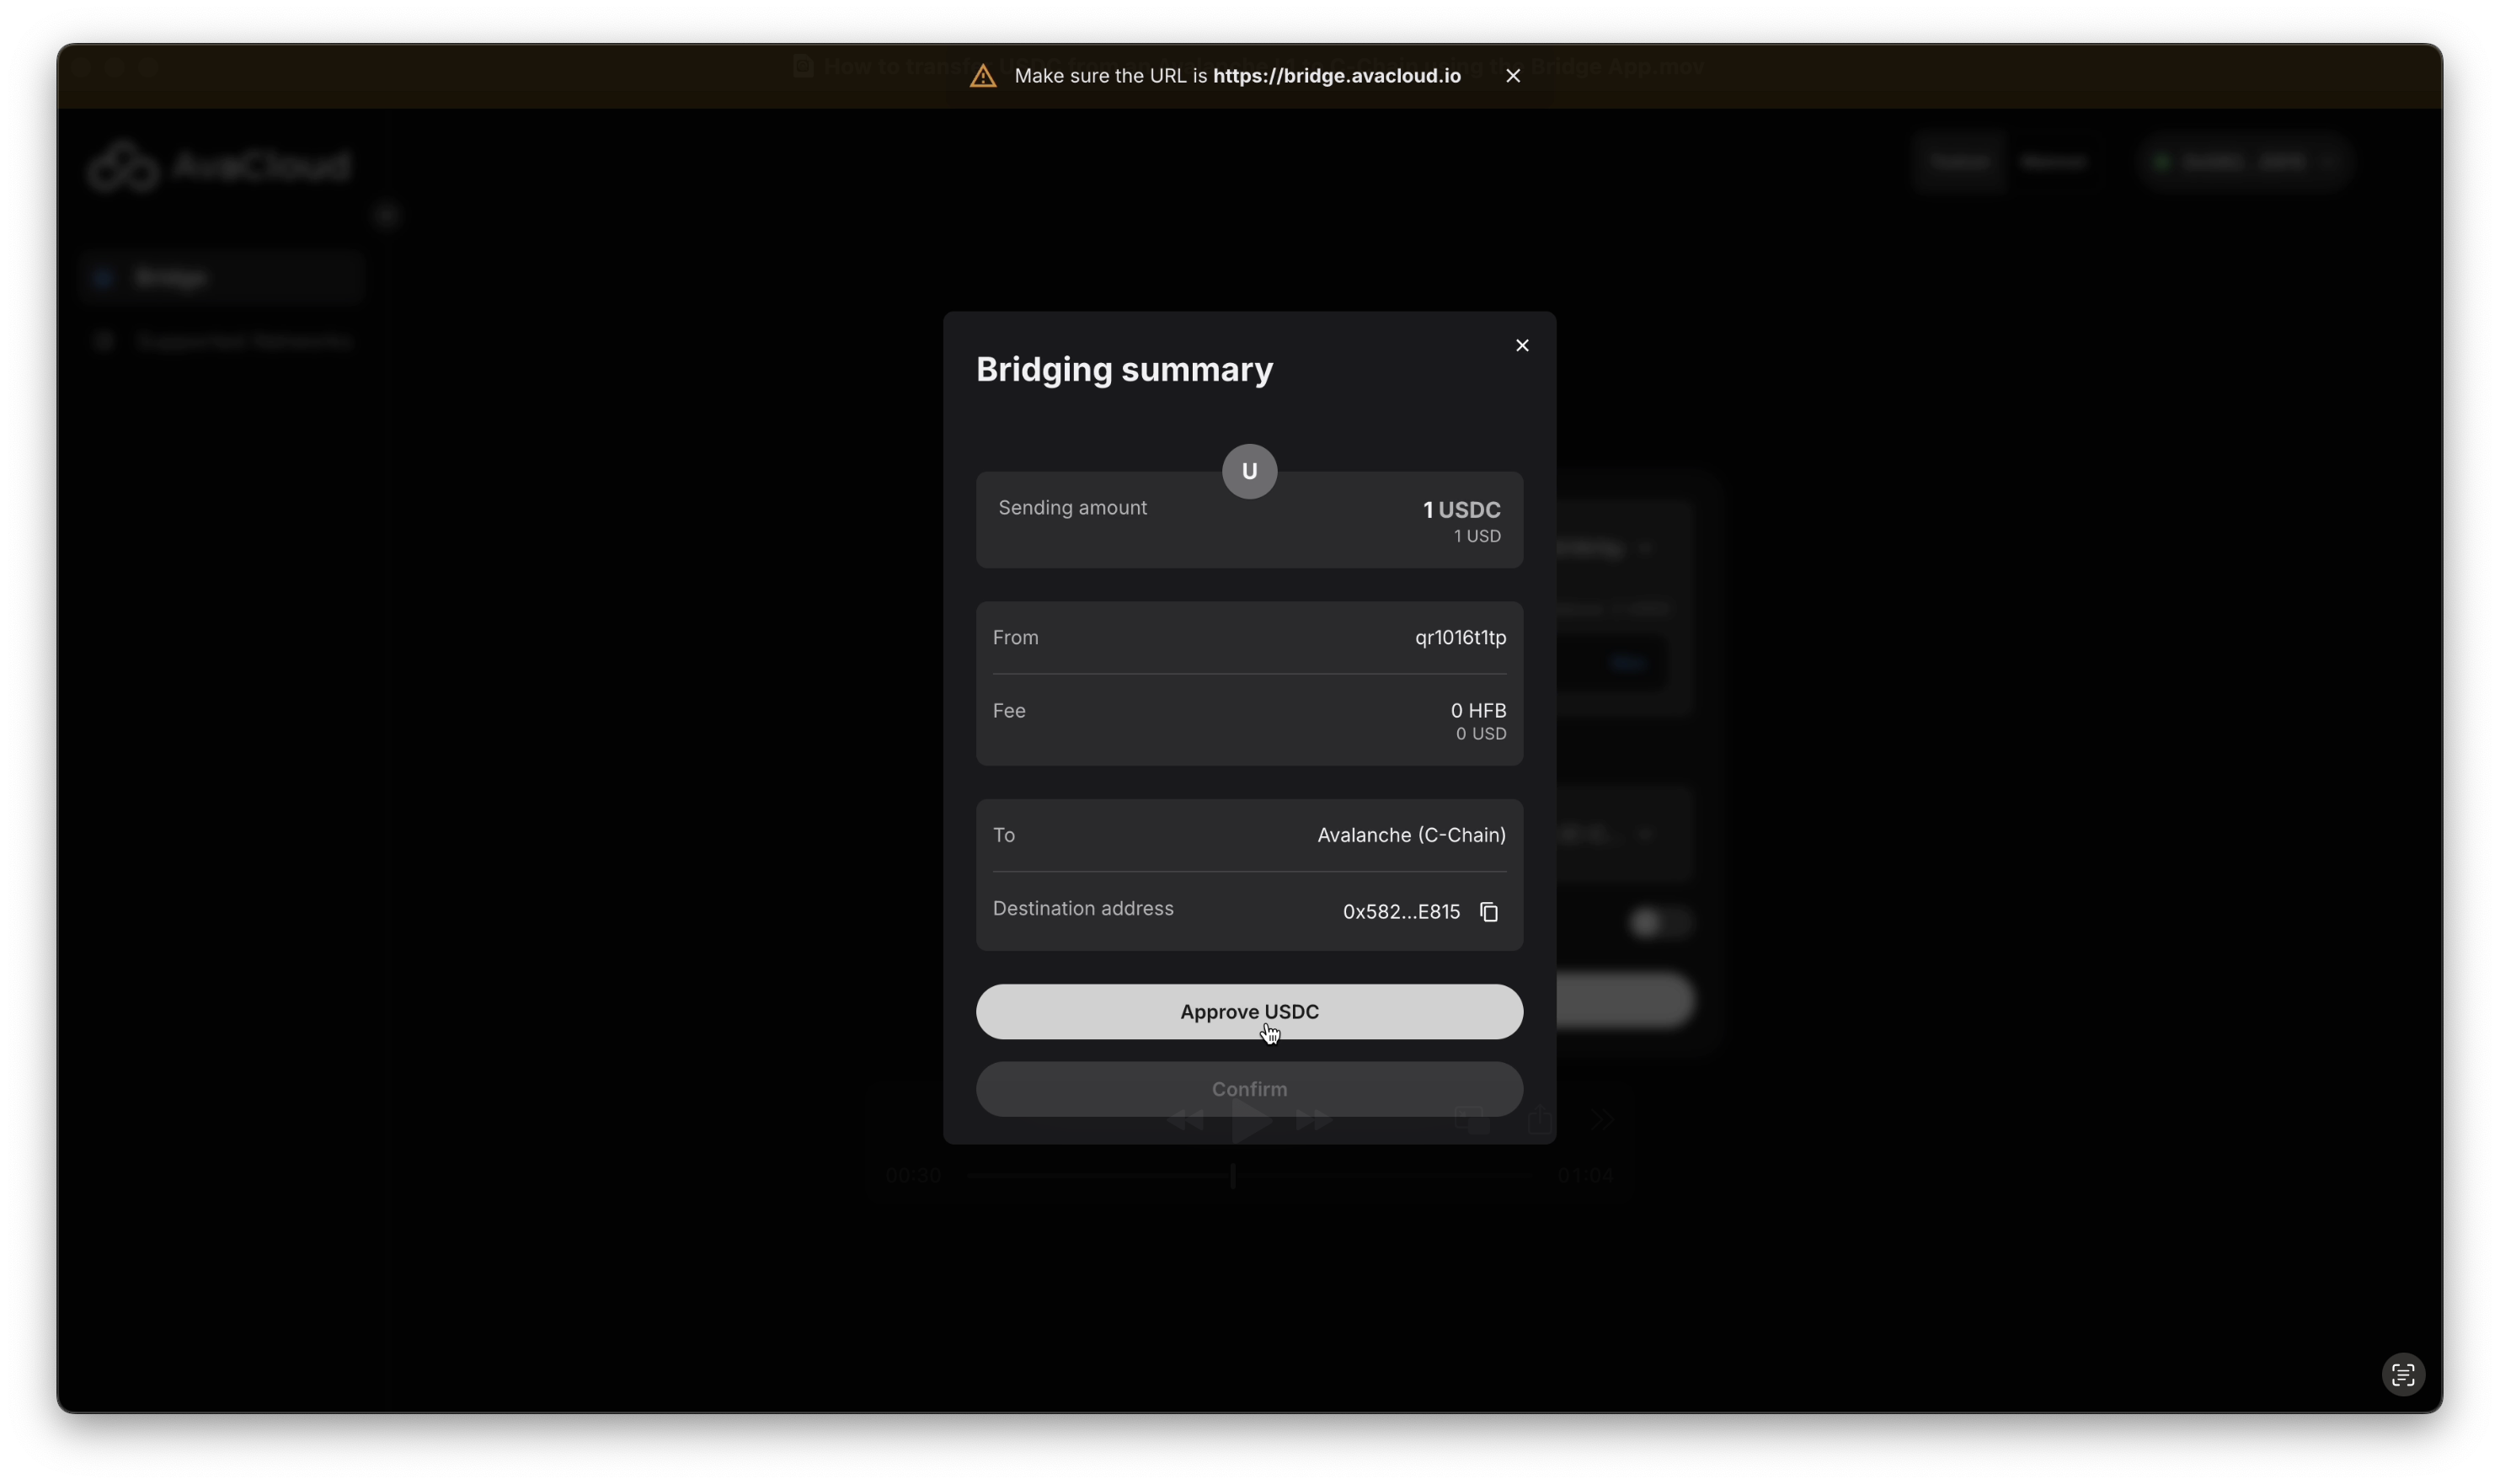
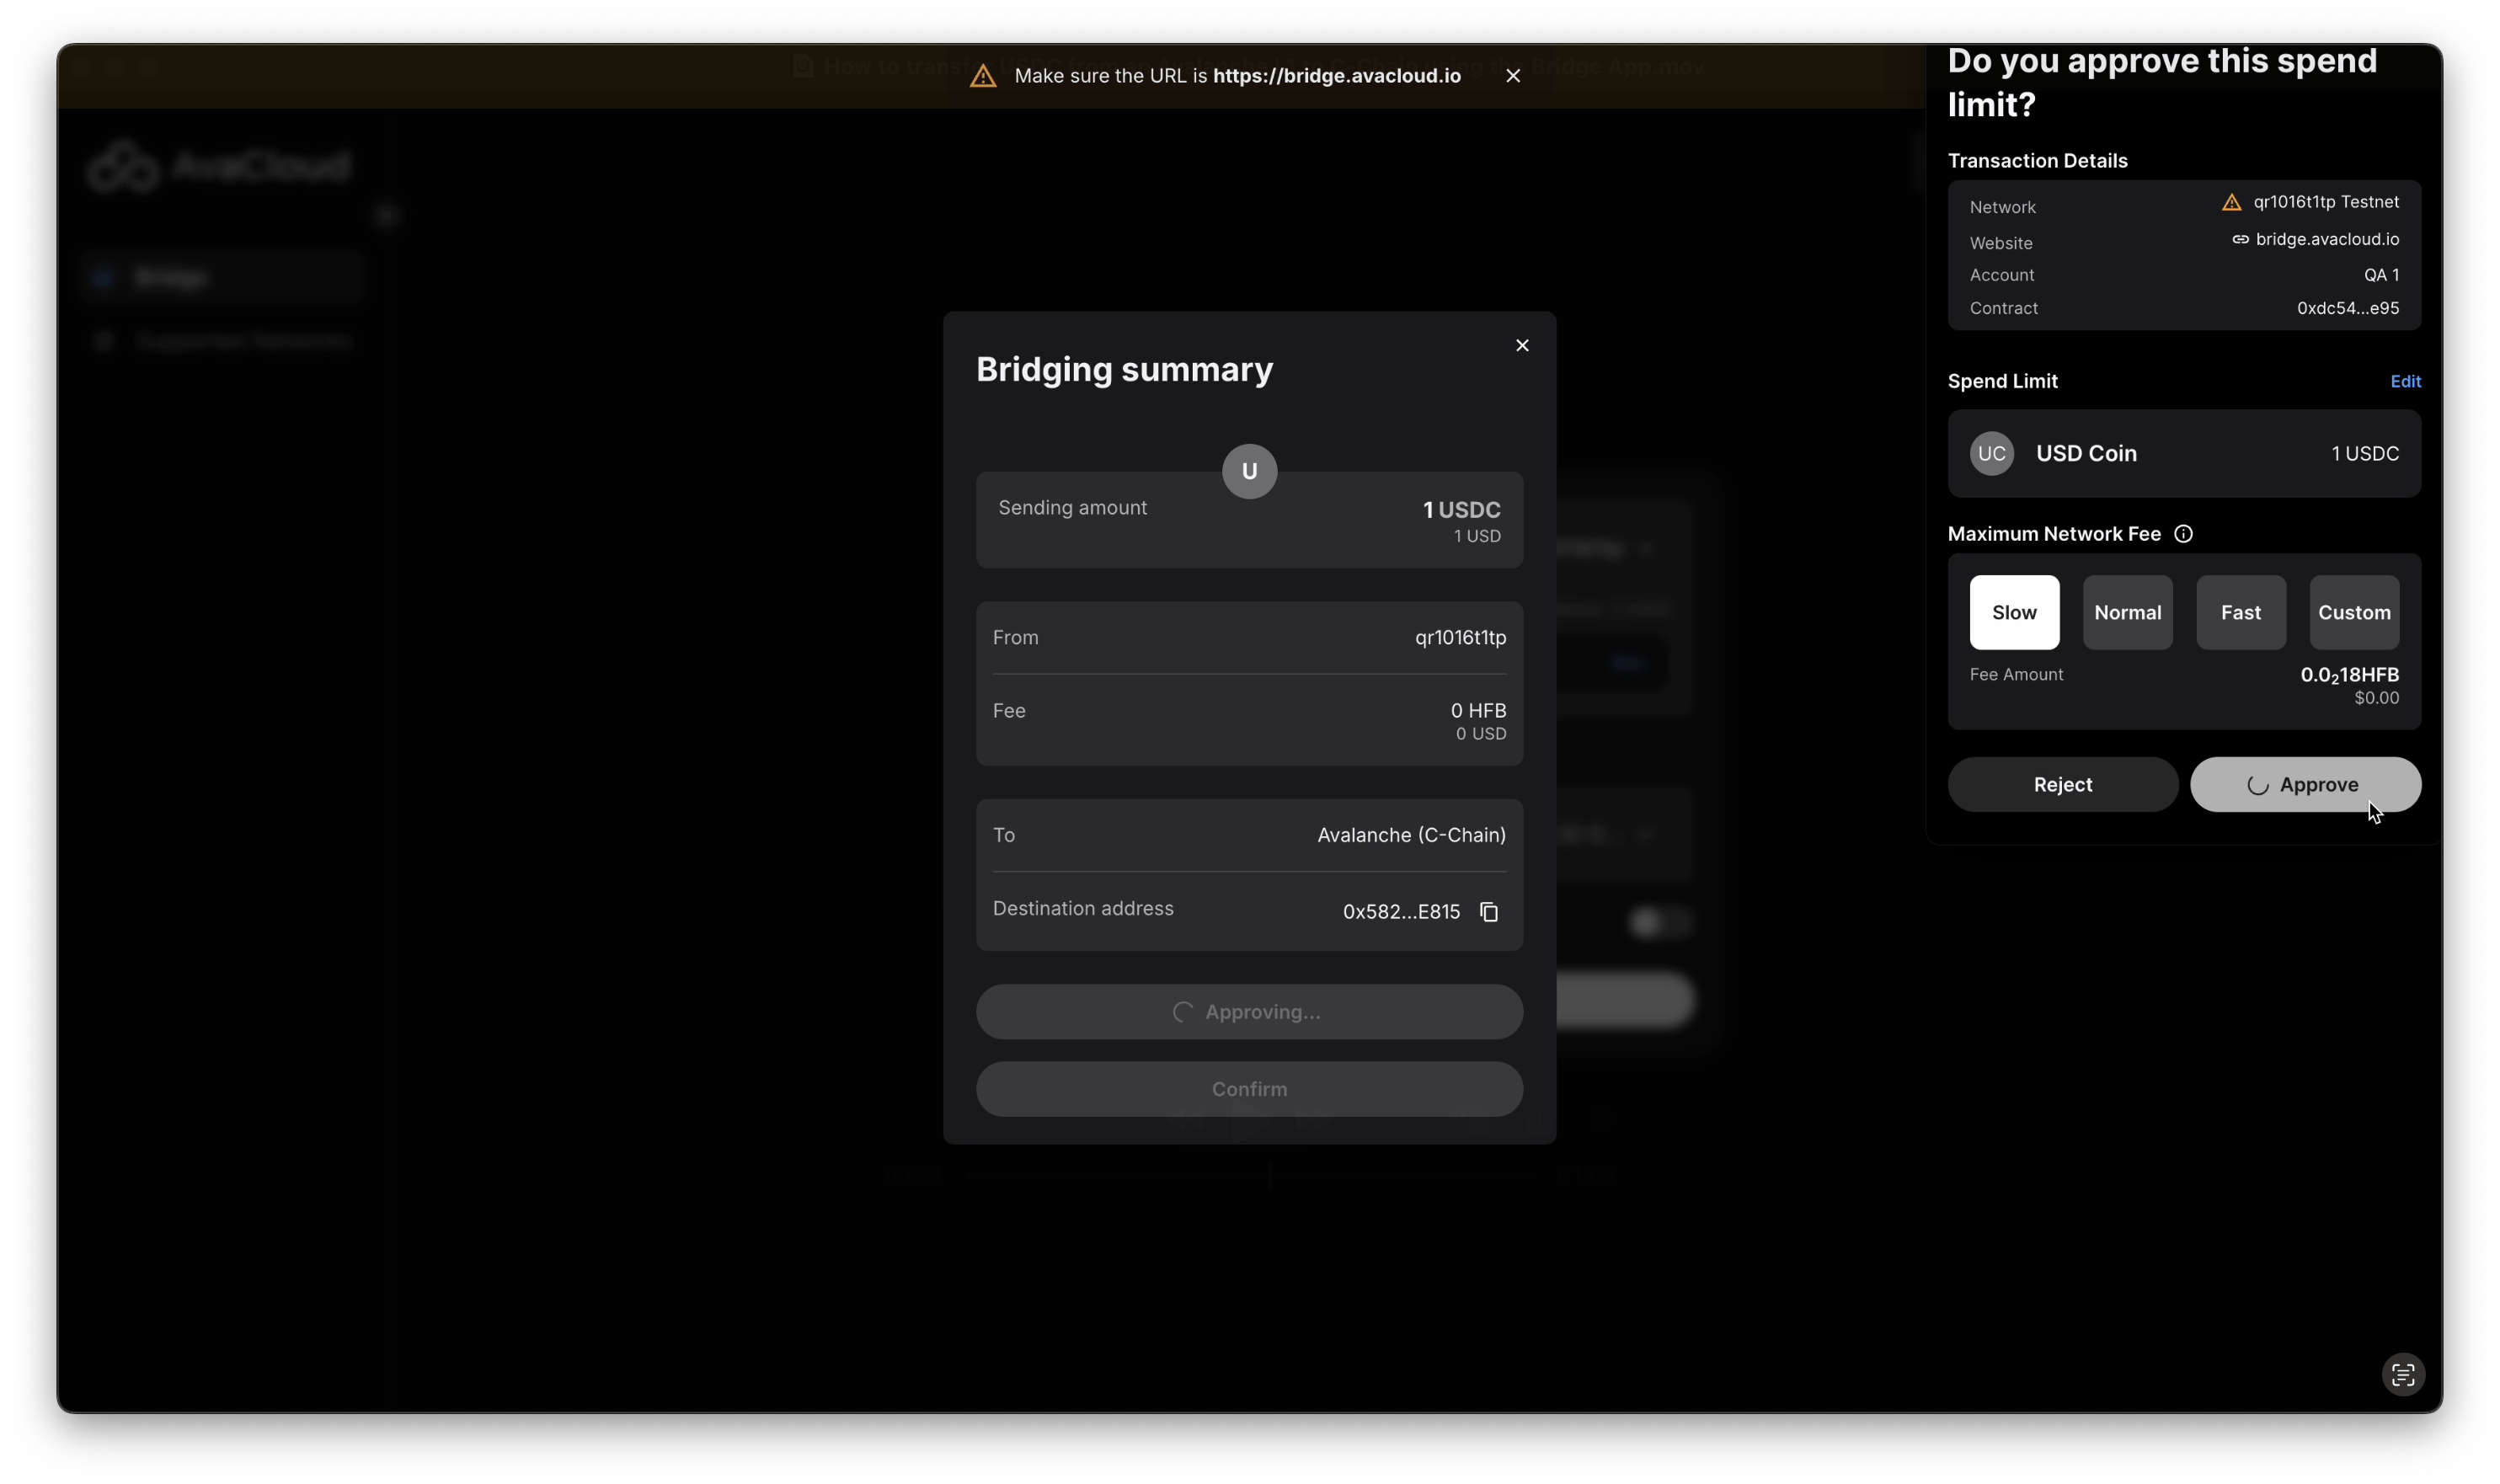
Approve the USDC token and specified transfer amount.
-
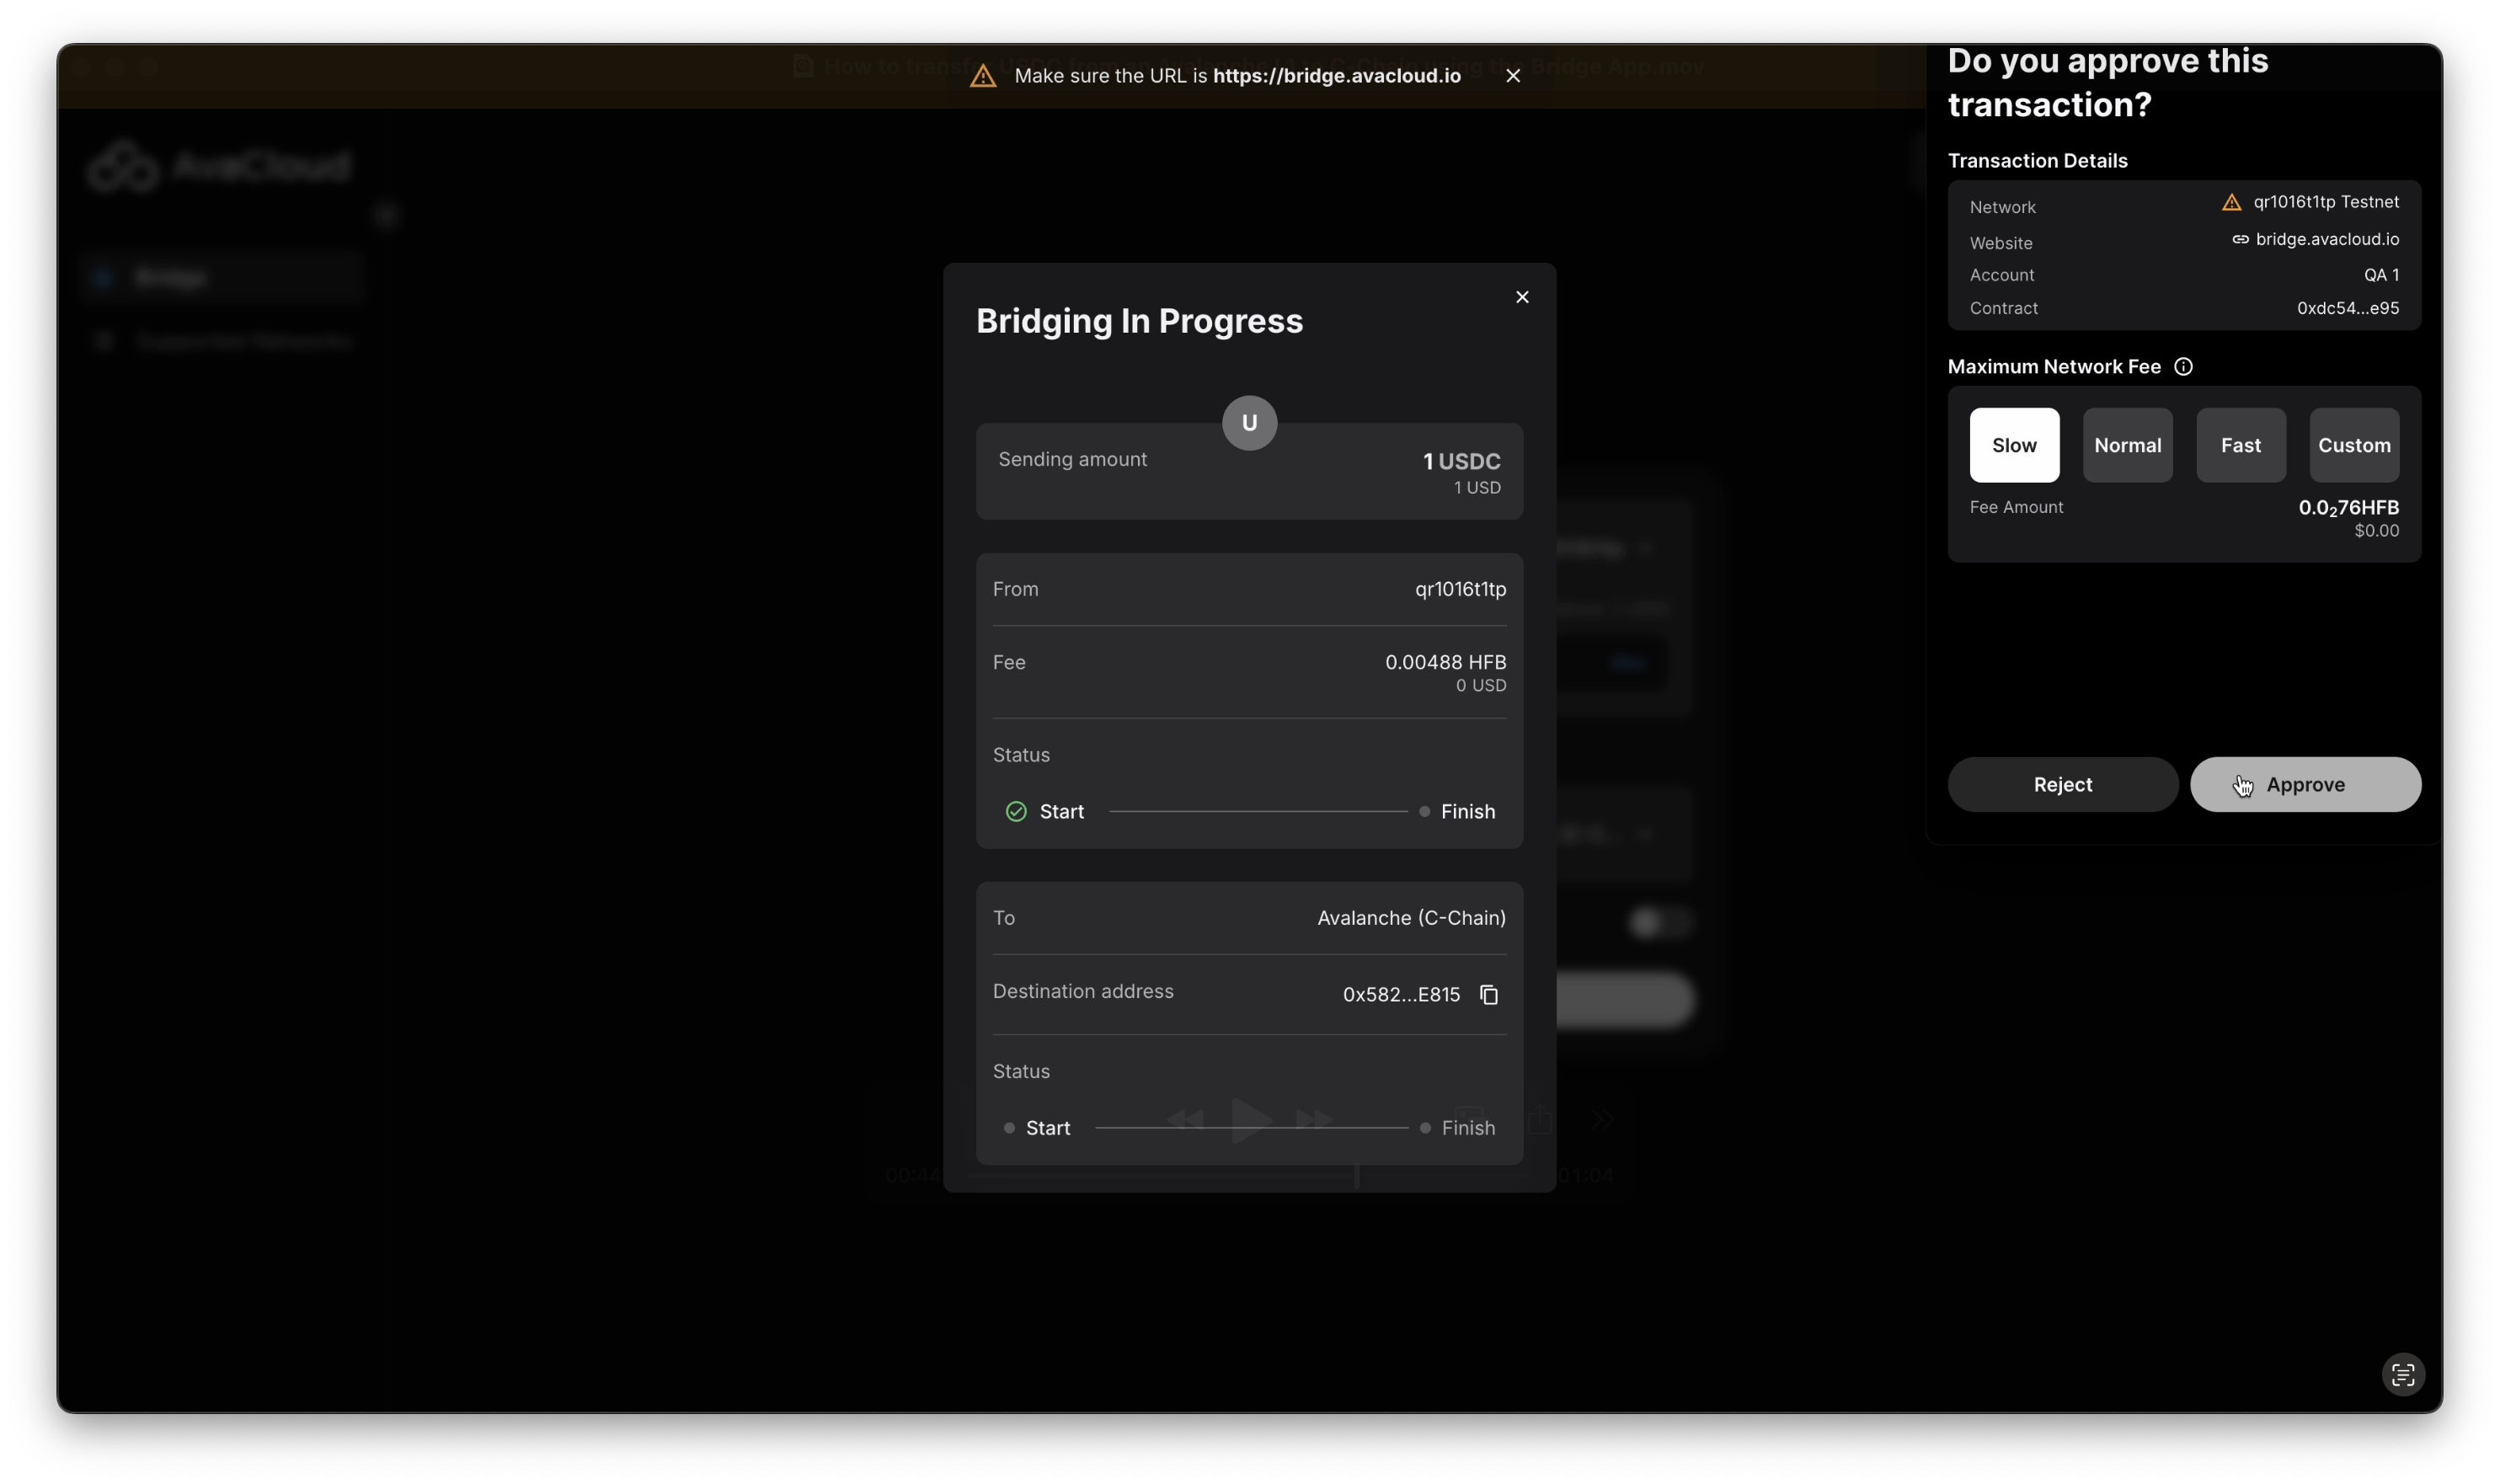
After approval, click
Confirmon AvaCloud Portal, and approve the transaction in the Core Extension. USDC will be sent from the specified L1 (e.g., qr1016t1tp) to C-Chain.
-
Once the transfer is complete, a success screen will display transaction links and the recipient address for verification.

In addition, the transferred USDC should be visible in the wallet on the Avalanche C-Chain.
![]()
Video Walkthrough
Watch a full demonstration of the transfer:
If you need more help, explore our other articles or reach out to our support team via chat or email [email protected]. All examples provided are for demonstration purposes only.
Learn More About AvaCloud | Download Case Studies | Schedule an AvaCloud Demo