How to Set Up Interoperability?
Clarification on Naming
As Avalanche Platform team continue developing Interoperability, a few names have been updated along the way.
- Interchain Messaging (ICM): The native interoperability protocol (formerly Avalanche Warp Messaging, or AWM).
- Interchain Messenger: The EVM implementation built on top of ICM, adding features like relayer rewards and message receipts (previously called Teleporter).
- Interchain Token Transfers (ICTT): The token bridge for ERC-20 and native tokens, implemented on ICM.
The Avalanche Platform and AvaCloud teams are in the process of updating documentation and codebases to reflect these naming changes.
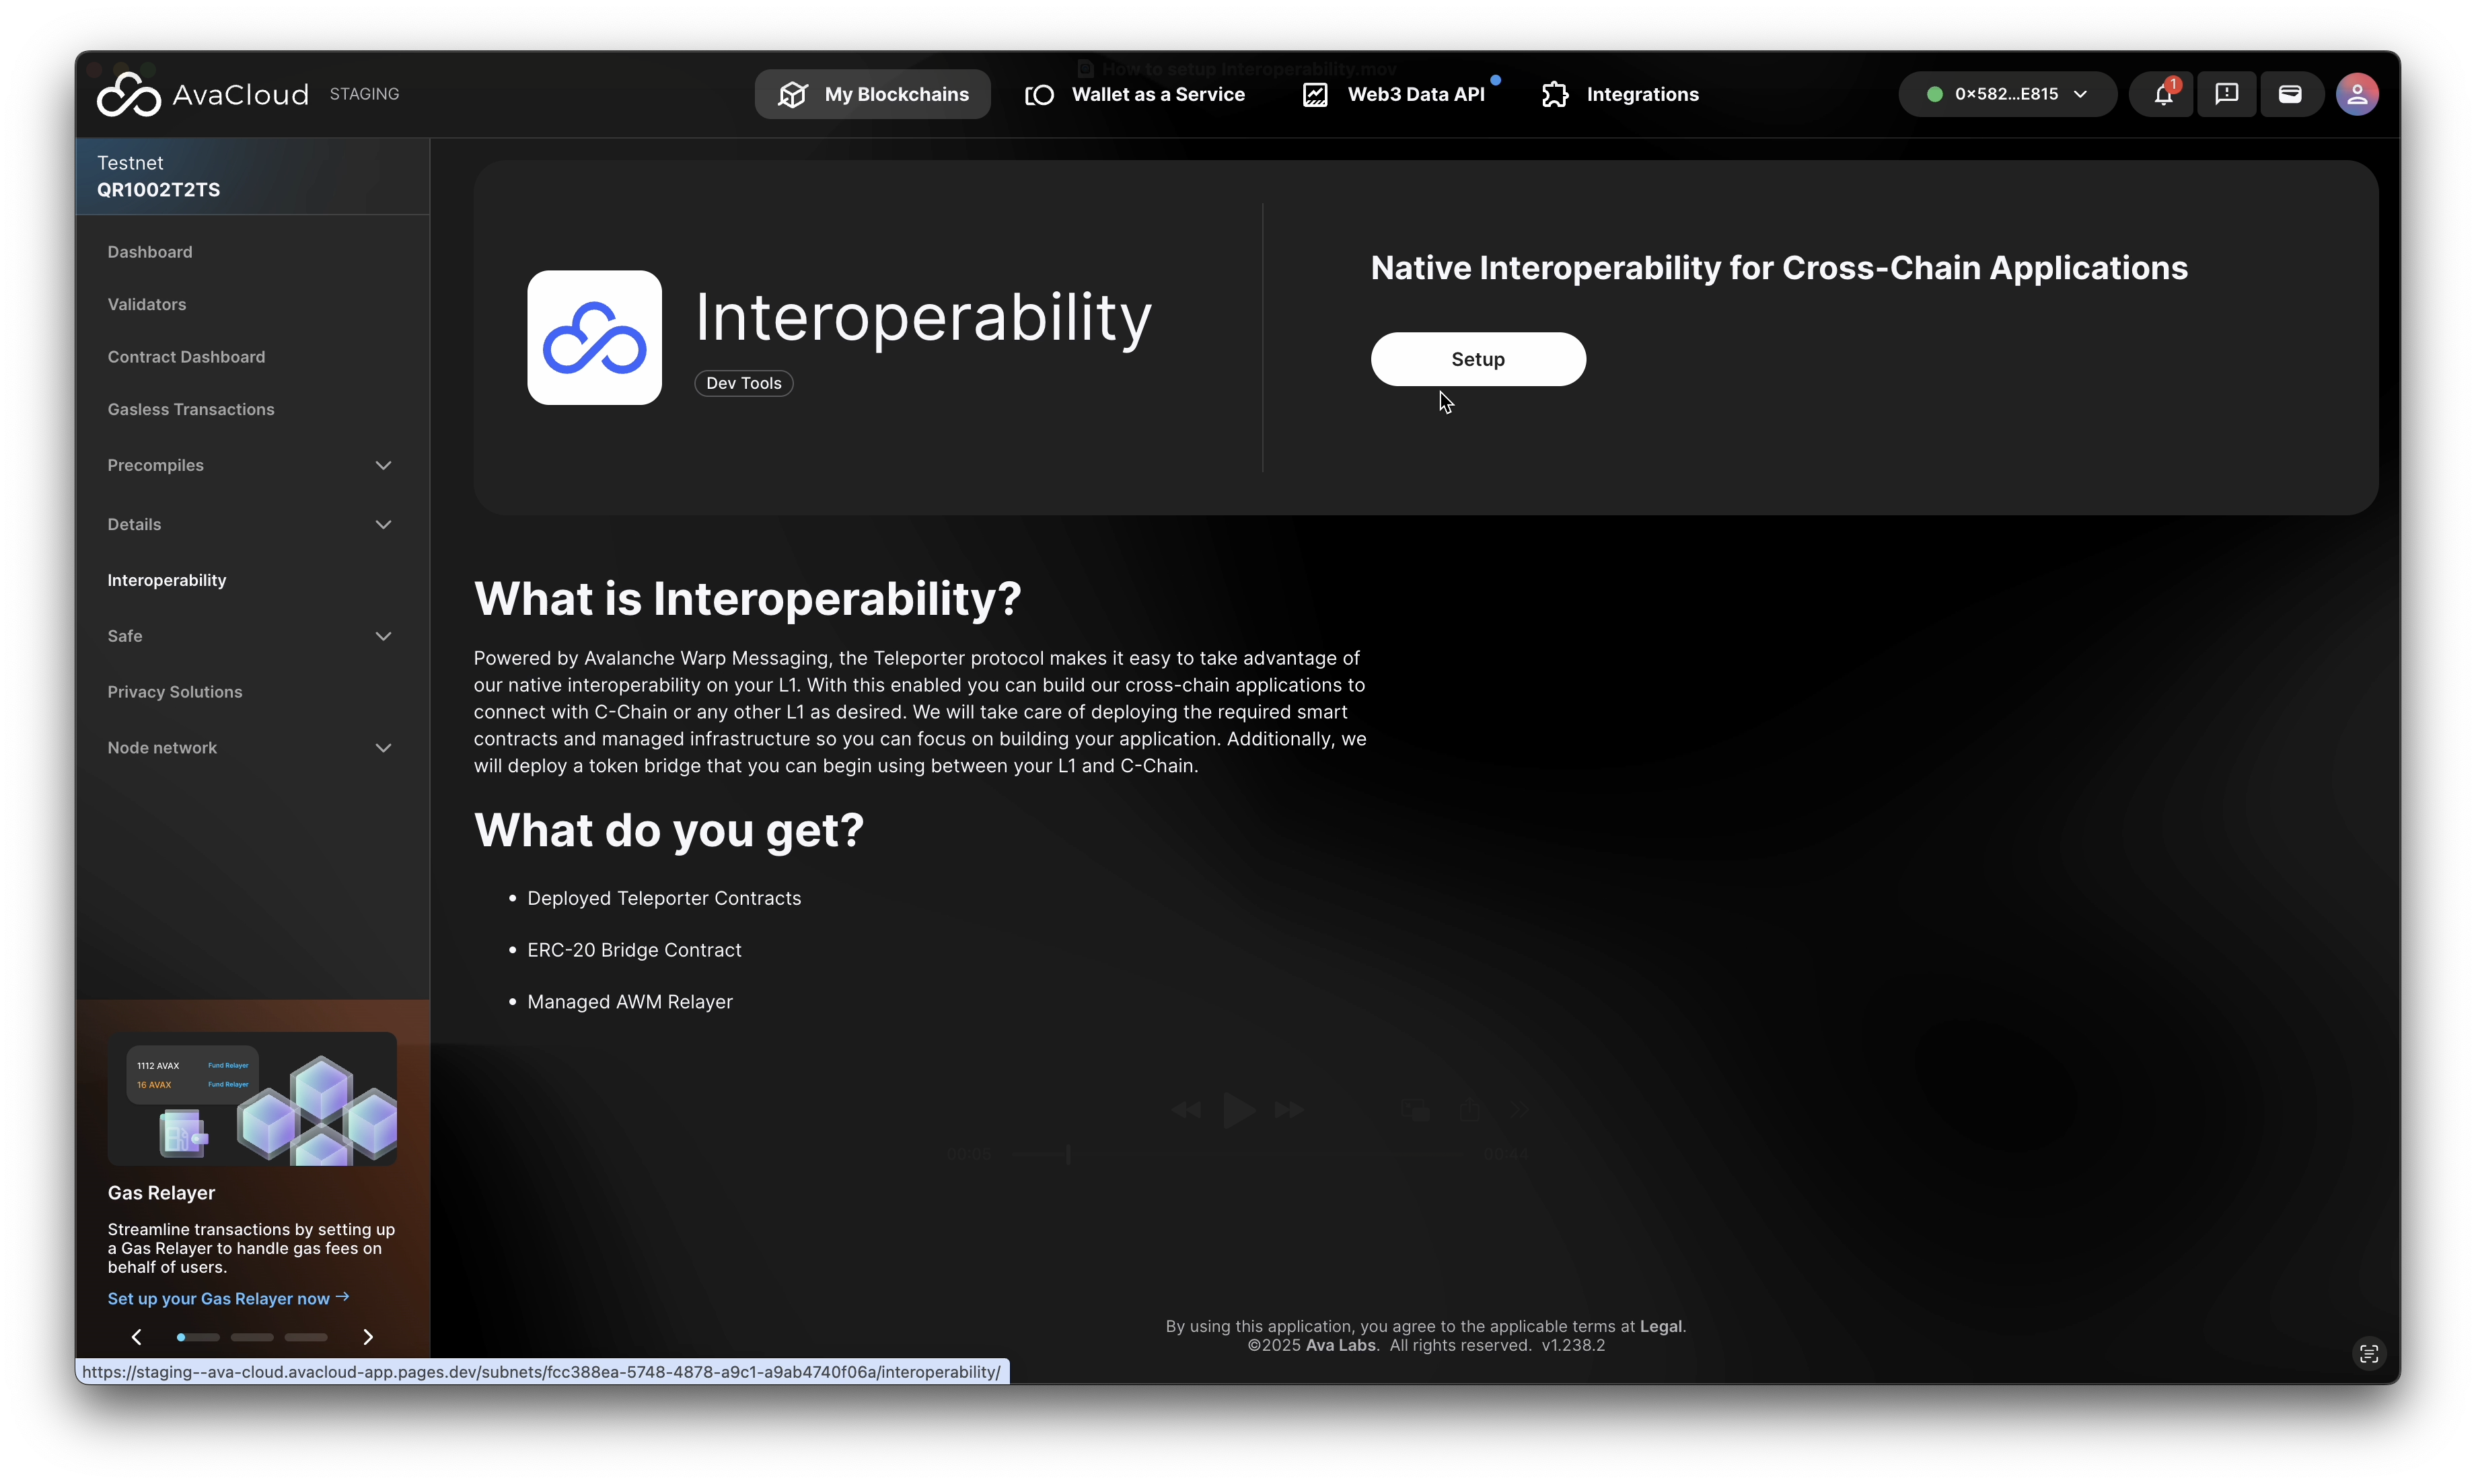
You can add interoperability to your Avalanche L1 in two ways:
- During the L1 creation process
- After your L1 has already been created
Setting Up Interoperability During L1 Creation
When creating your L1 in AvaCloud, you’ll encounter an interoperability configuration step. Select the “I want Teleporter for native interoperability for my L1” option to enable cross-chain messaging and token transfers.
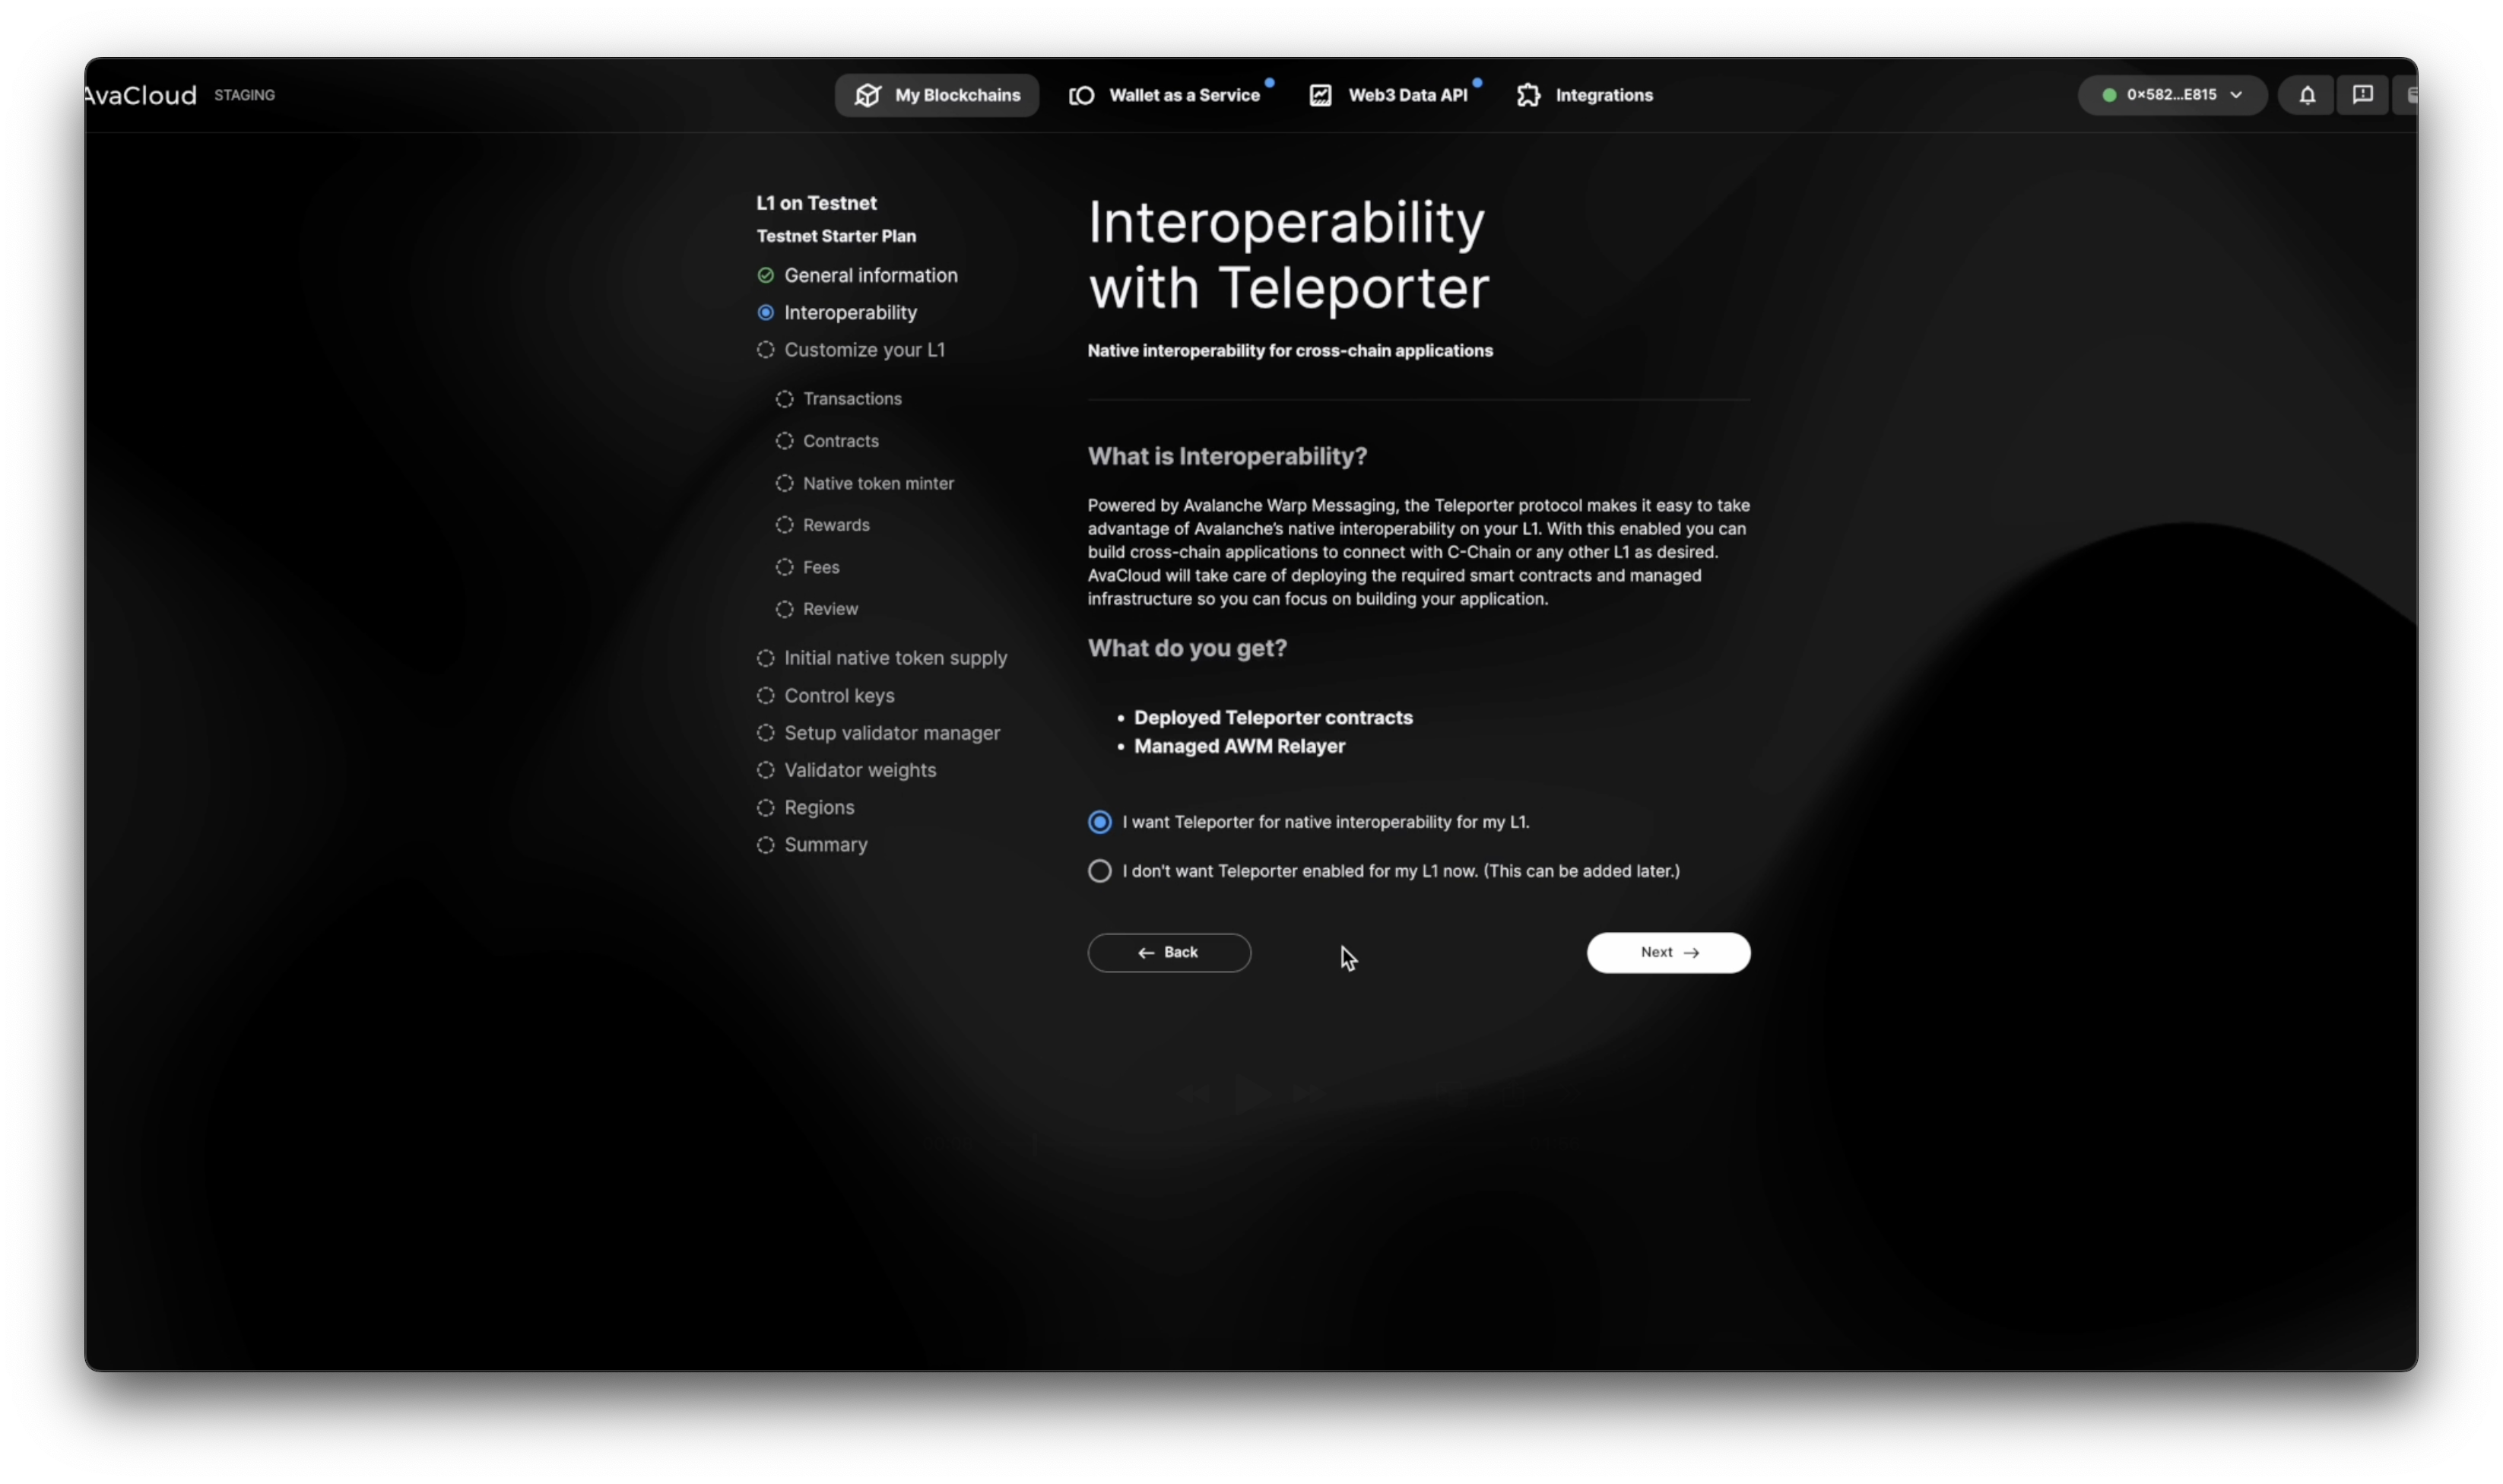
This choice automates several setup steps based on the precompiles enabled for your L1:
-
If the Transaction Manager precompile is enabled:
The necessary addresses for interoperability (such as ICM relayers, which are marked as Teleporter) are automatically added to the relevant allowlists. These addresses cannot by edited or deleted.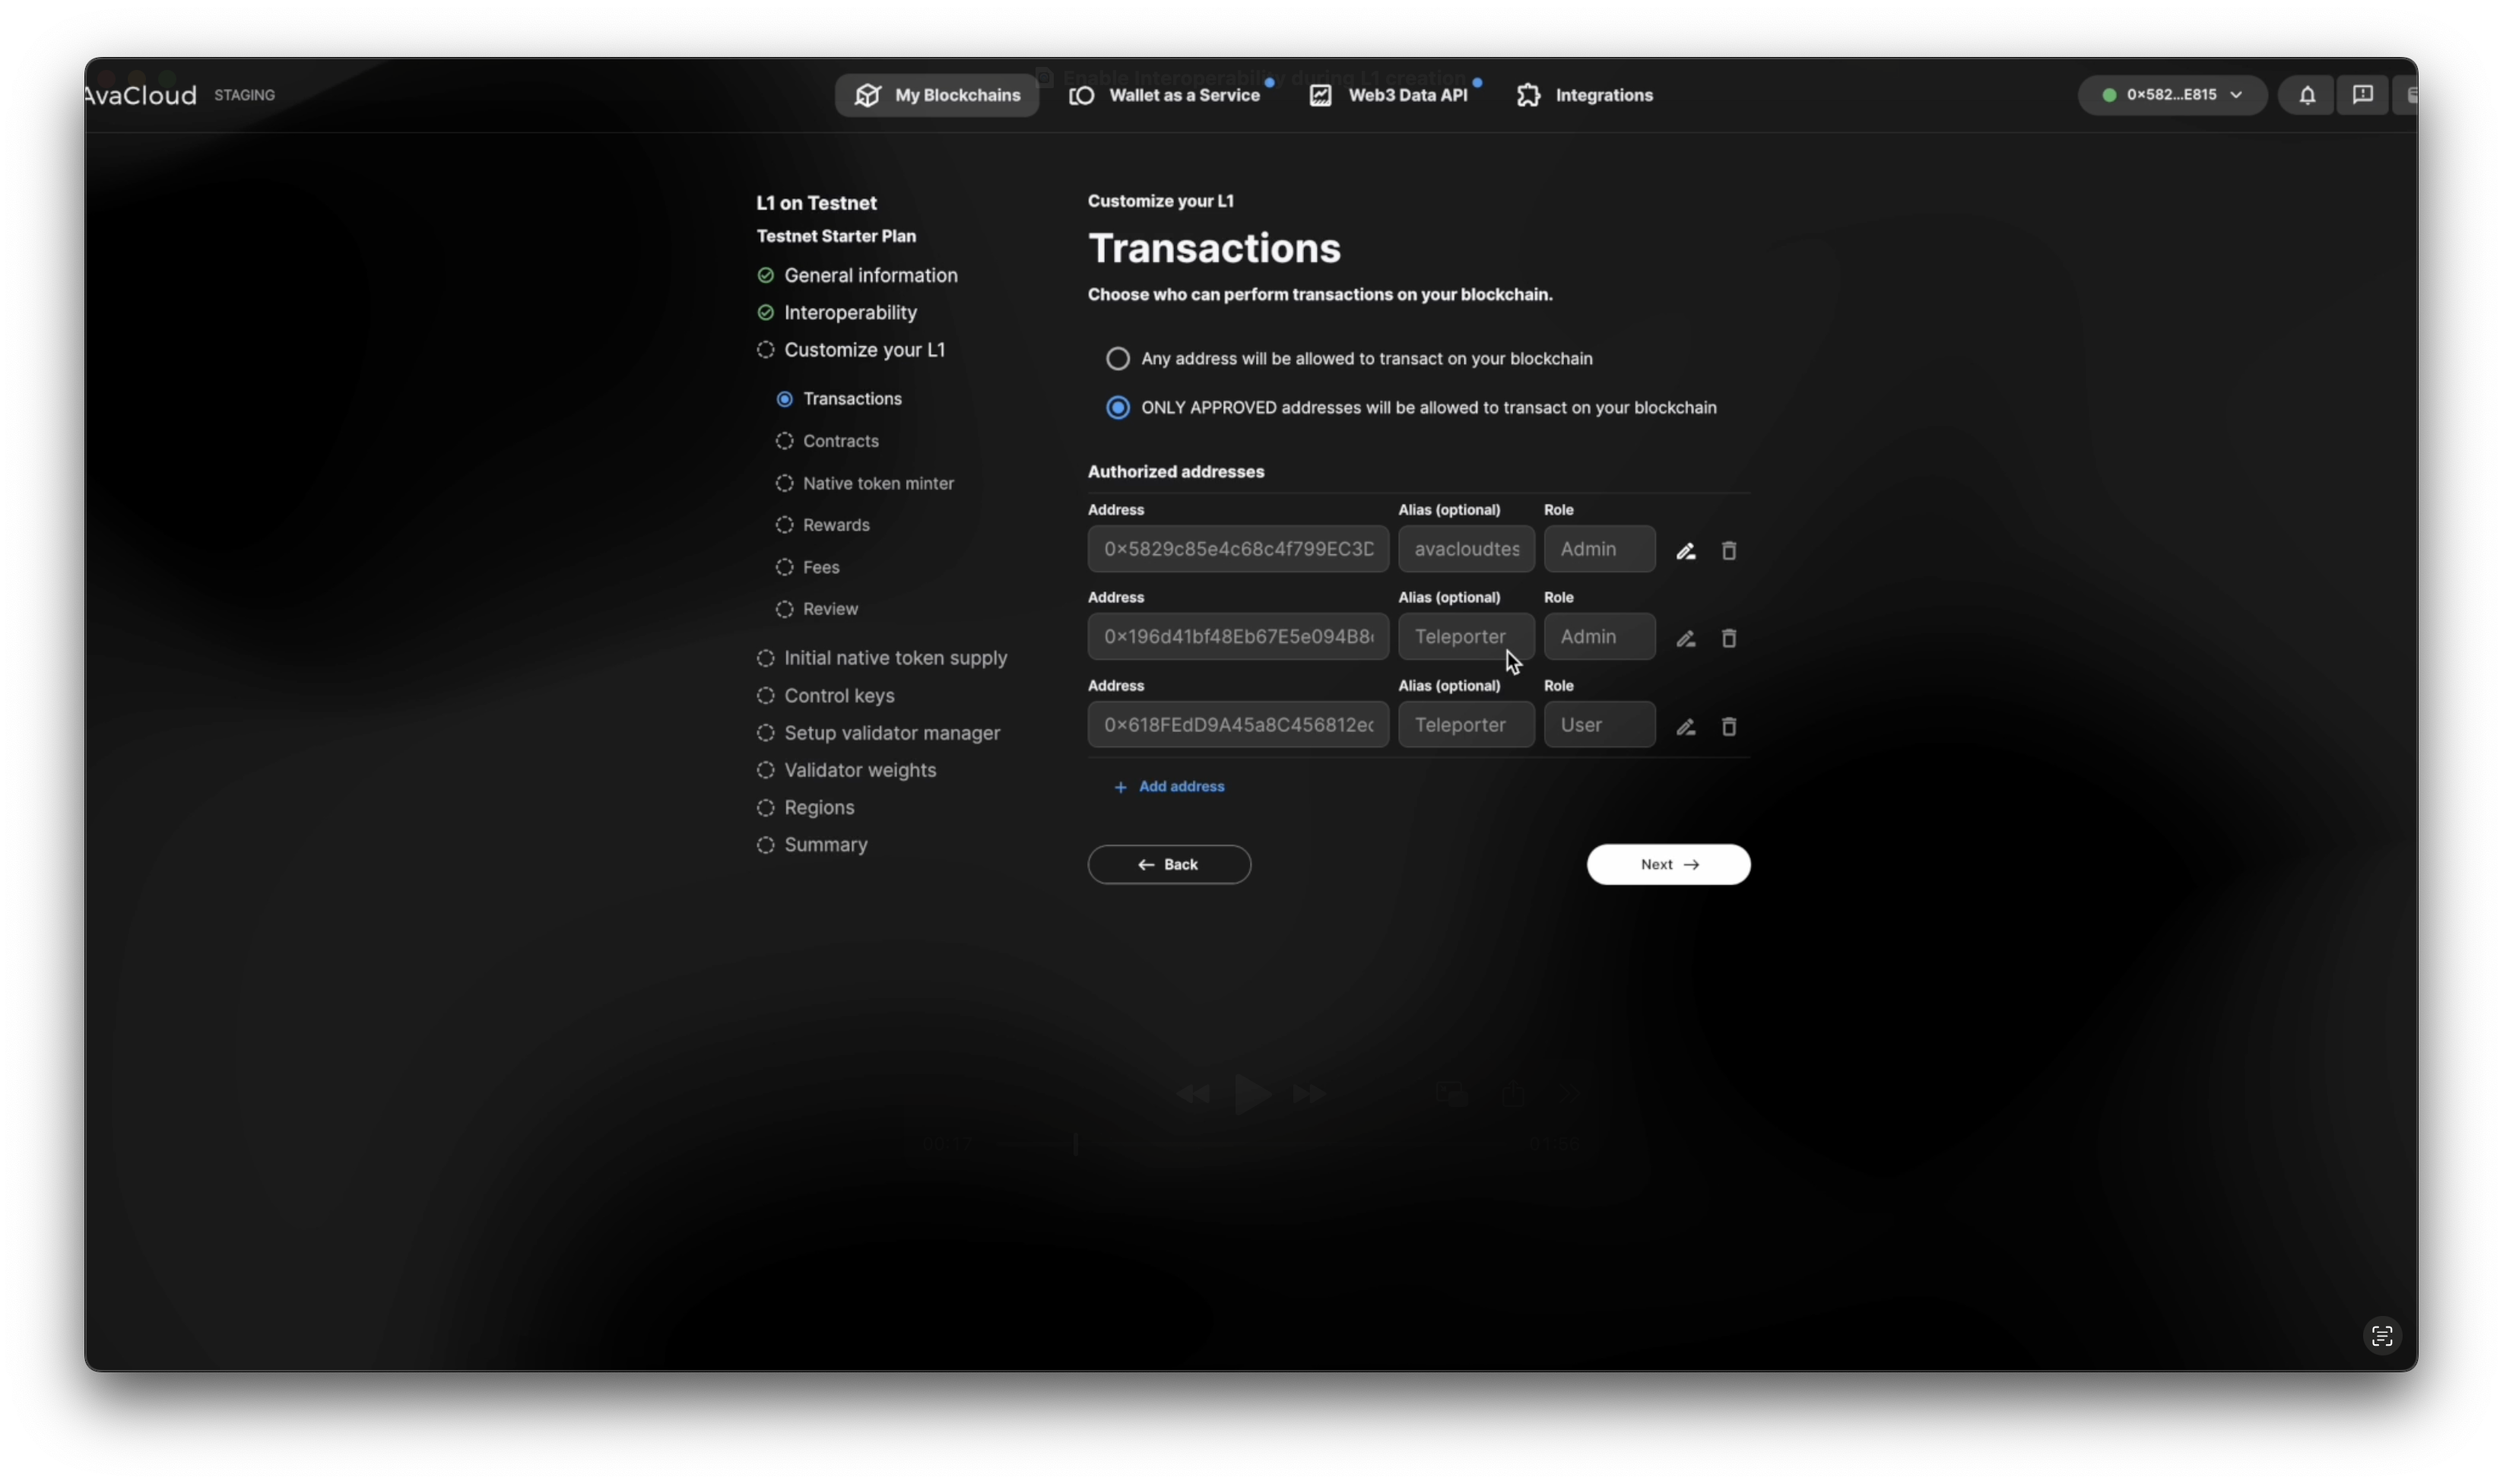
-
If the Contract Manager precompile is enabled:
Required addresses are similarly allowlisted for contract-related interoperability features.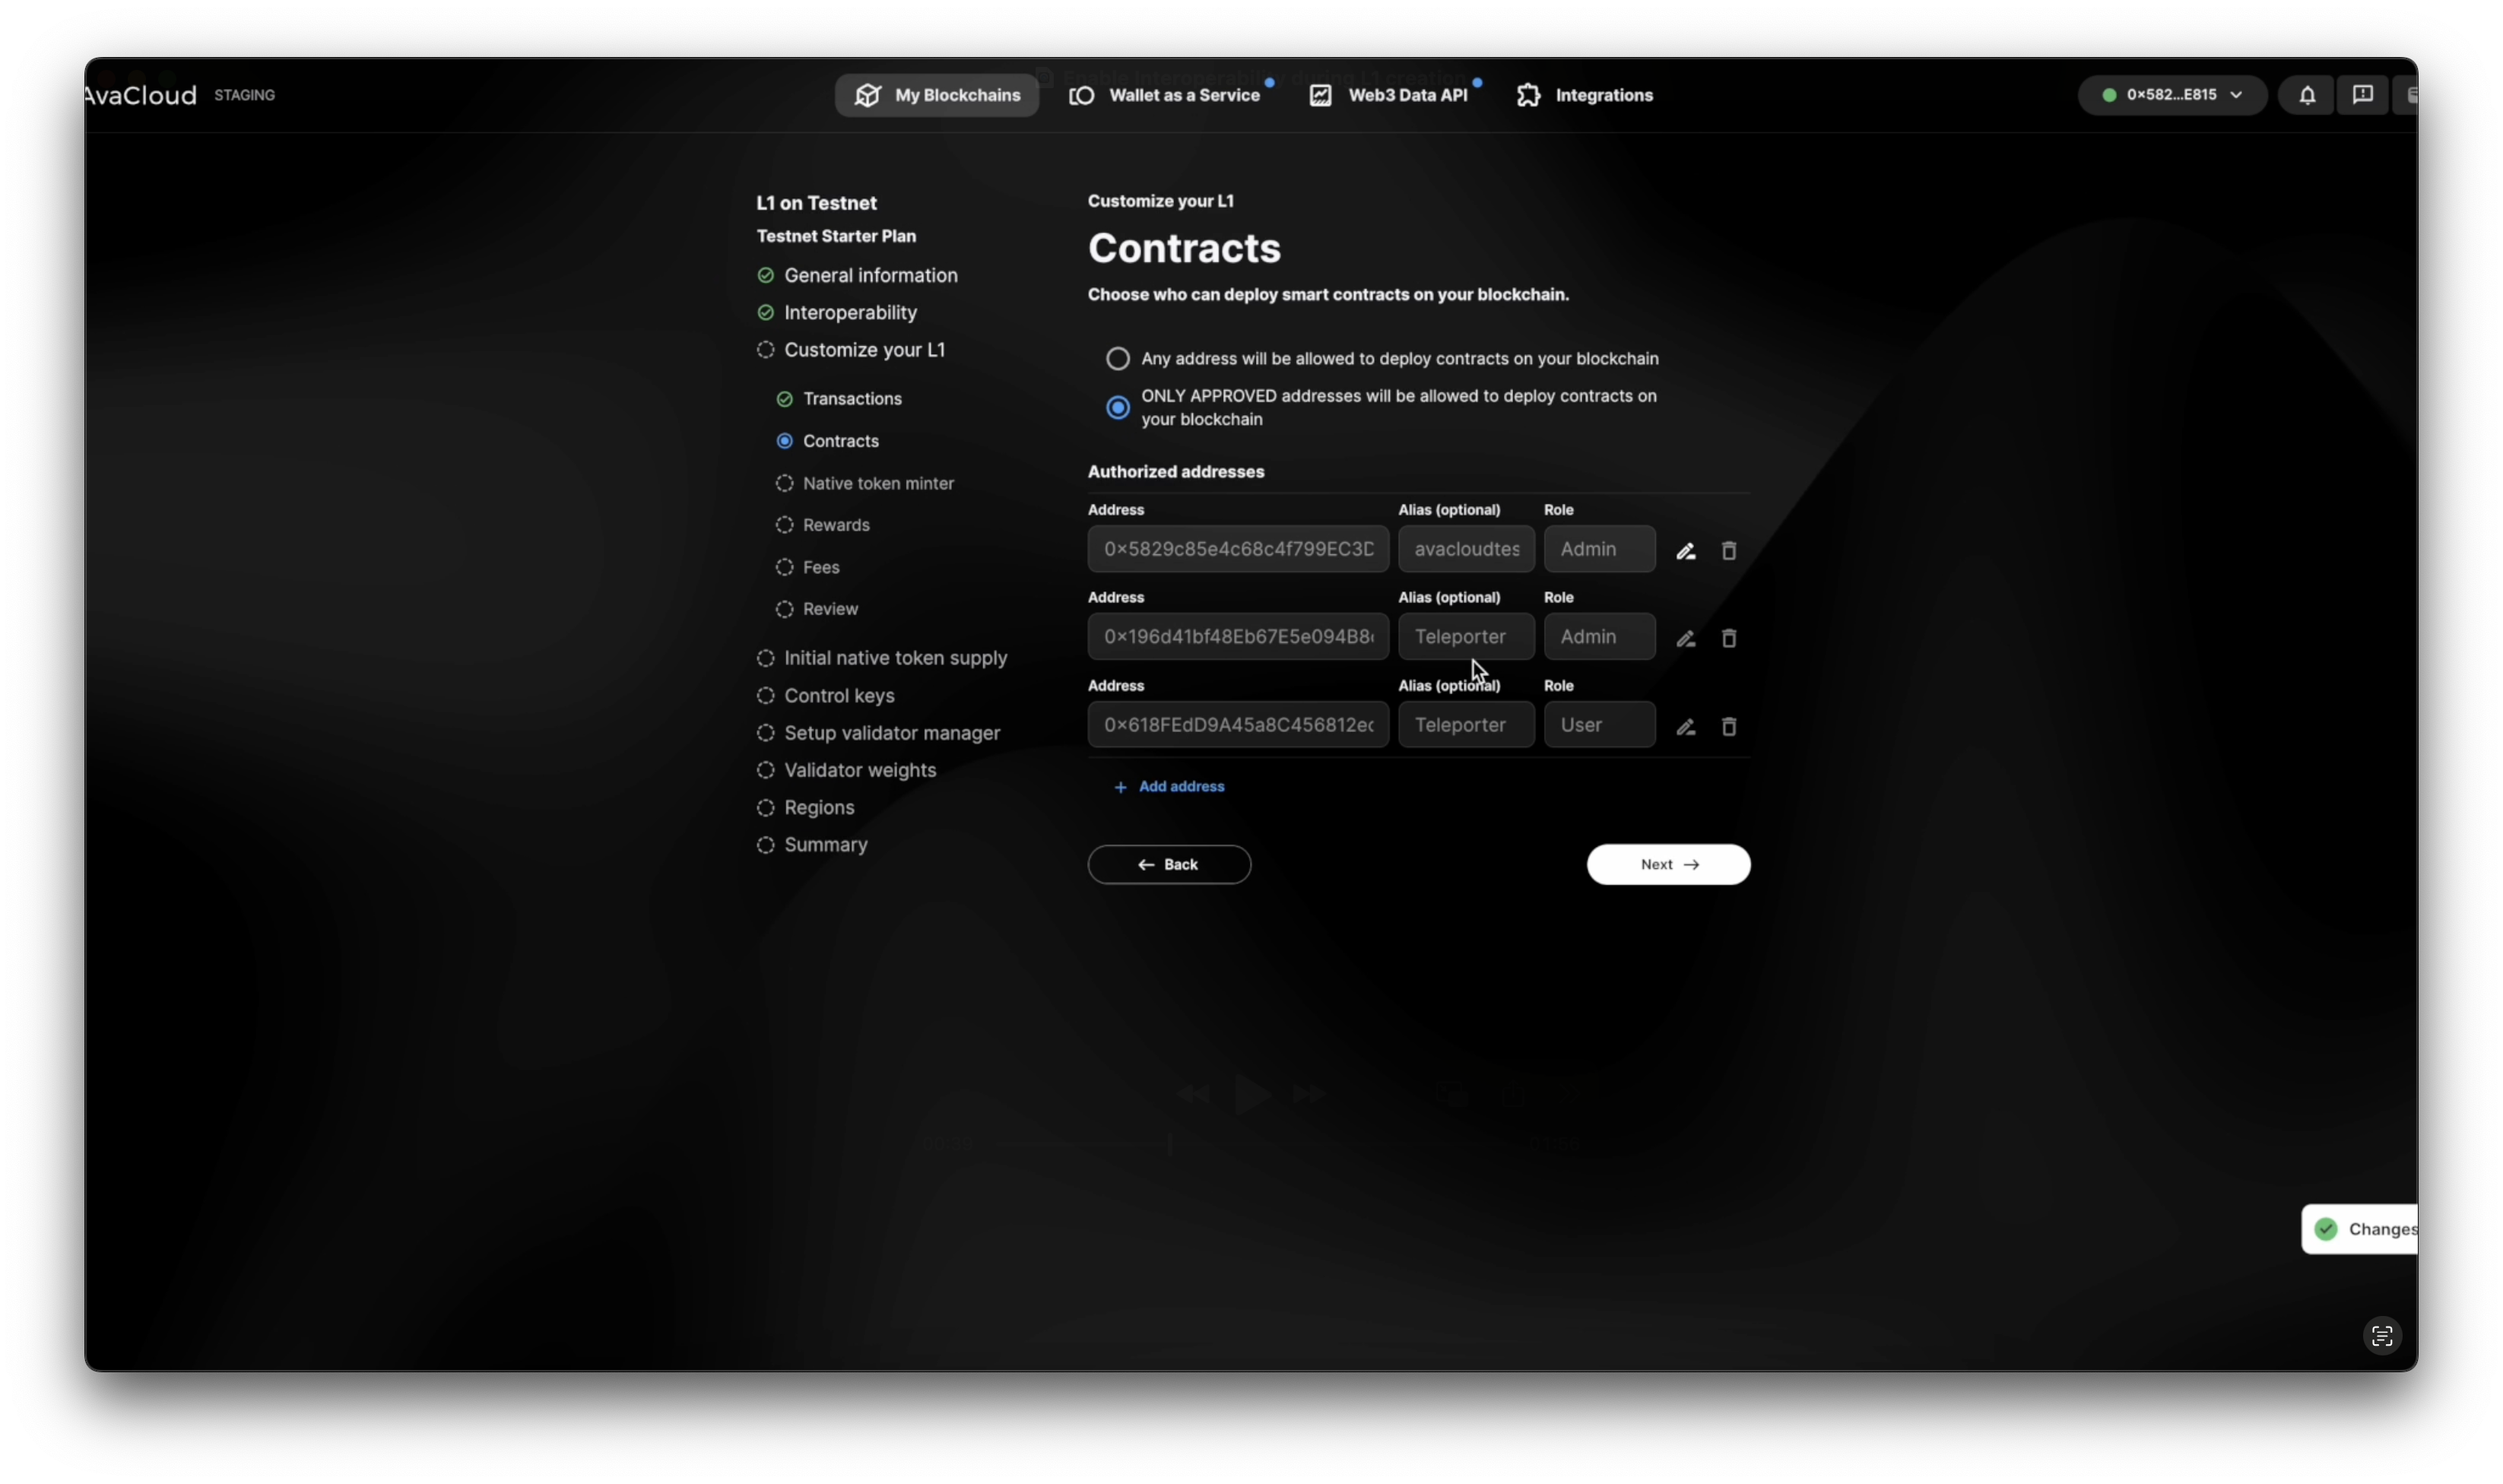
-
In all cases:
The Interoperability address is automatically added to your airdrop recipients list so it receives an initial funding allocation.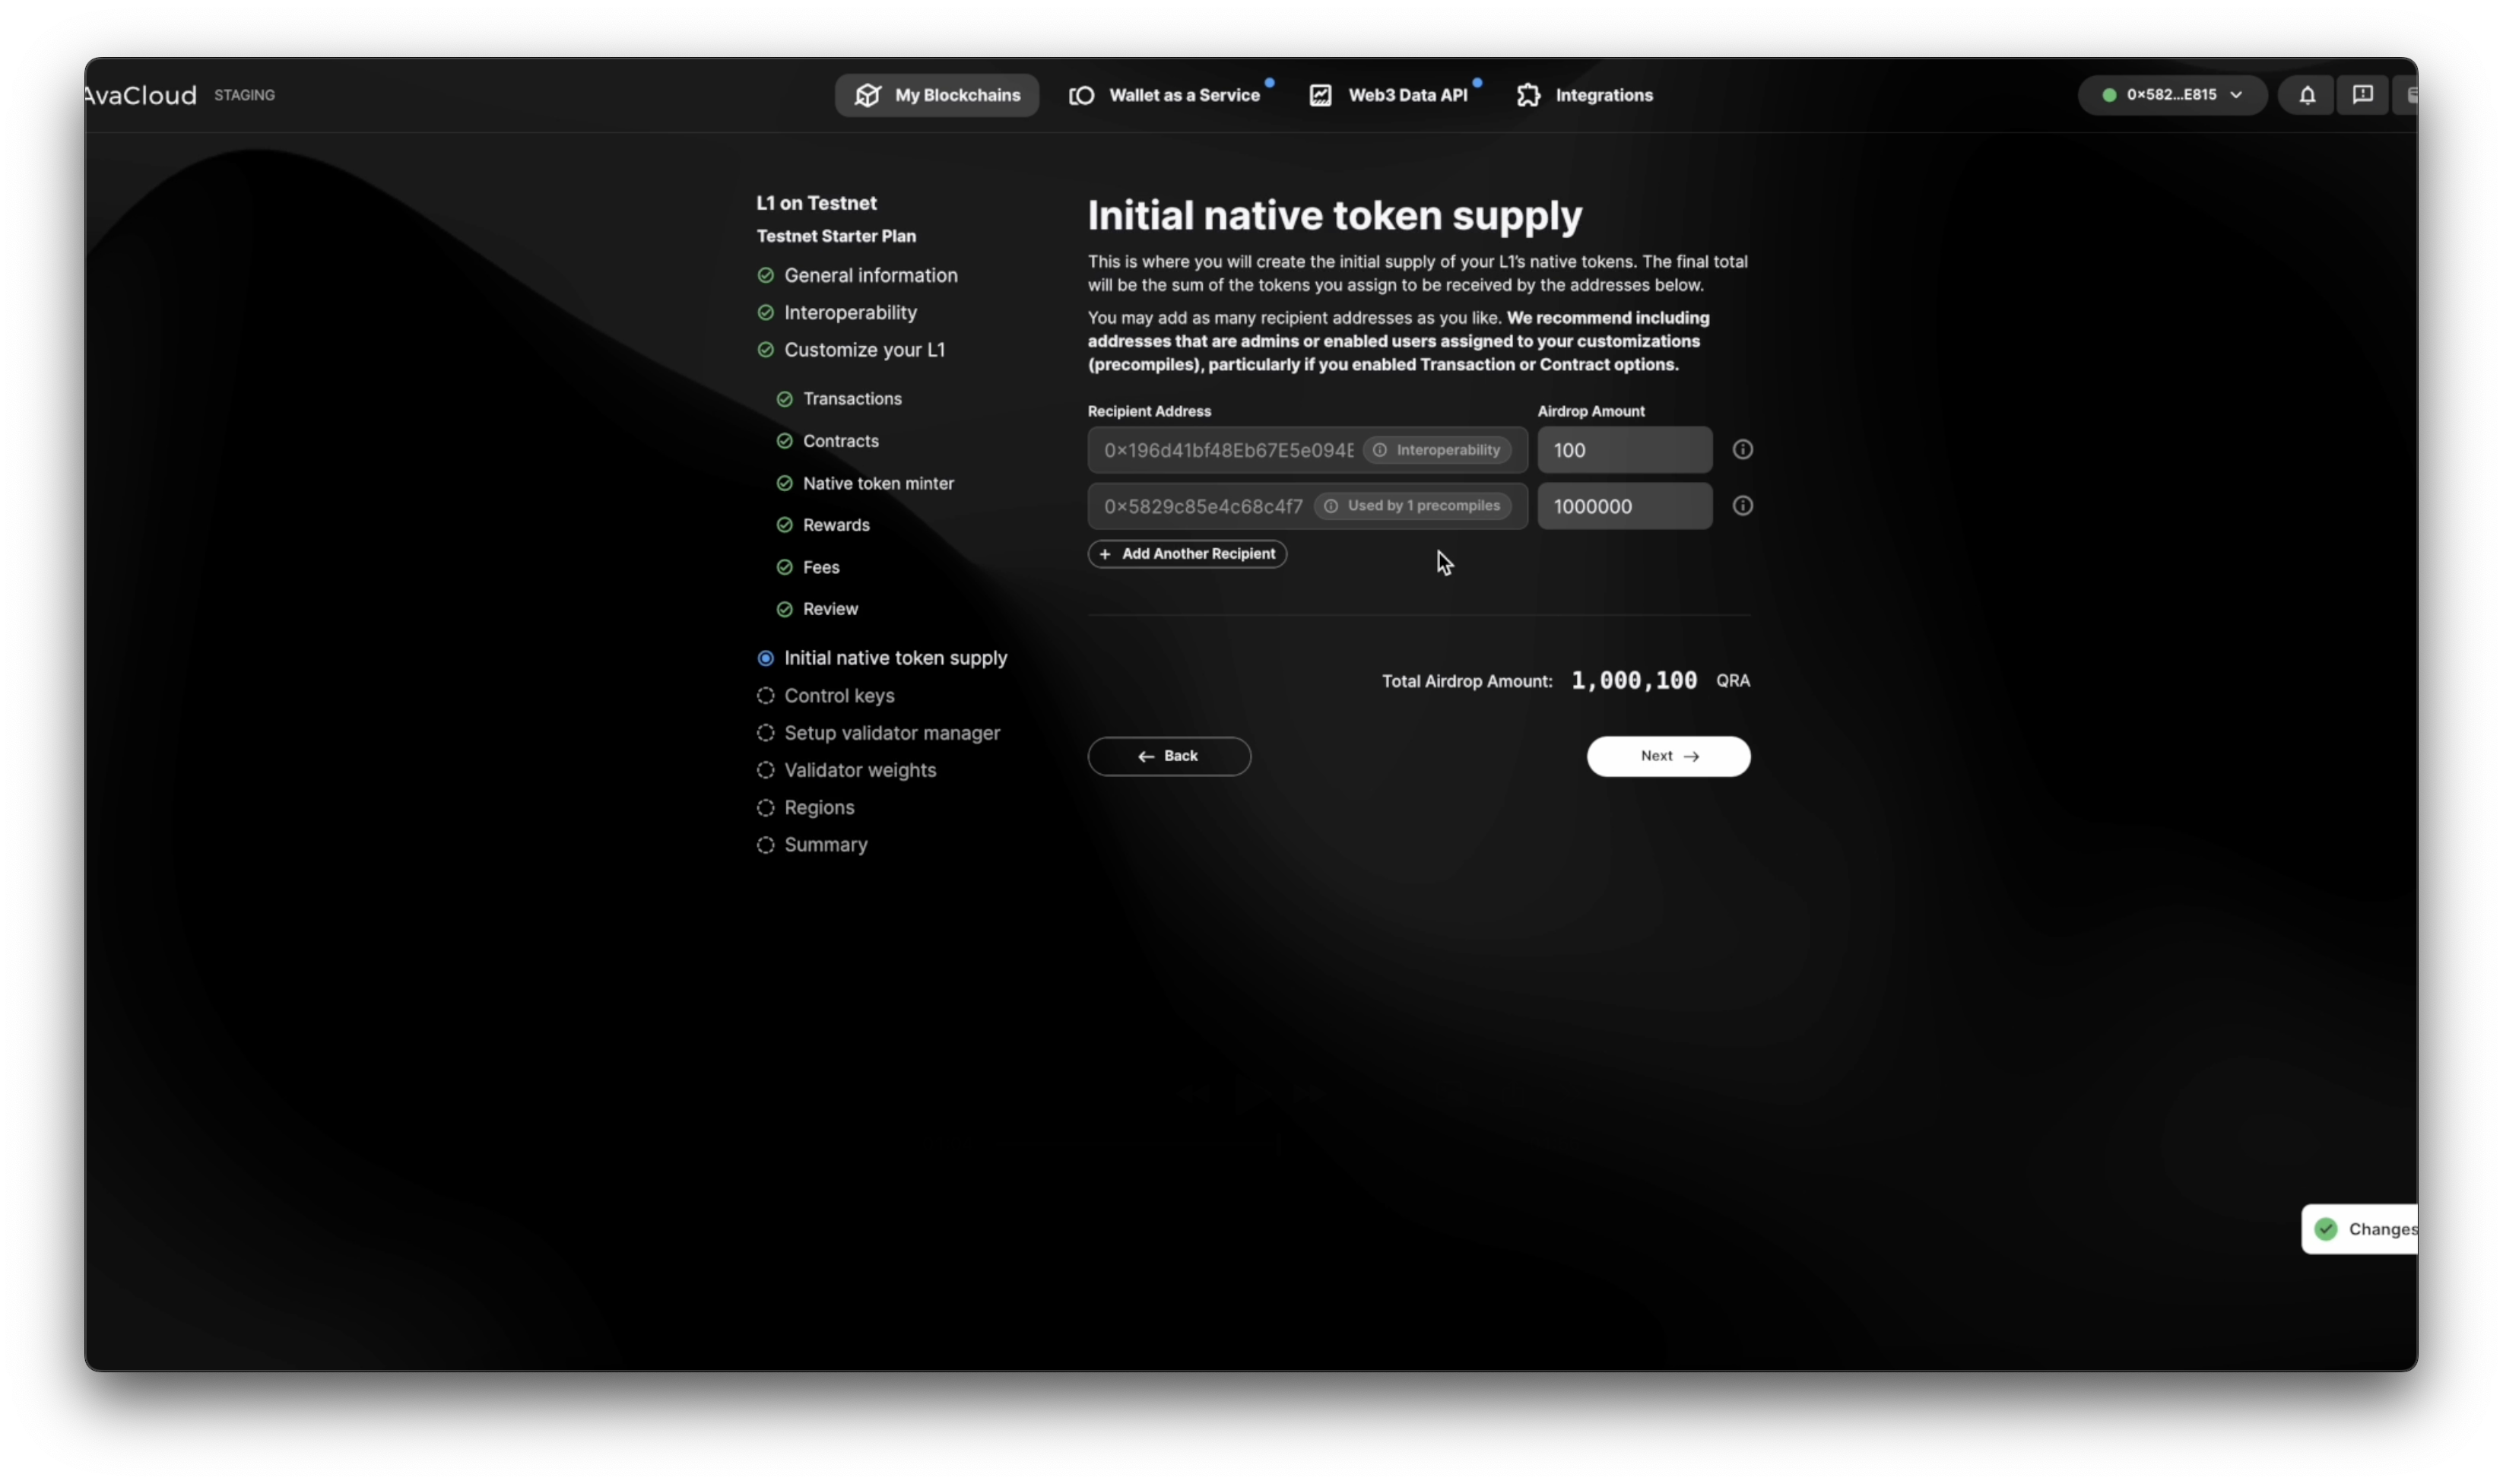
After completing the final steps of L1 creation, interoperability will be ready to use as soon as your L1 is deployed.
Watch the setup in action:
Setting Up Interoperability After L1 Creation
If your L1 was created without interoperability, you can enable it later from the AvaCloud portal:
-
Go to your L1’s Interoperability tab and click Setup.
-
The portal first checks that your wallet is connected to the correct L1, since several on-chain transactions must be signed to enable interoperability.
-
Depending on which precompiles are enabled:
-
Contract Manager precompile:
You’ll need to approve a few transactions to add the required relayer addresses to the allowlist (if this precompile isn’t enabled, this step is skipped).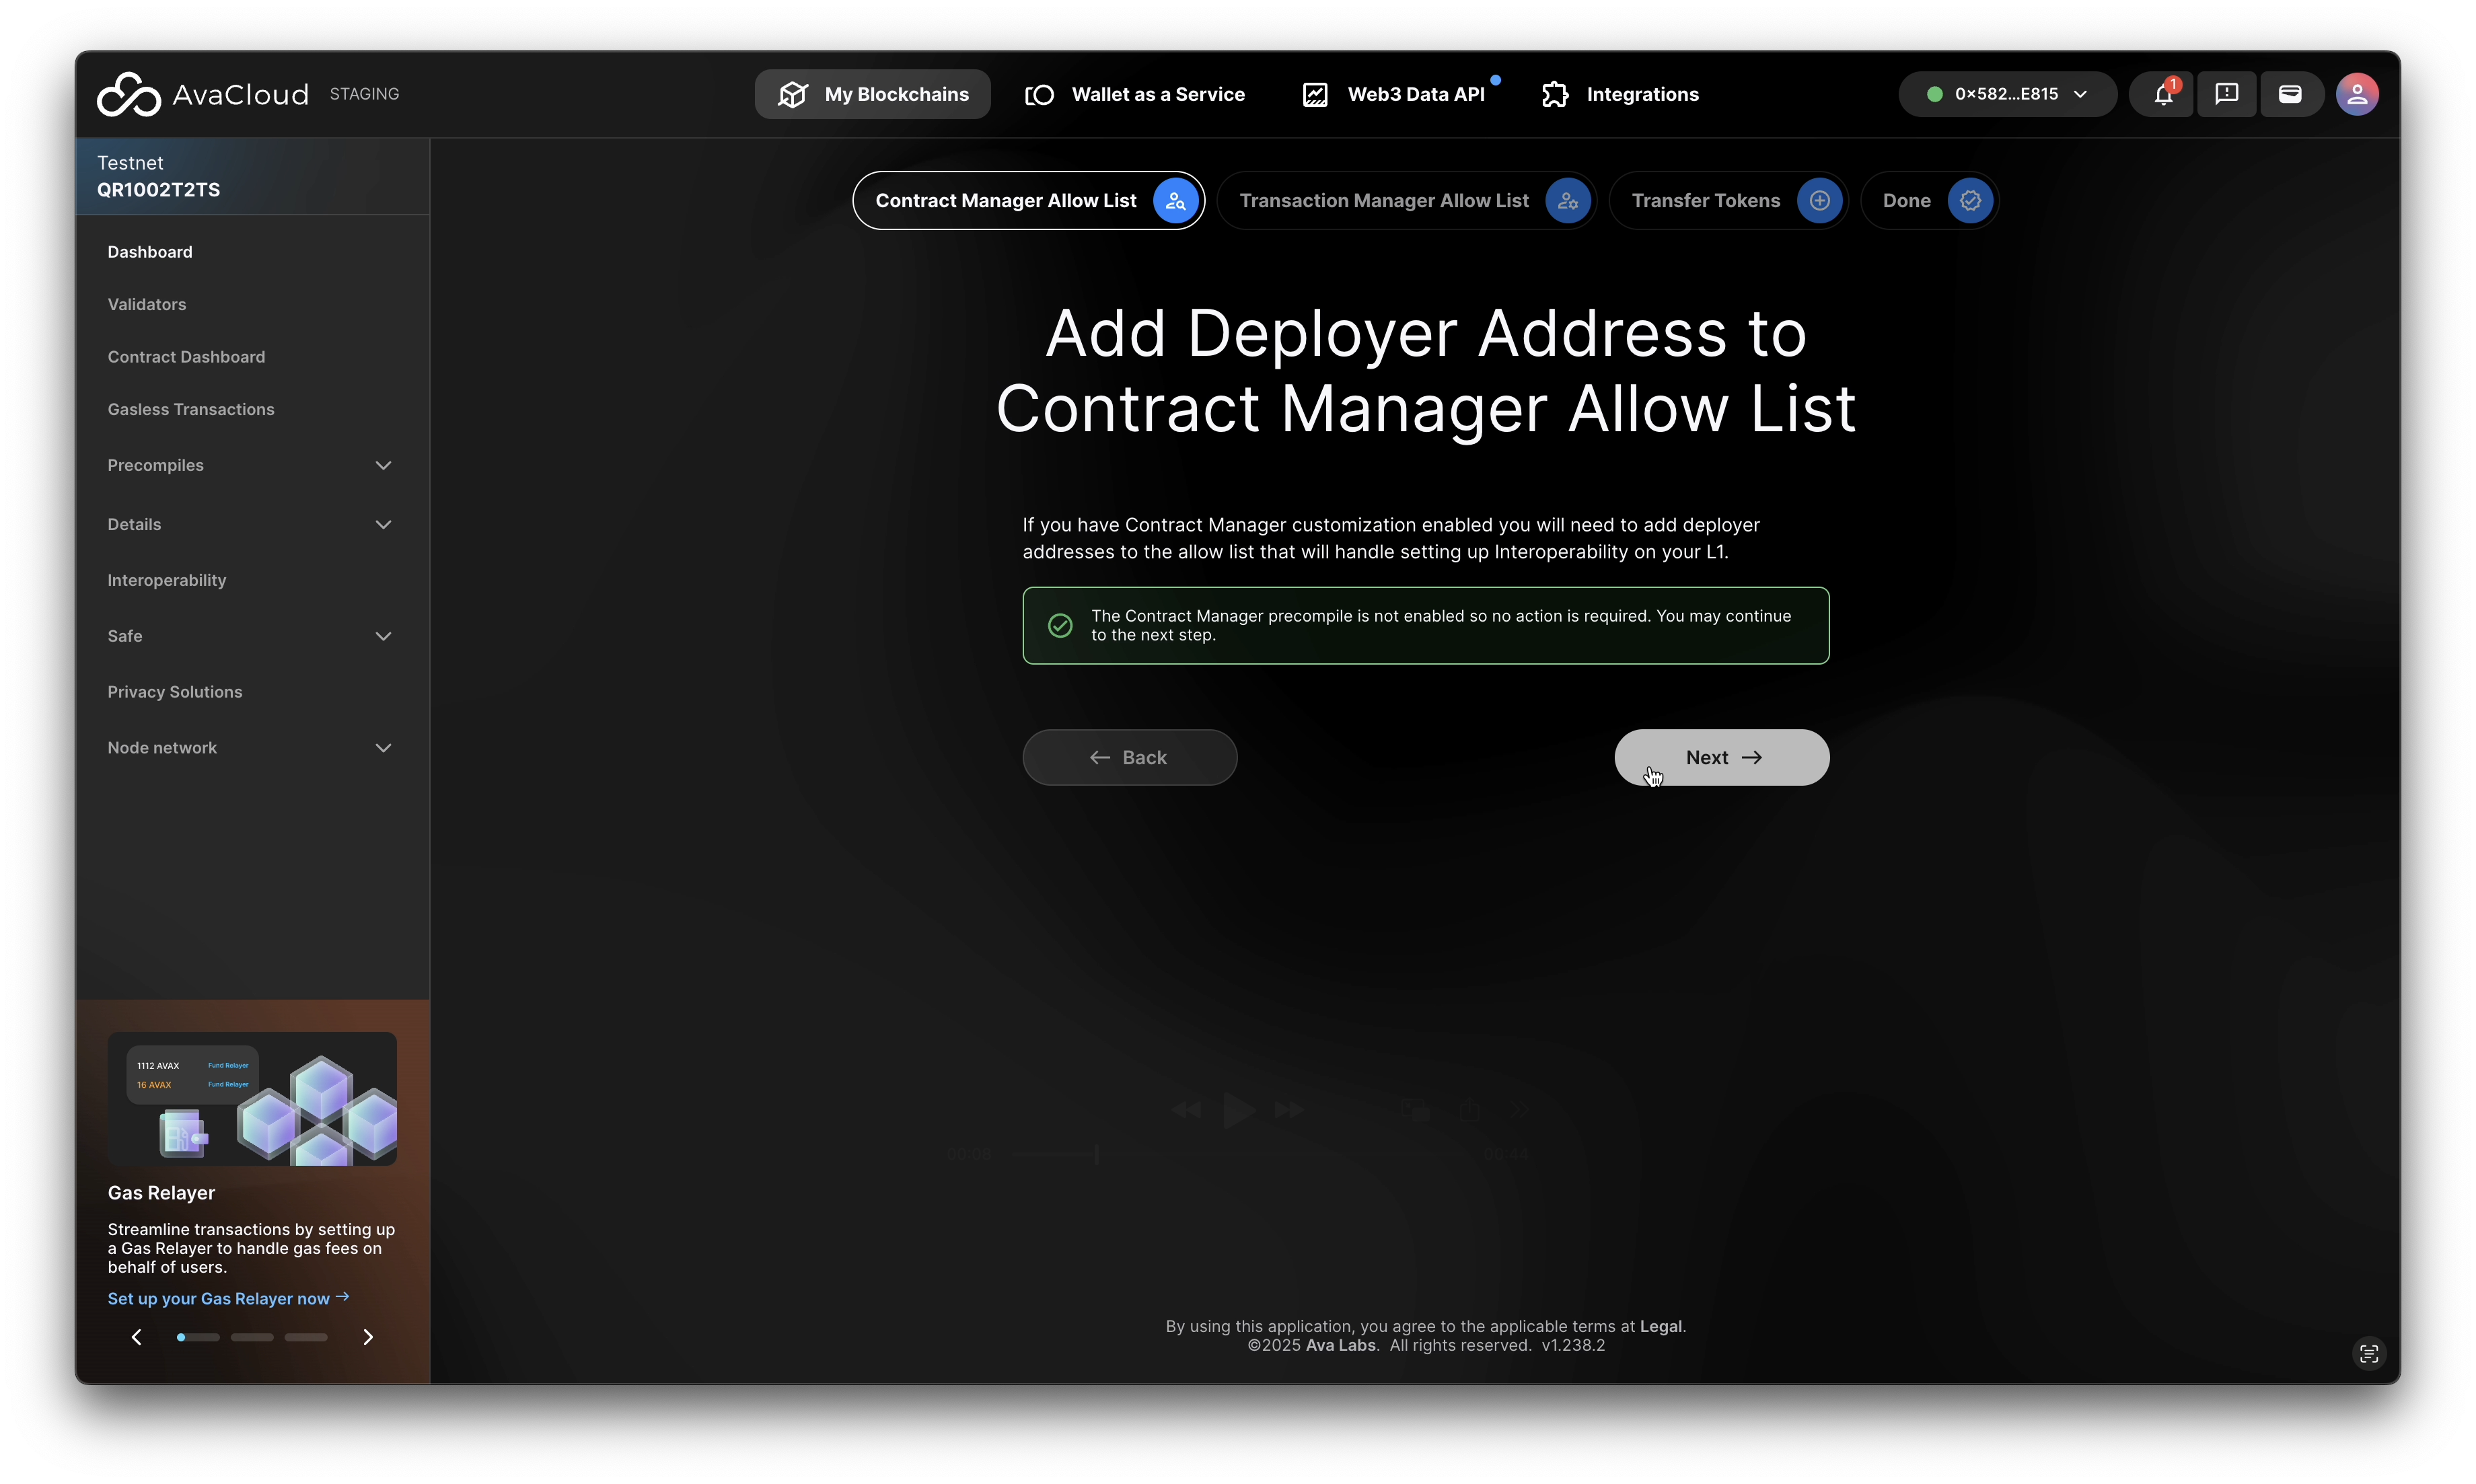
-
Transaction Manager precompile:
Similarly, you’ll approve transactions to add AWM relayer addresses to the relevant allowlist (if this precompile isn’t enabled, this step is skipped).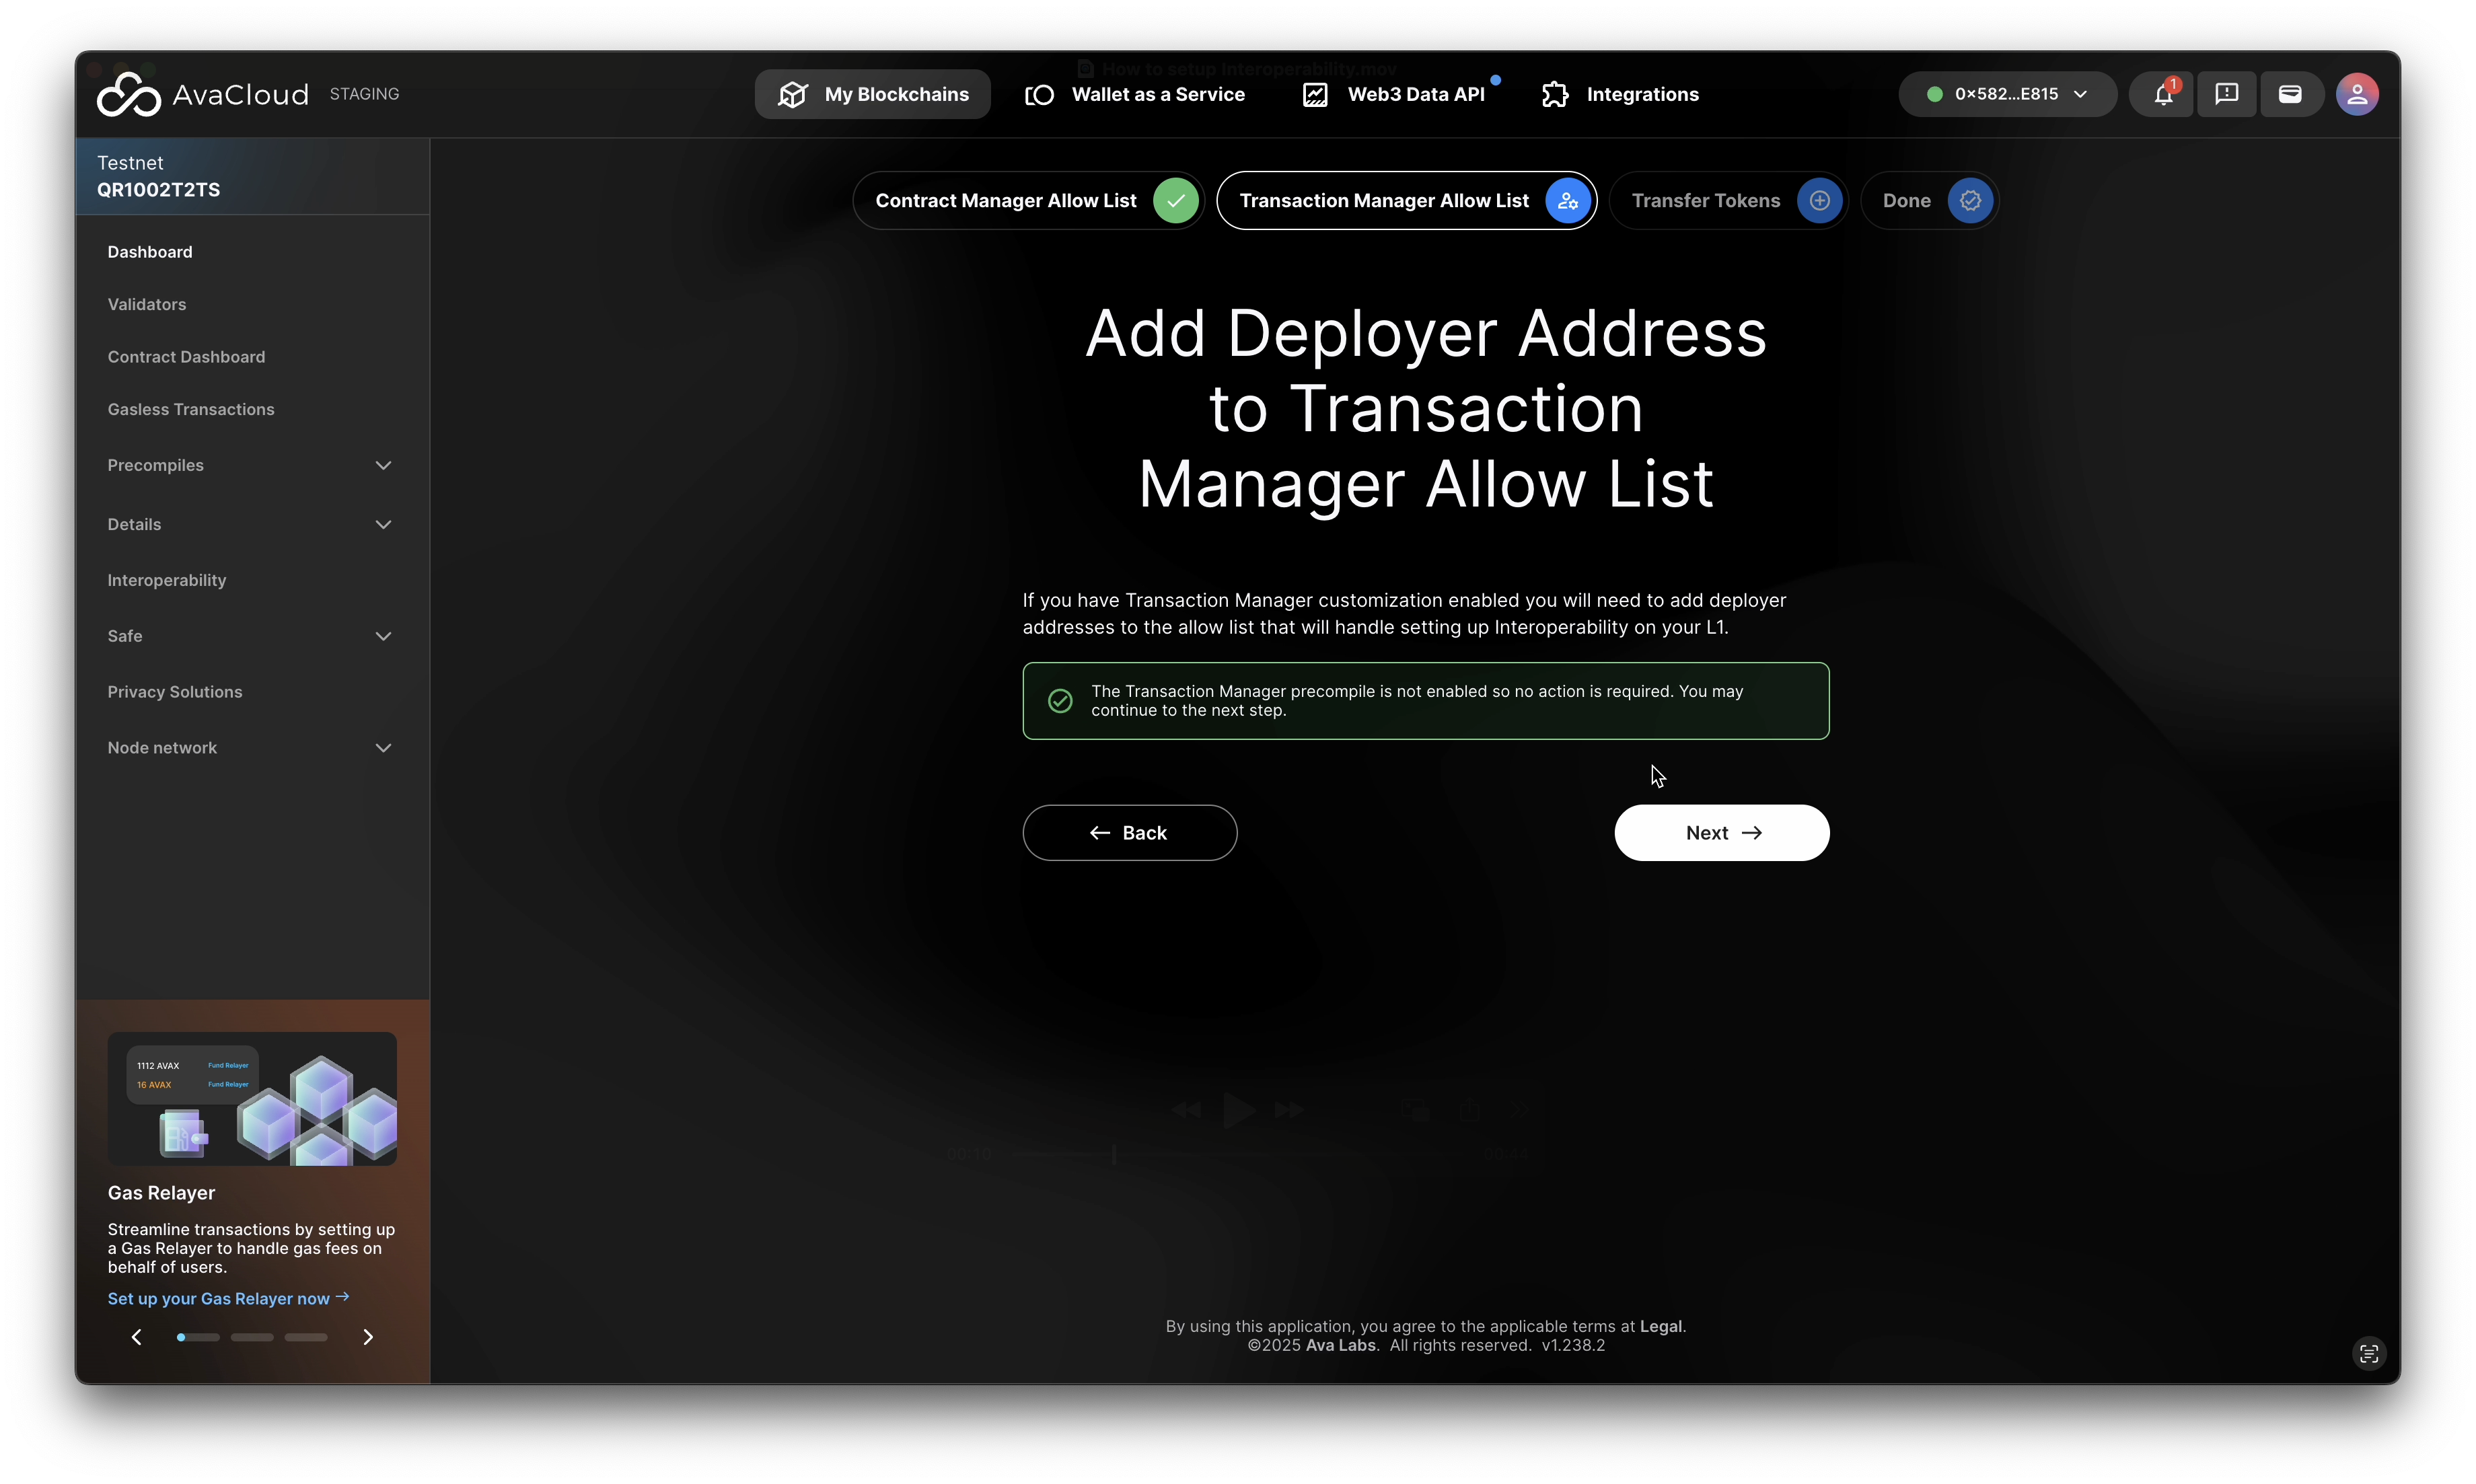
-
-
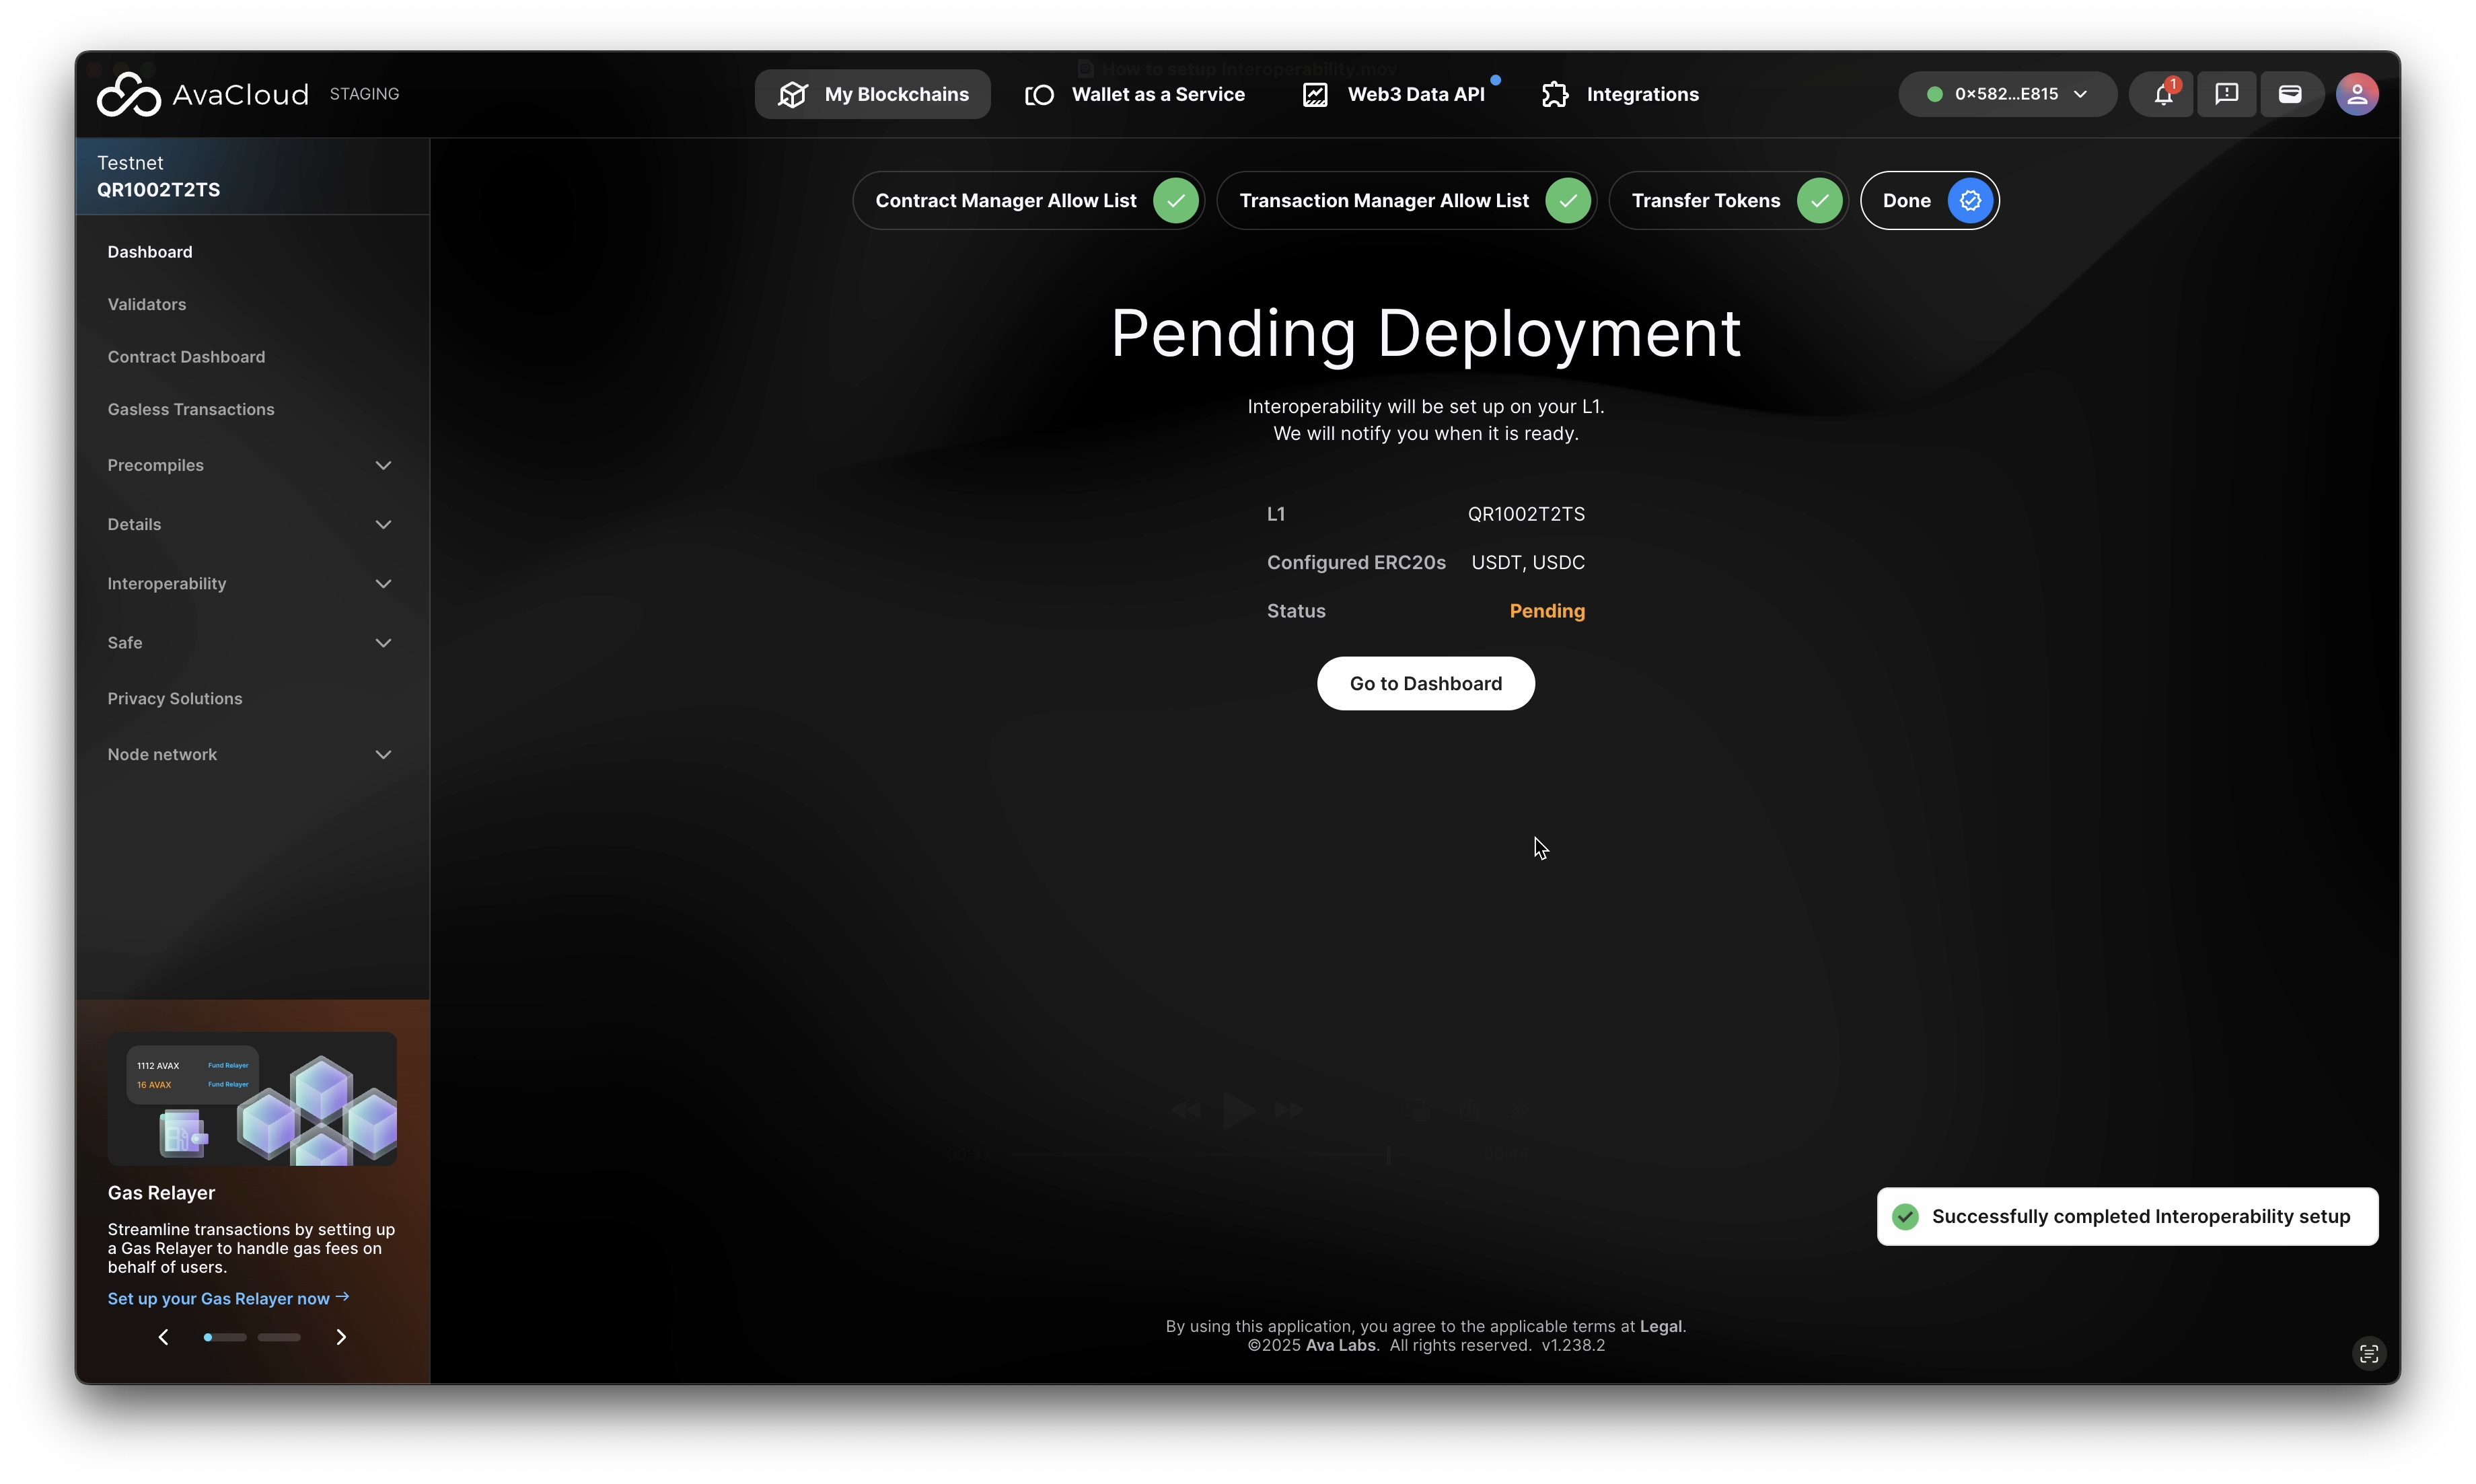
Next, you’ll fund the relayer account using one of two methods:
- Mint new tokens directly to the relayer
- Transfer tokens to the relayer’s address

-
Once the relayer is funded, the portal will proceed to finalize the AWM relayer setup.

-
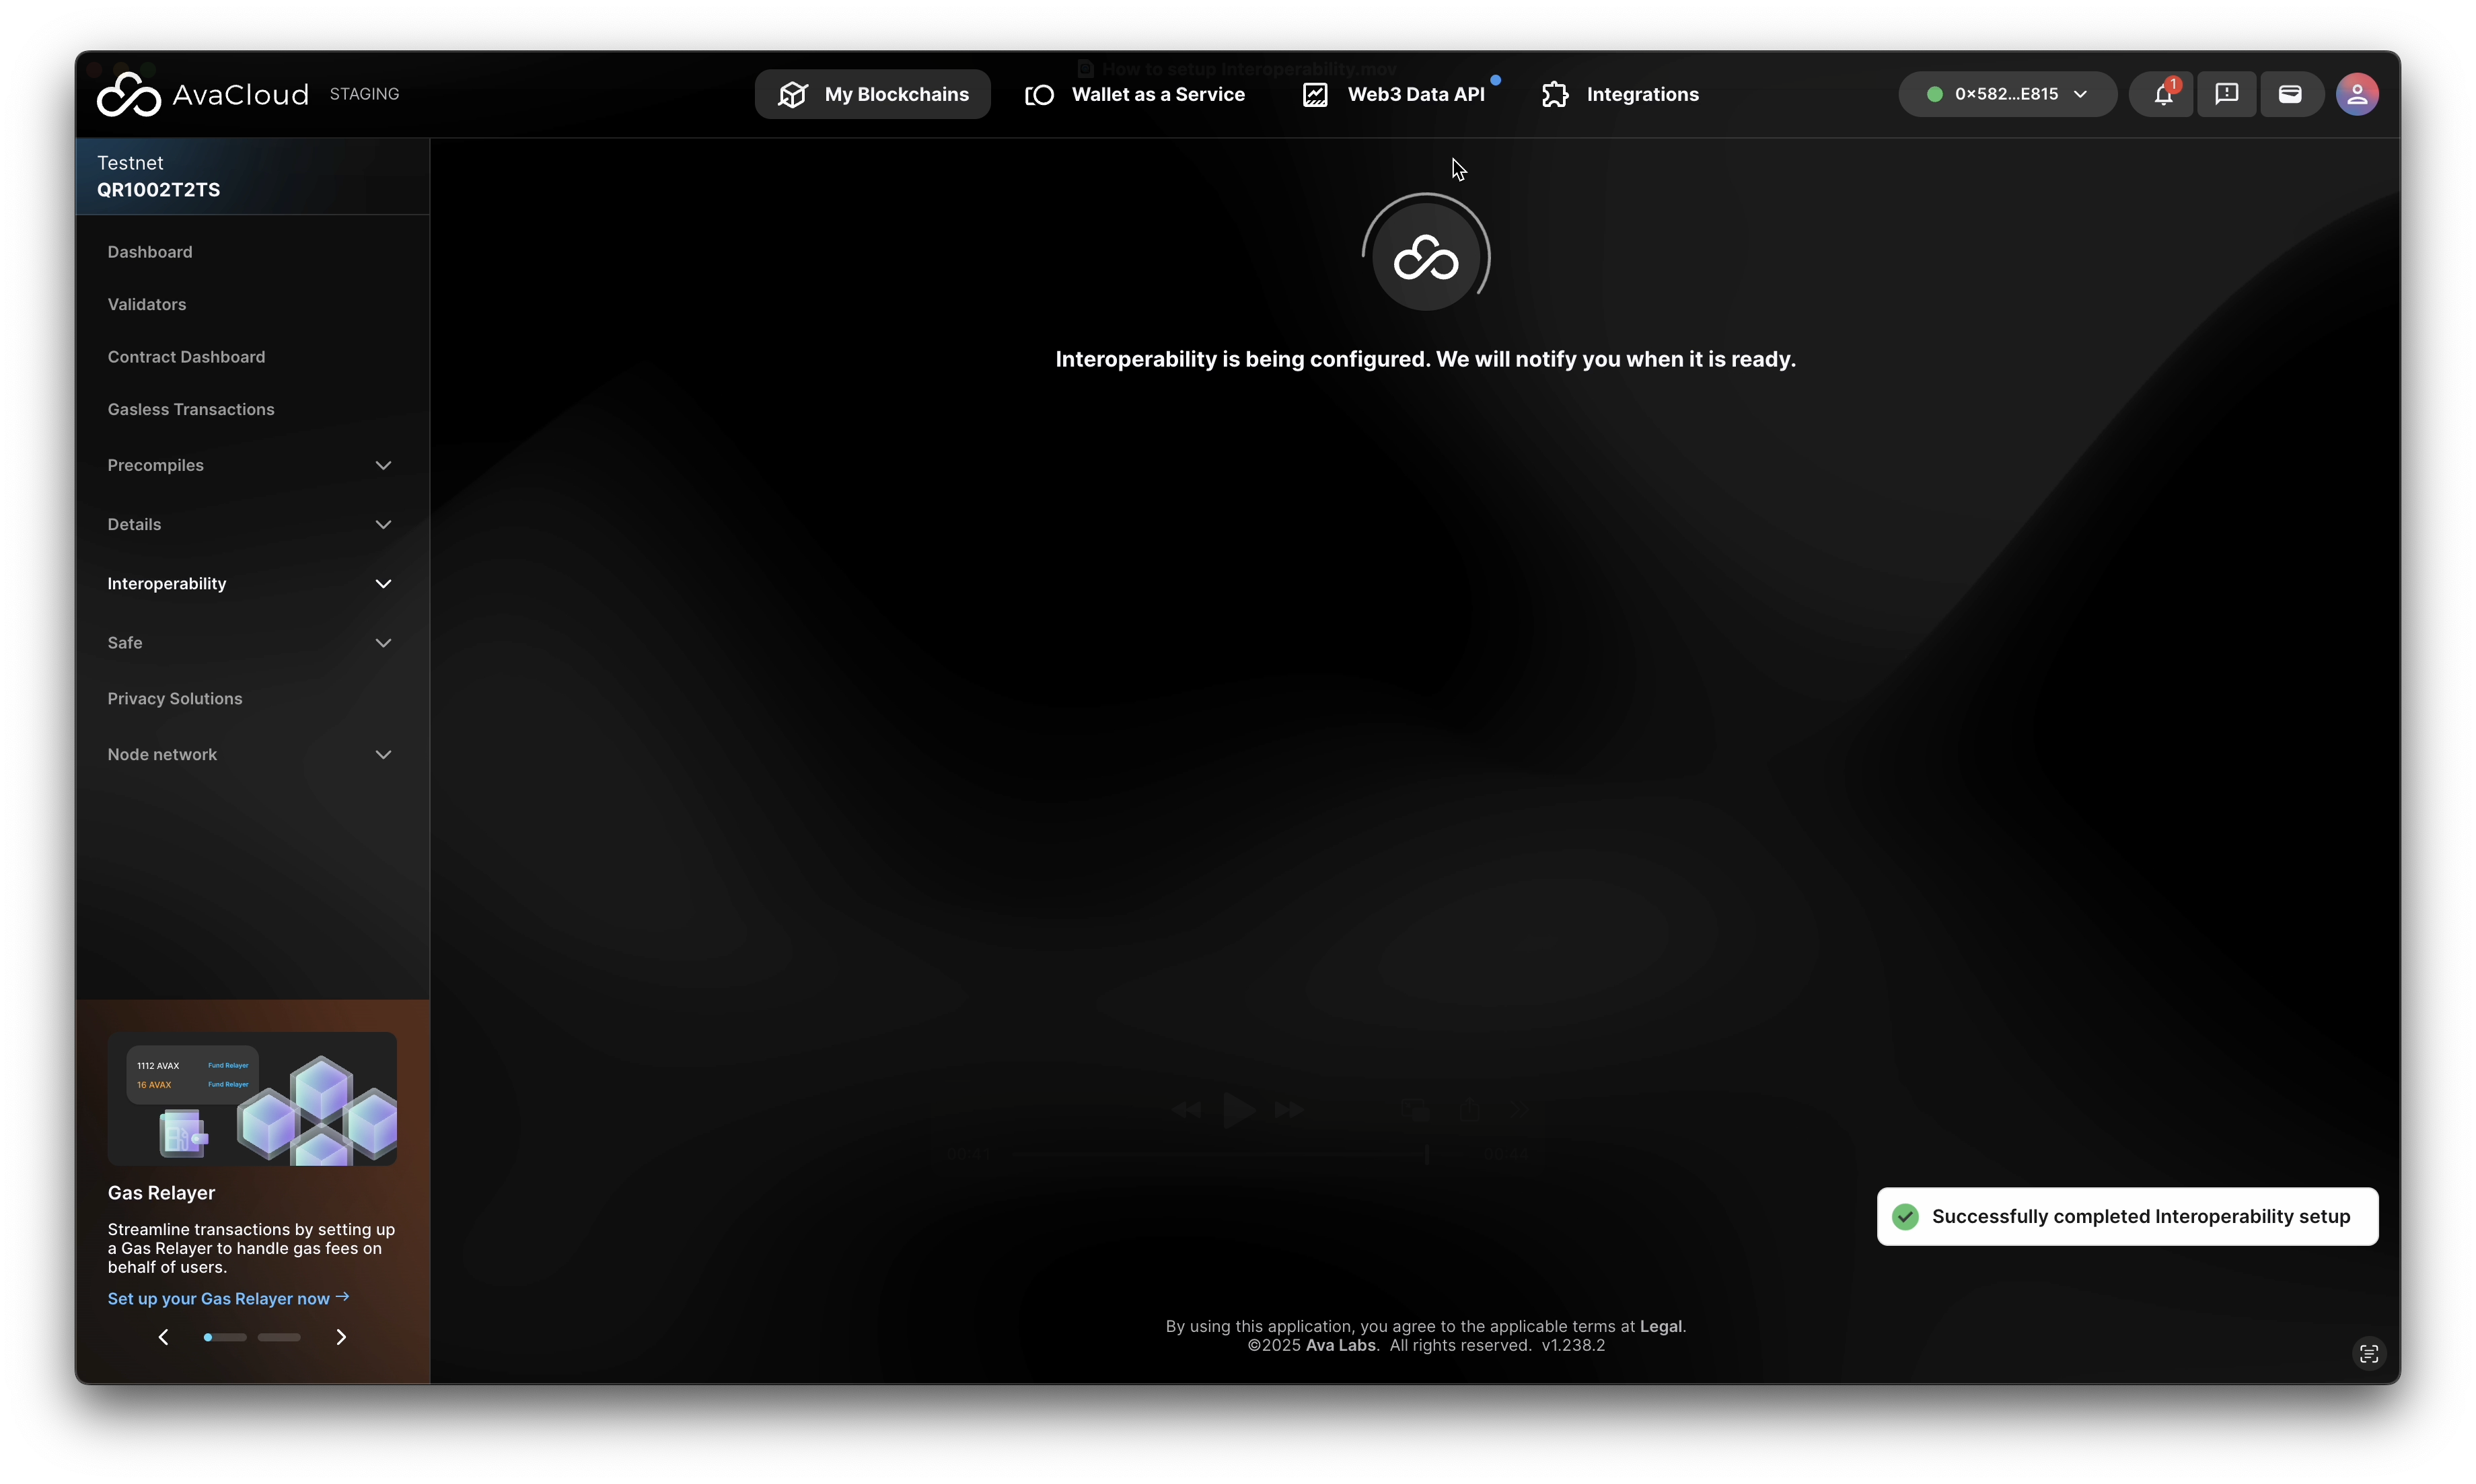
The relayer deployment starts, and your dashboard will update to show the deployment status.
-
Pending Deployment:
-
Loading State:
-
Watch the post-creation setup process:
More Resources on Avalanche Interoperability
- Avalanche Academy: Interchain Messaging
- Avalanche Academy: Interchain Token Transfer
- Documentation: Interchain Messaging
- icm-services Repository
If you need more help, explore our other articles or reach out to our support team via chat or email [email protected]. All examples provided are for demonstration purposes only.
Learn More About AvaCloud | Download Case Studies | Schedule an AvaCloud Demo