How to Set Up a Gasless Transactions Relayer
Prerequisite
Make sure you have already created an L1 by following these steps.
Step-by-Step Guide
-
Open Your L1 and Access Gasless Transactions
Navigate to your L1, then select
Gasless Transactionsfrom the navigation menu on the left.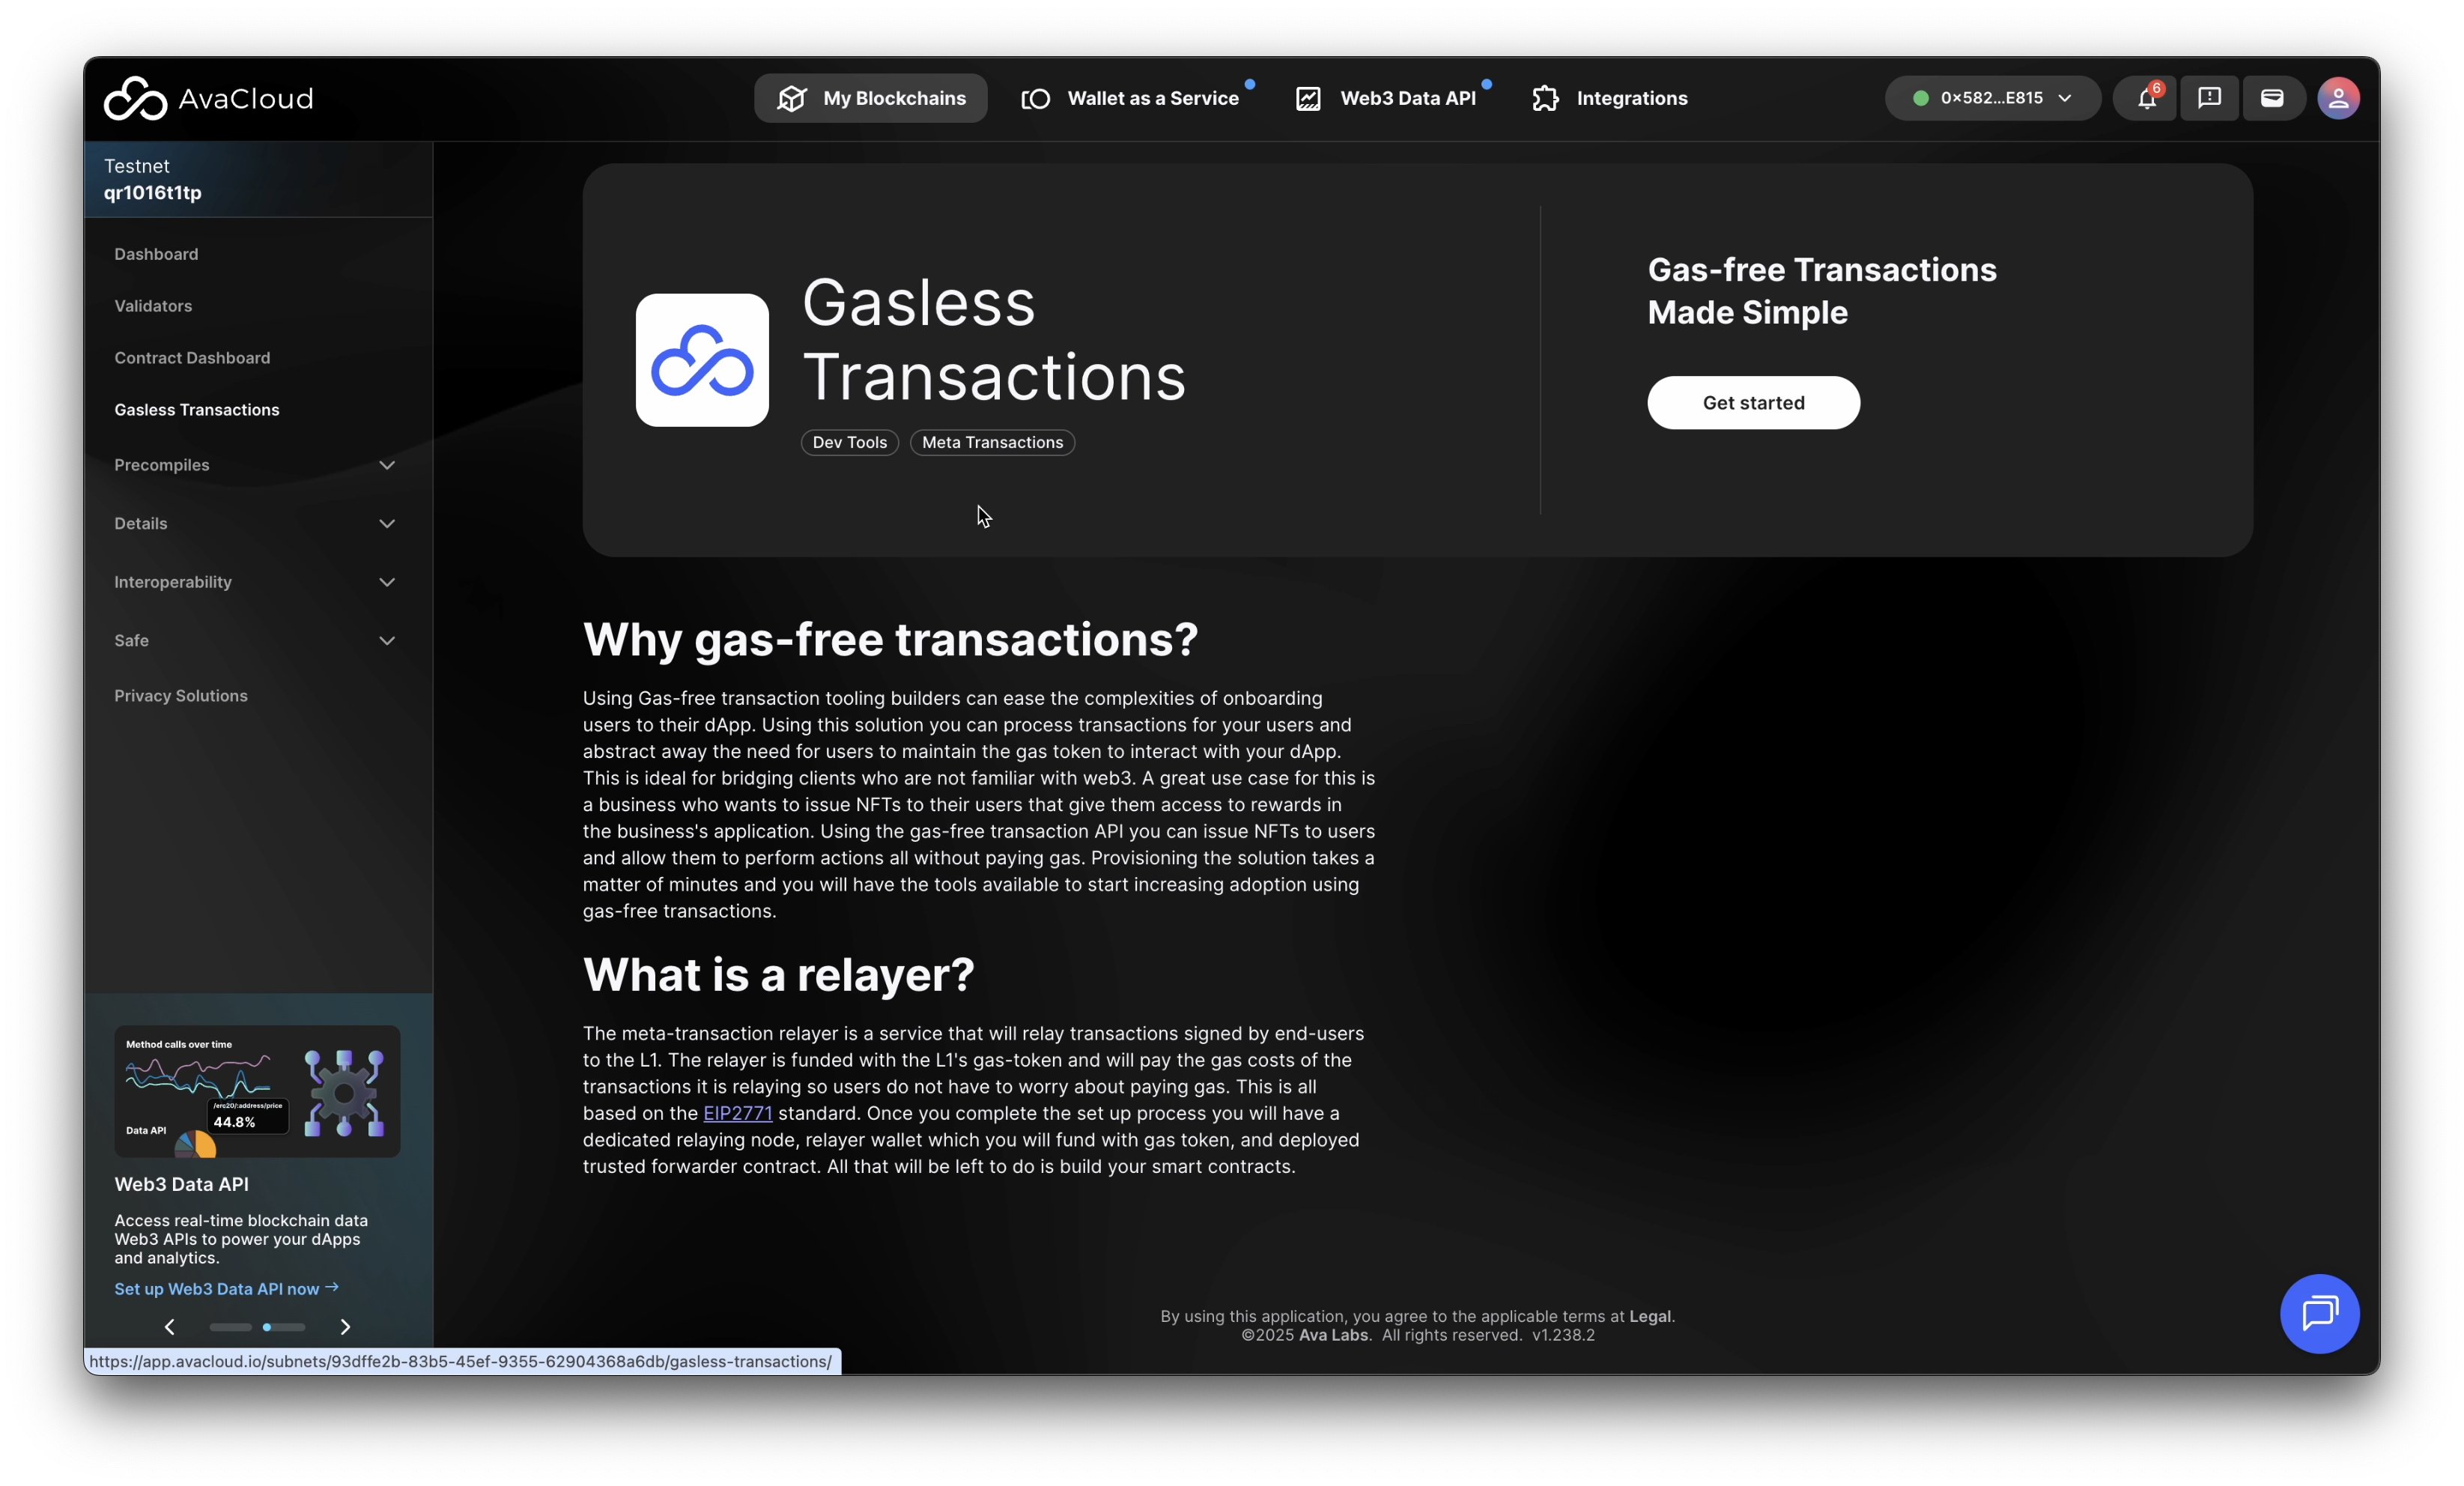
-
Begin Setup and Select a Plan
Click the
Get startedbutton. You will be presented with a selection of performance plans.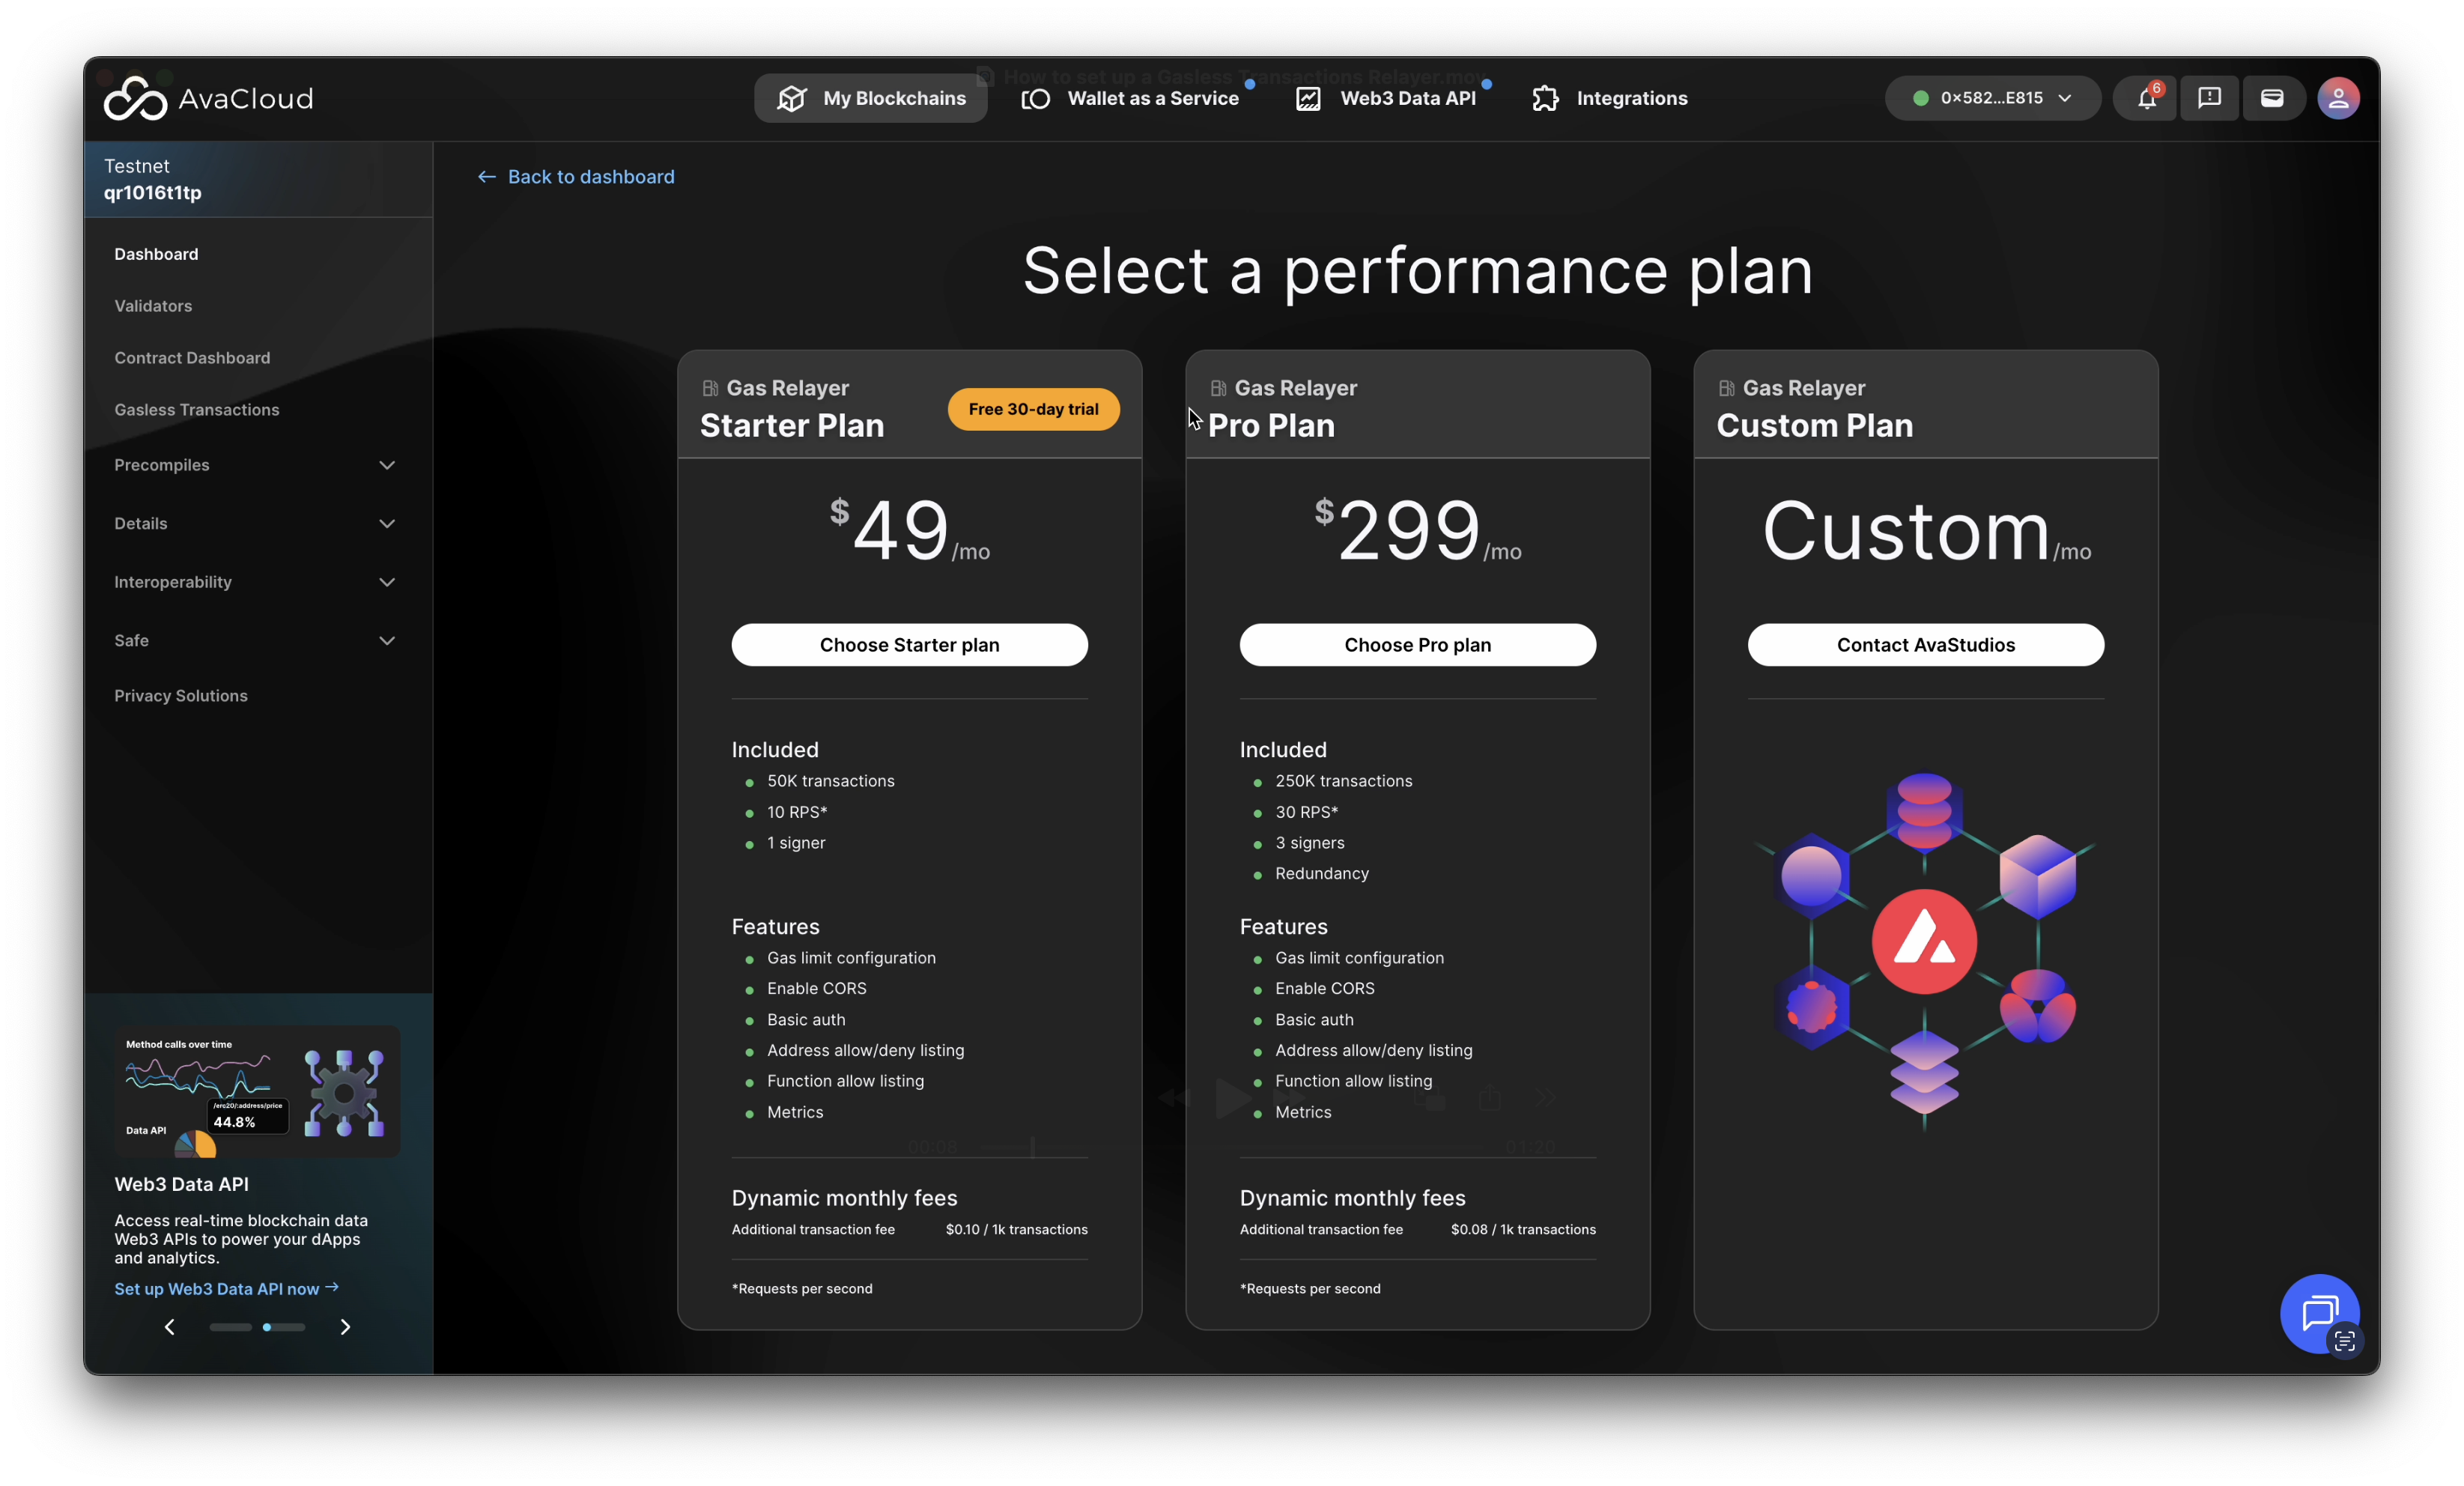
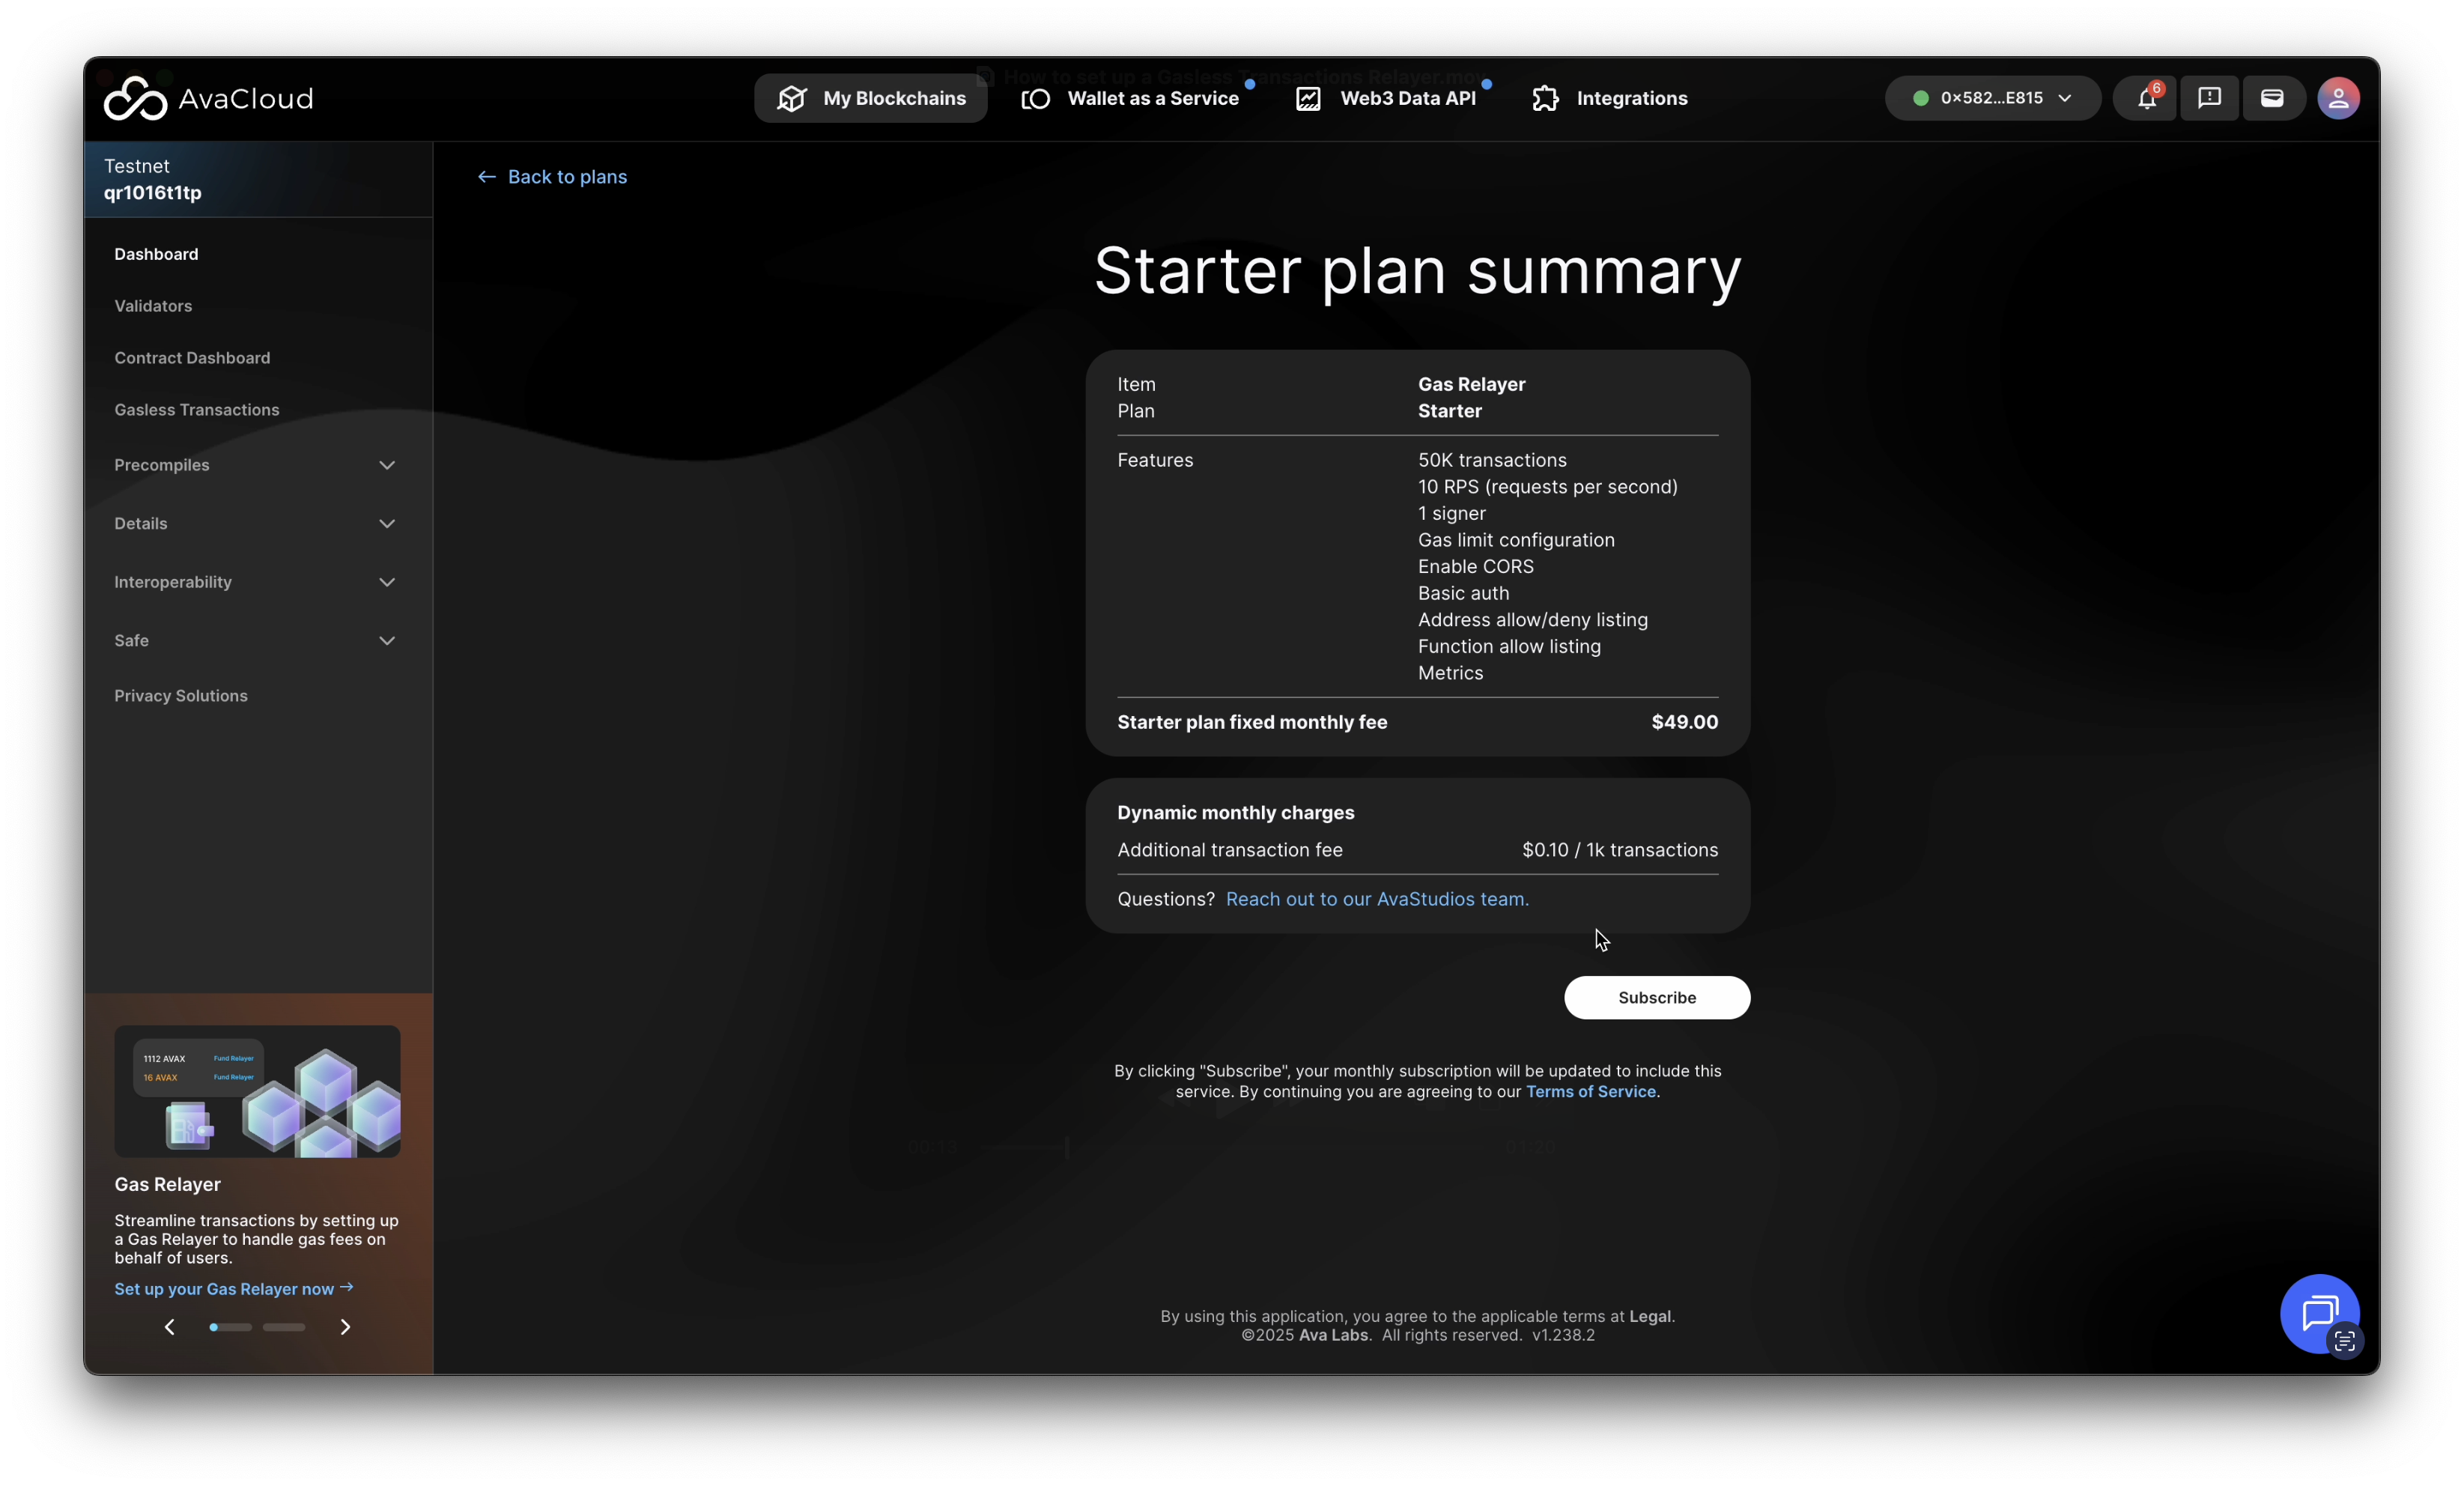
Once you choose a plan, you’ll see a summary to review the details before subscribing.
-
Subscribe and Switch Network if Needed
Click
Subscribe. The portal will check if your connected wallet is set to the correct L1. If not, you’ll be prompted to switch networks.The Gasless Transactions setup process will then begin.
-
Deploy the Forwarder Contract
Start by deploying a Forwarder contract. Click
Deploy Forwarder Contractto initiate this process.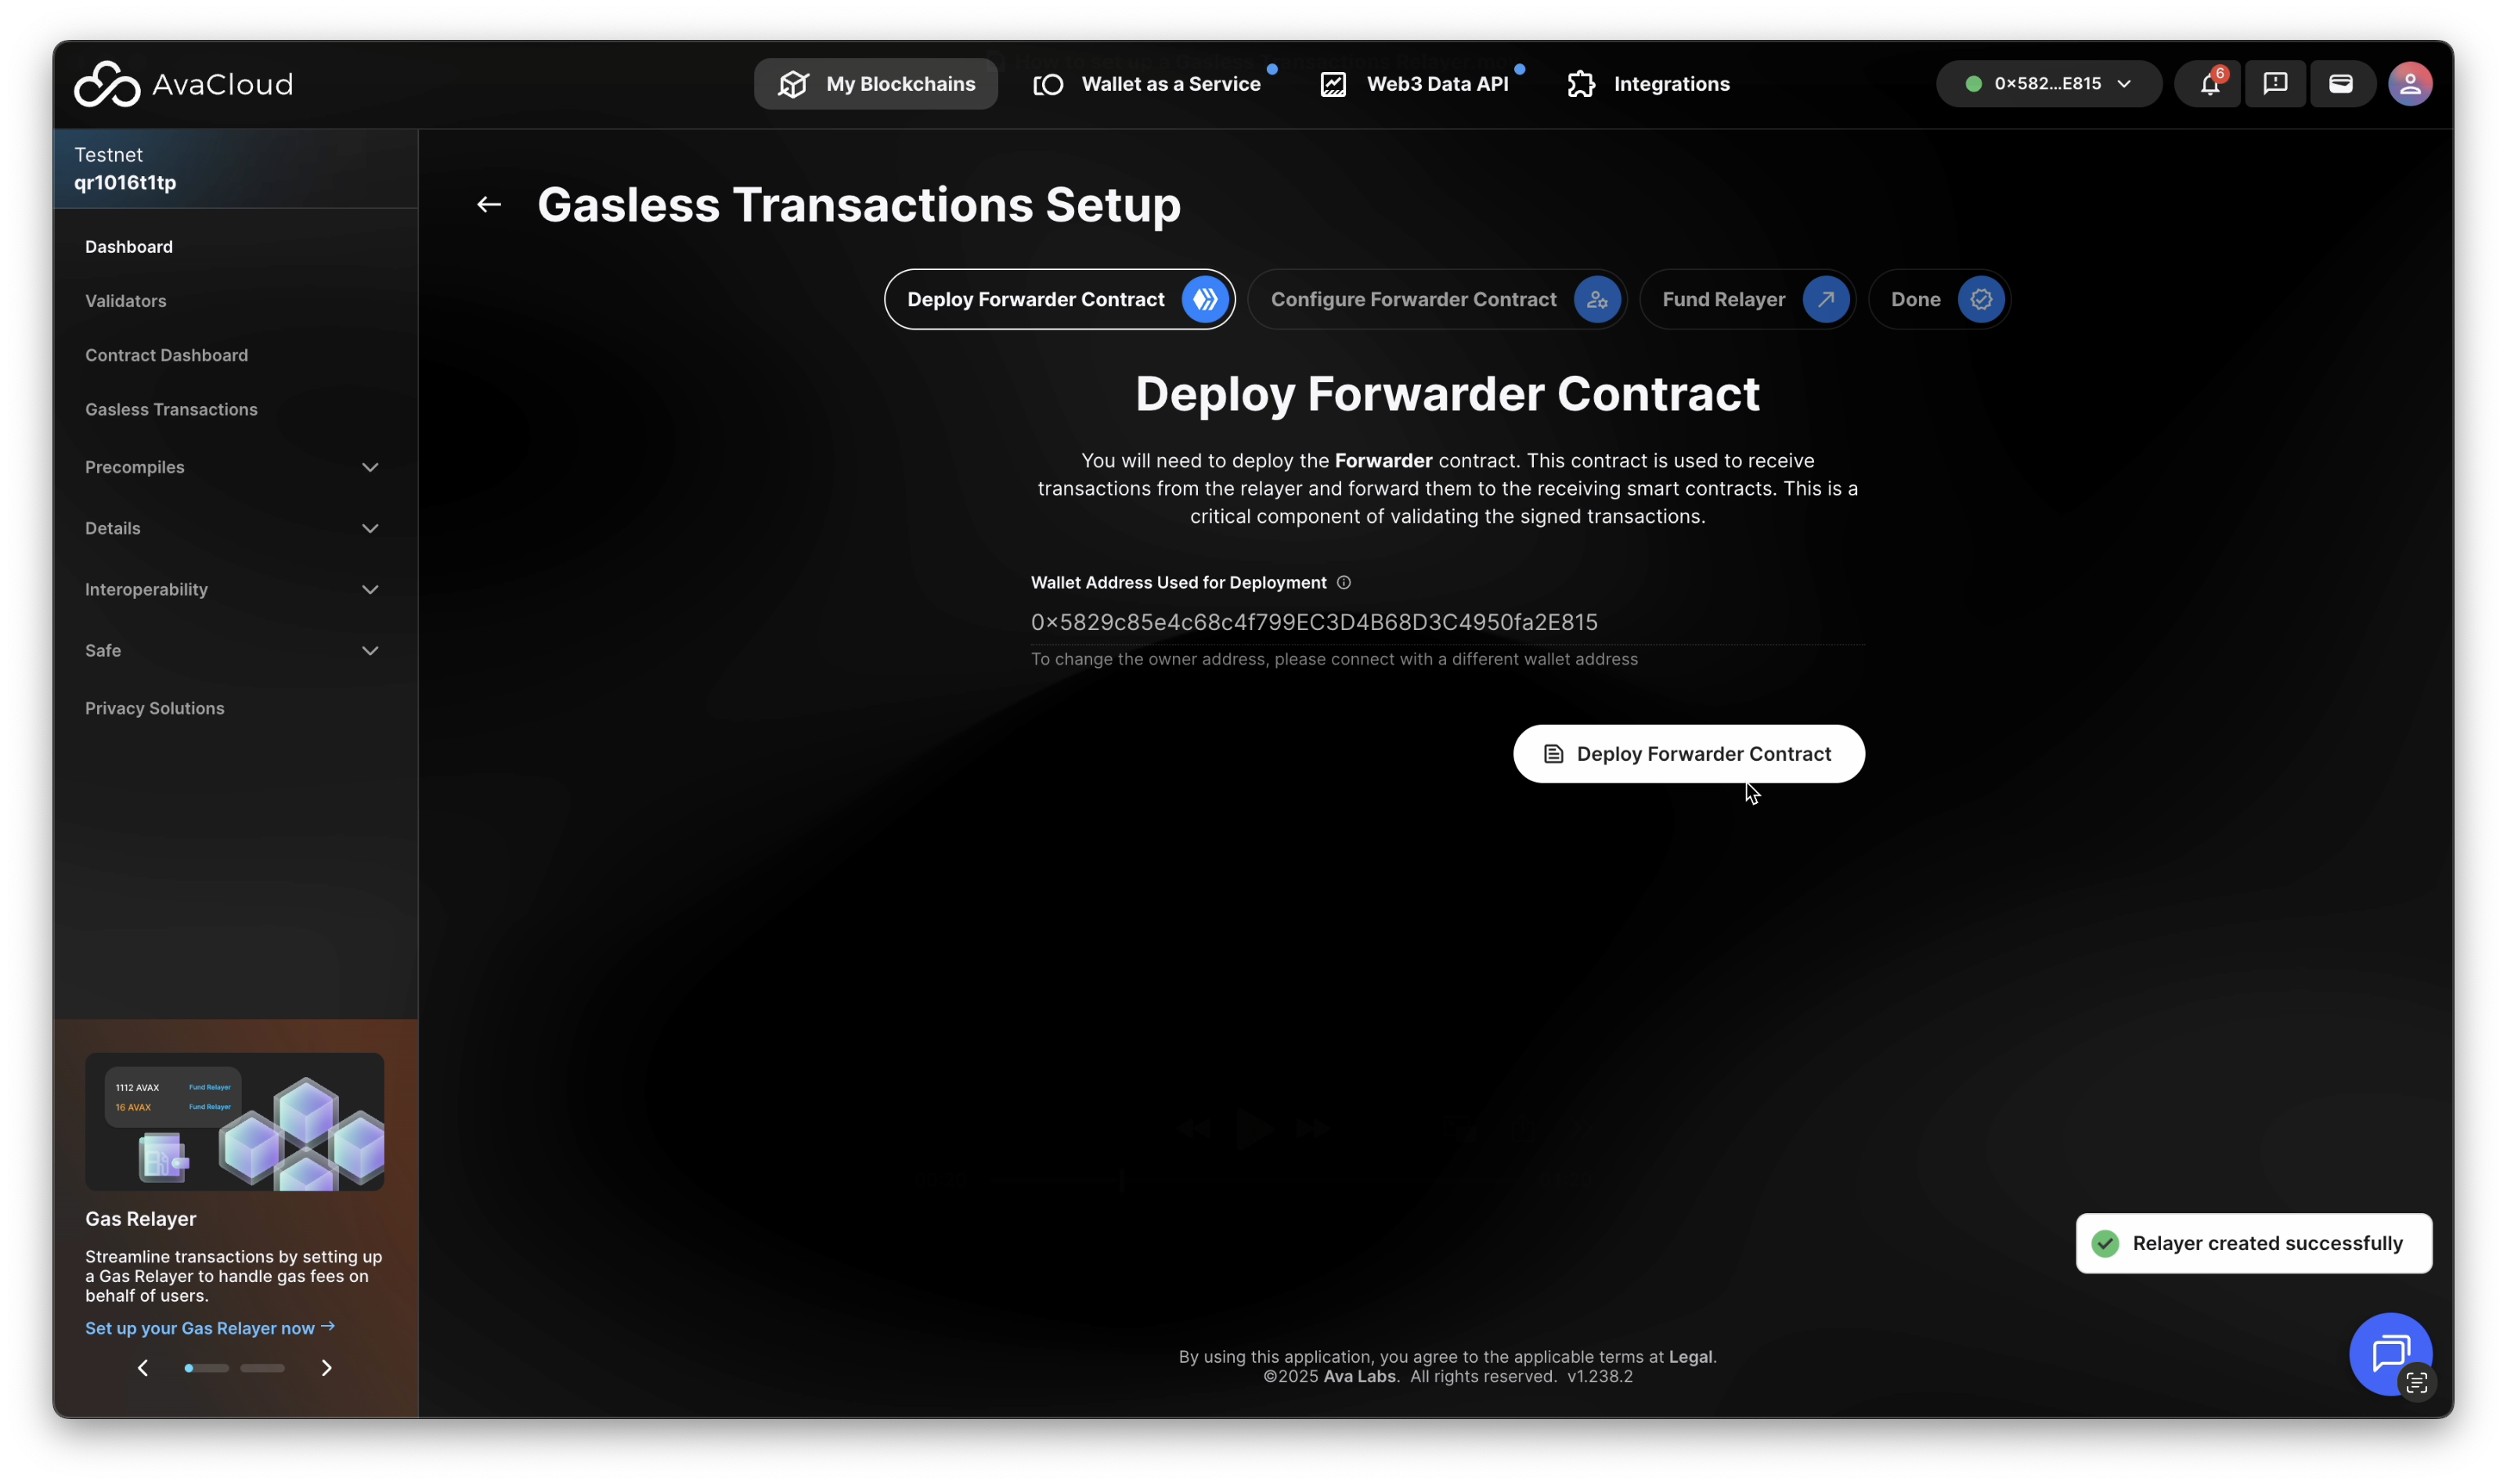
-
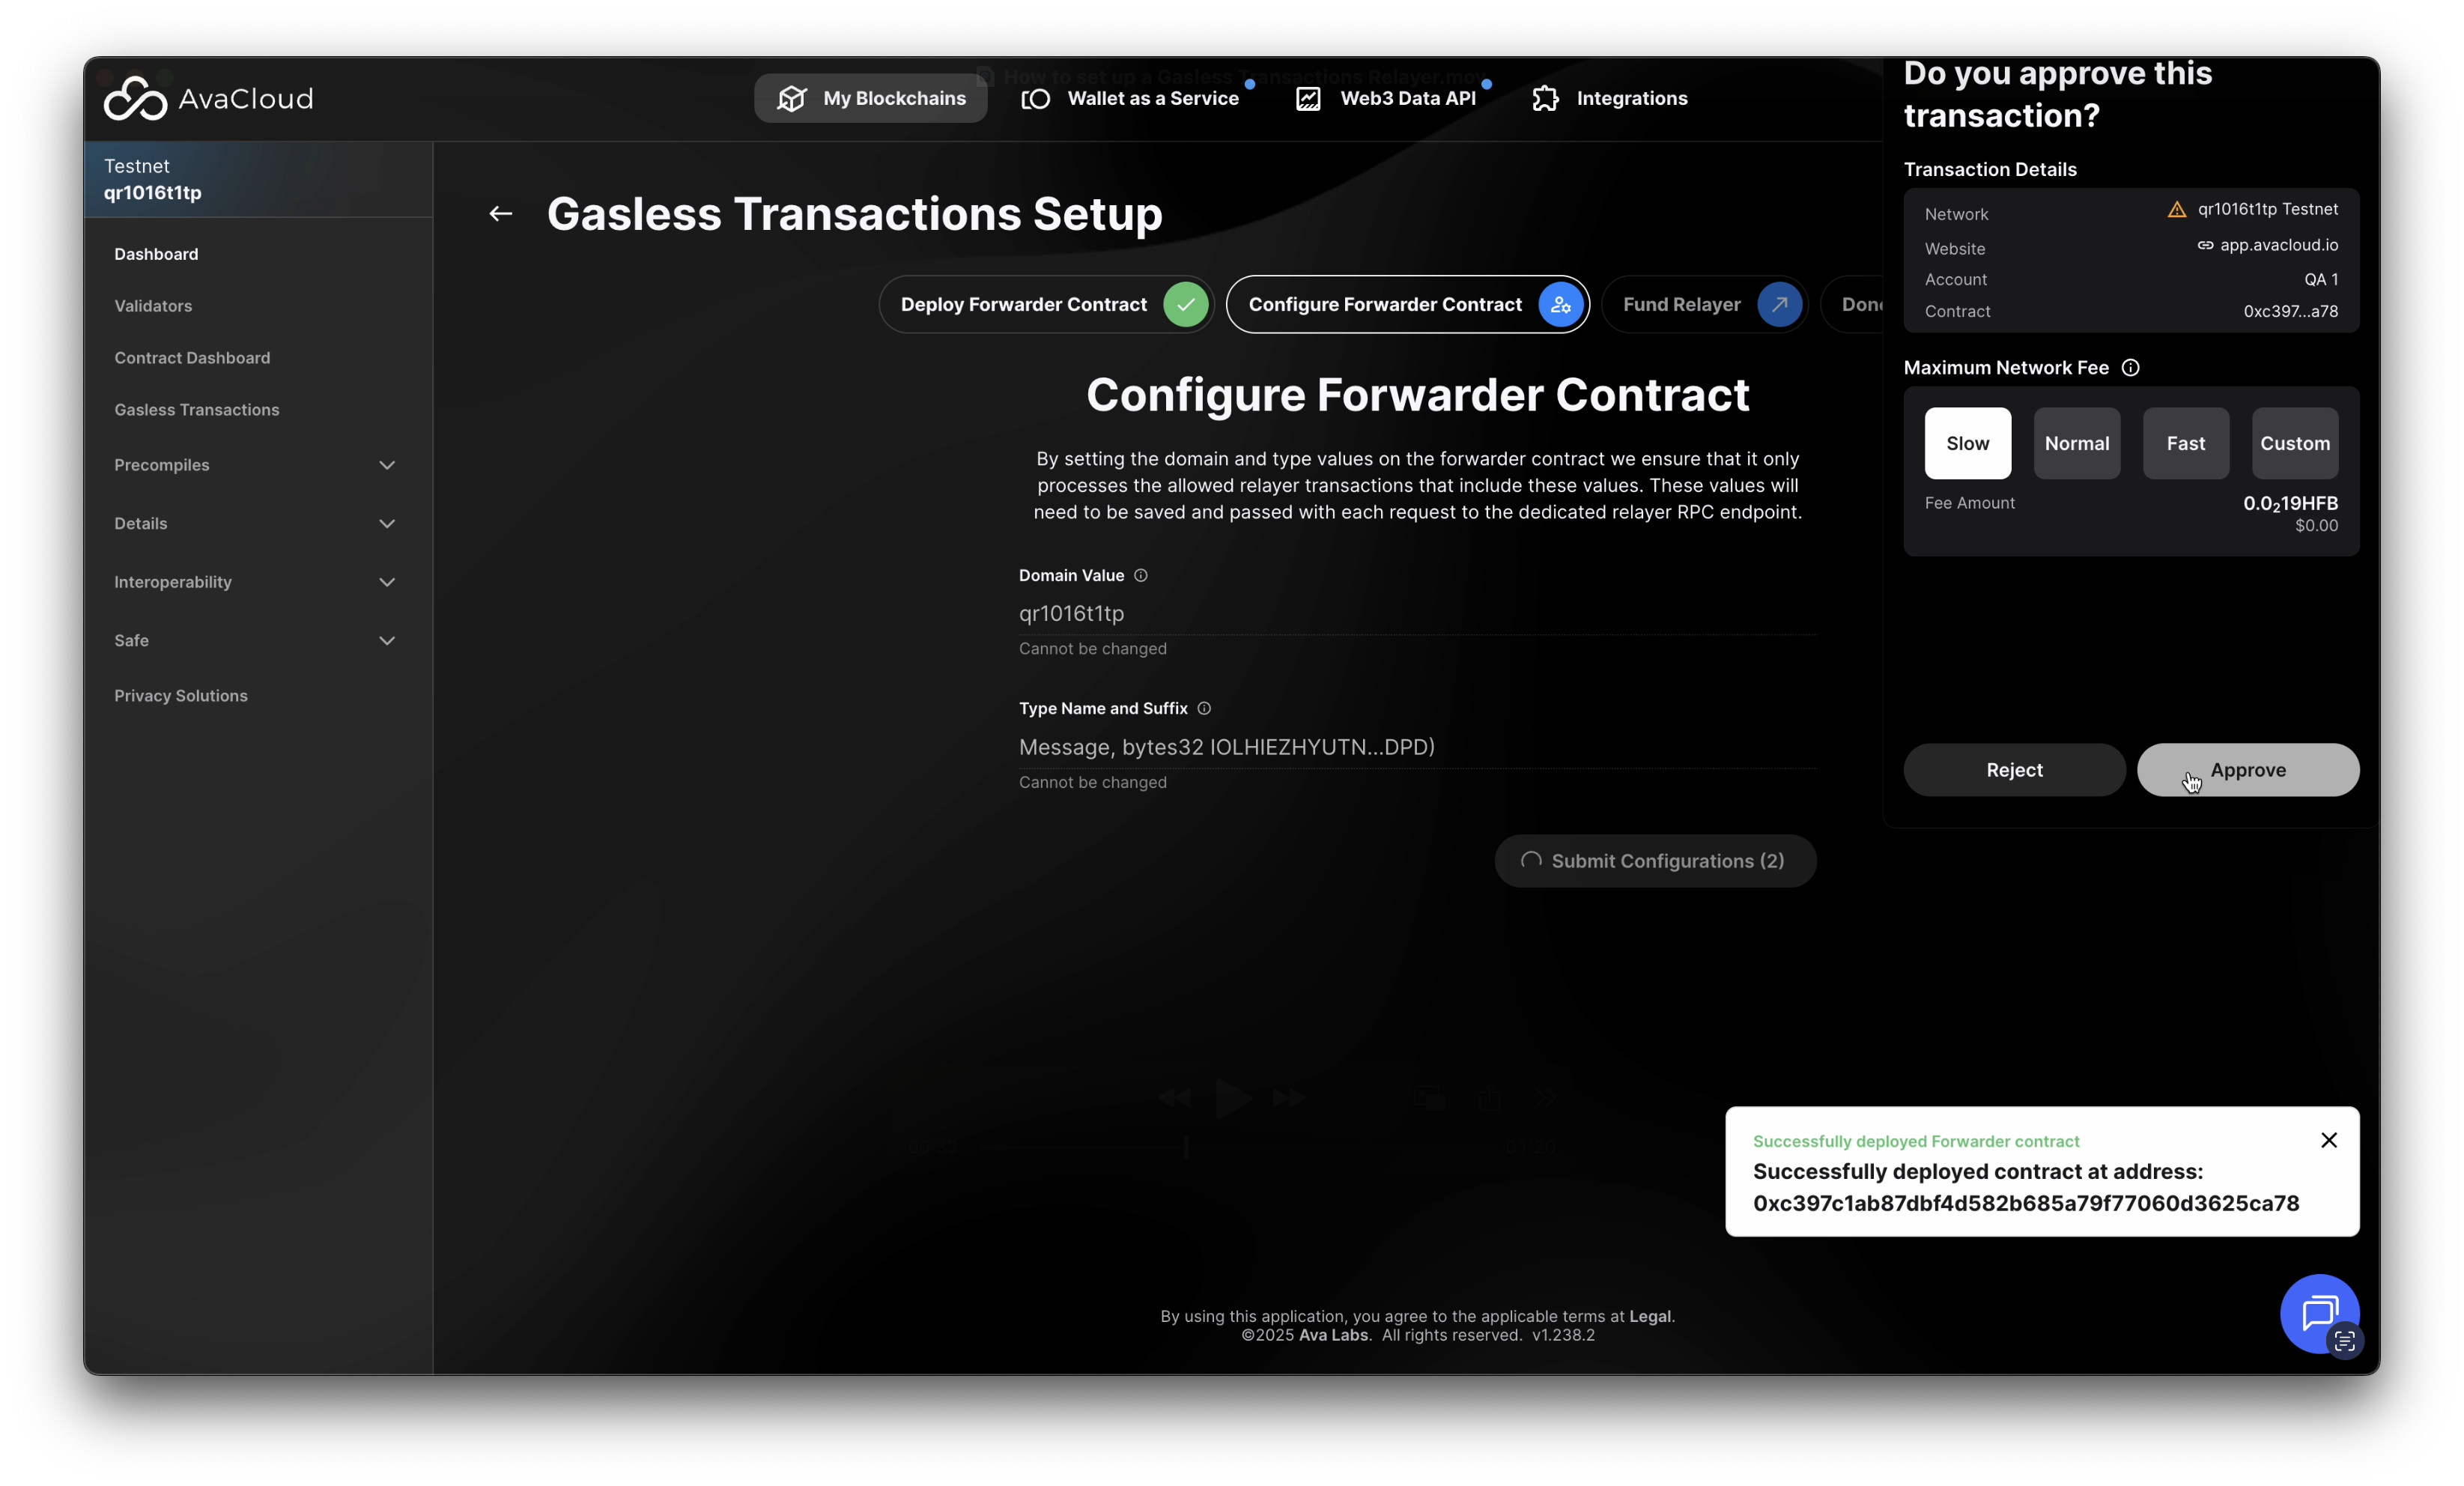
Configure Forwarder Contract
This step requires two approvals (indicated by the number in the button, which updates as approvals are completed).
-
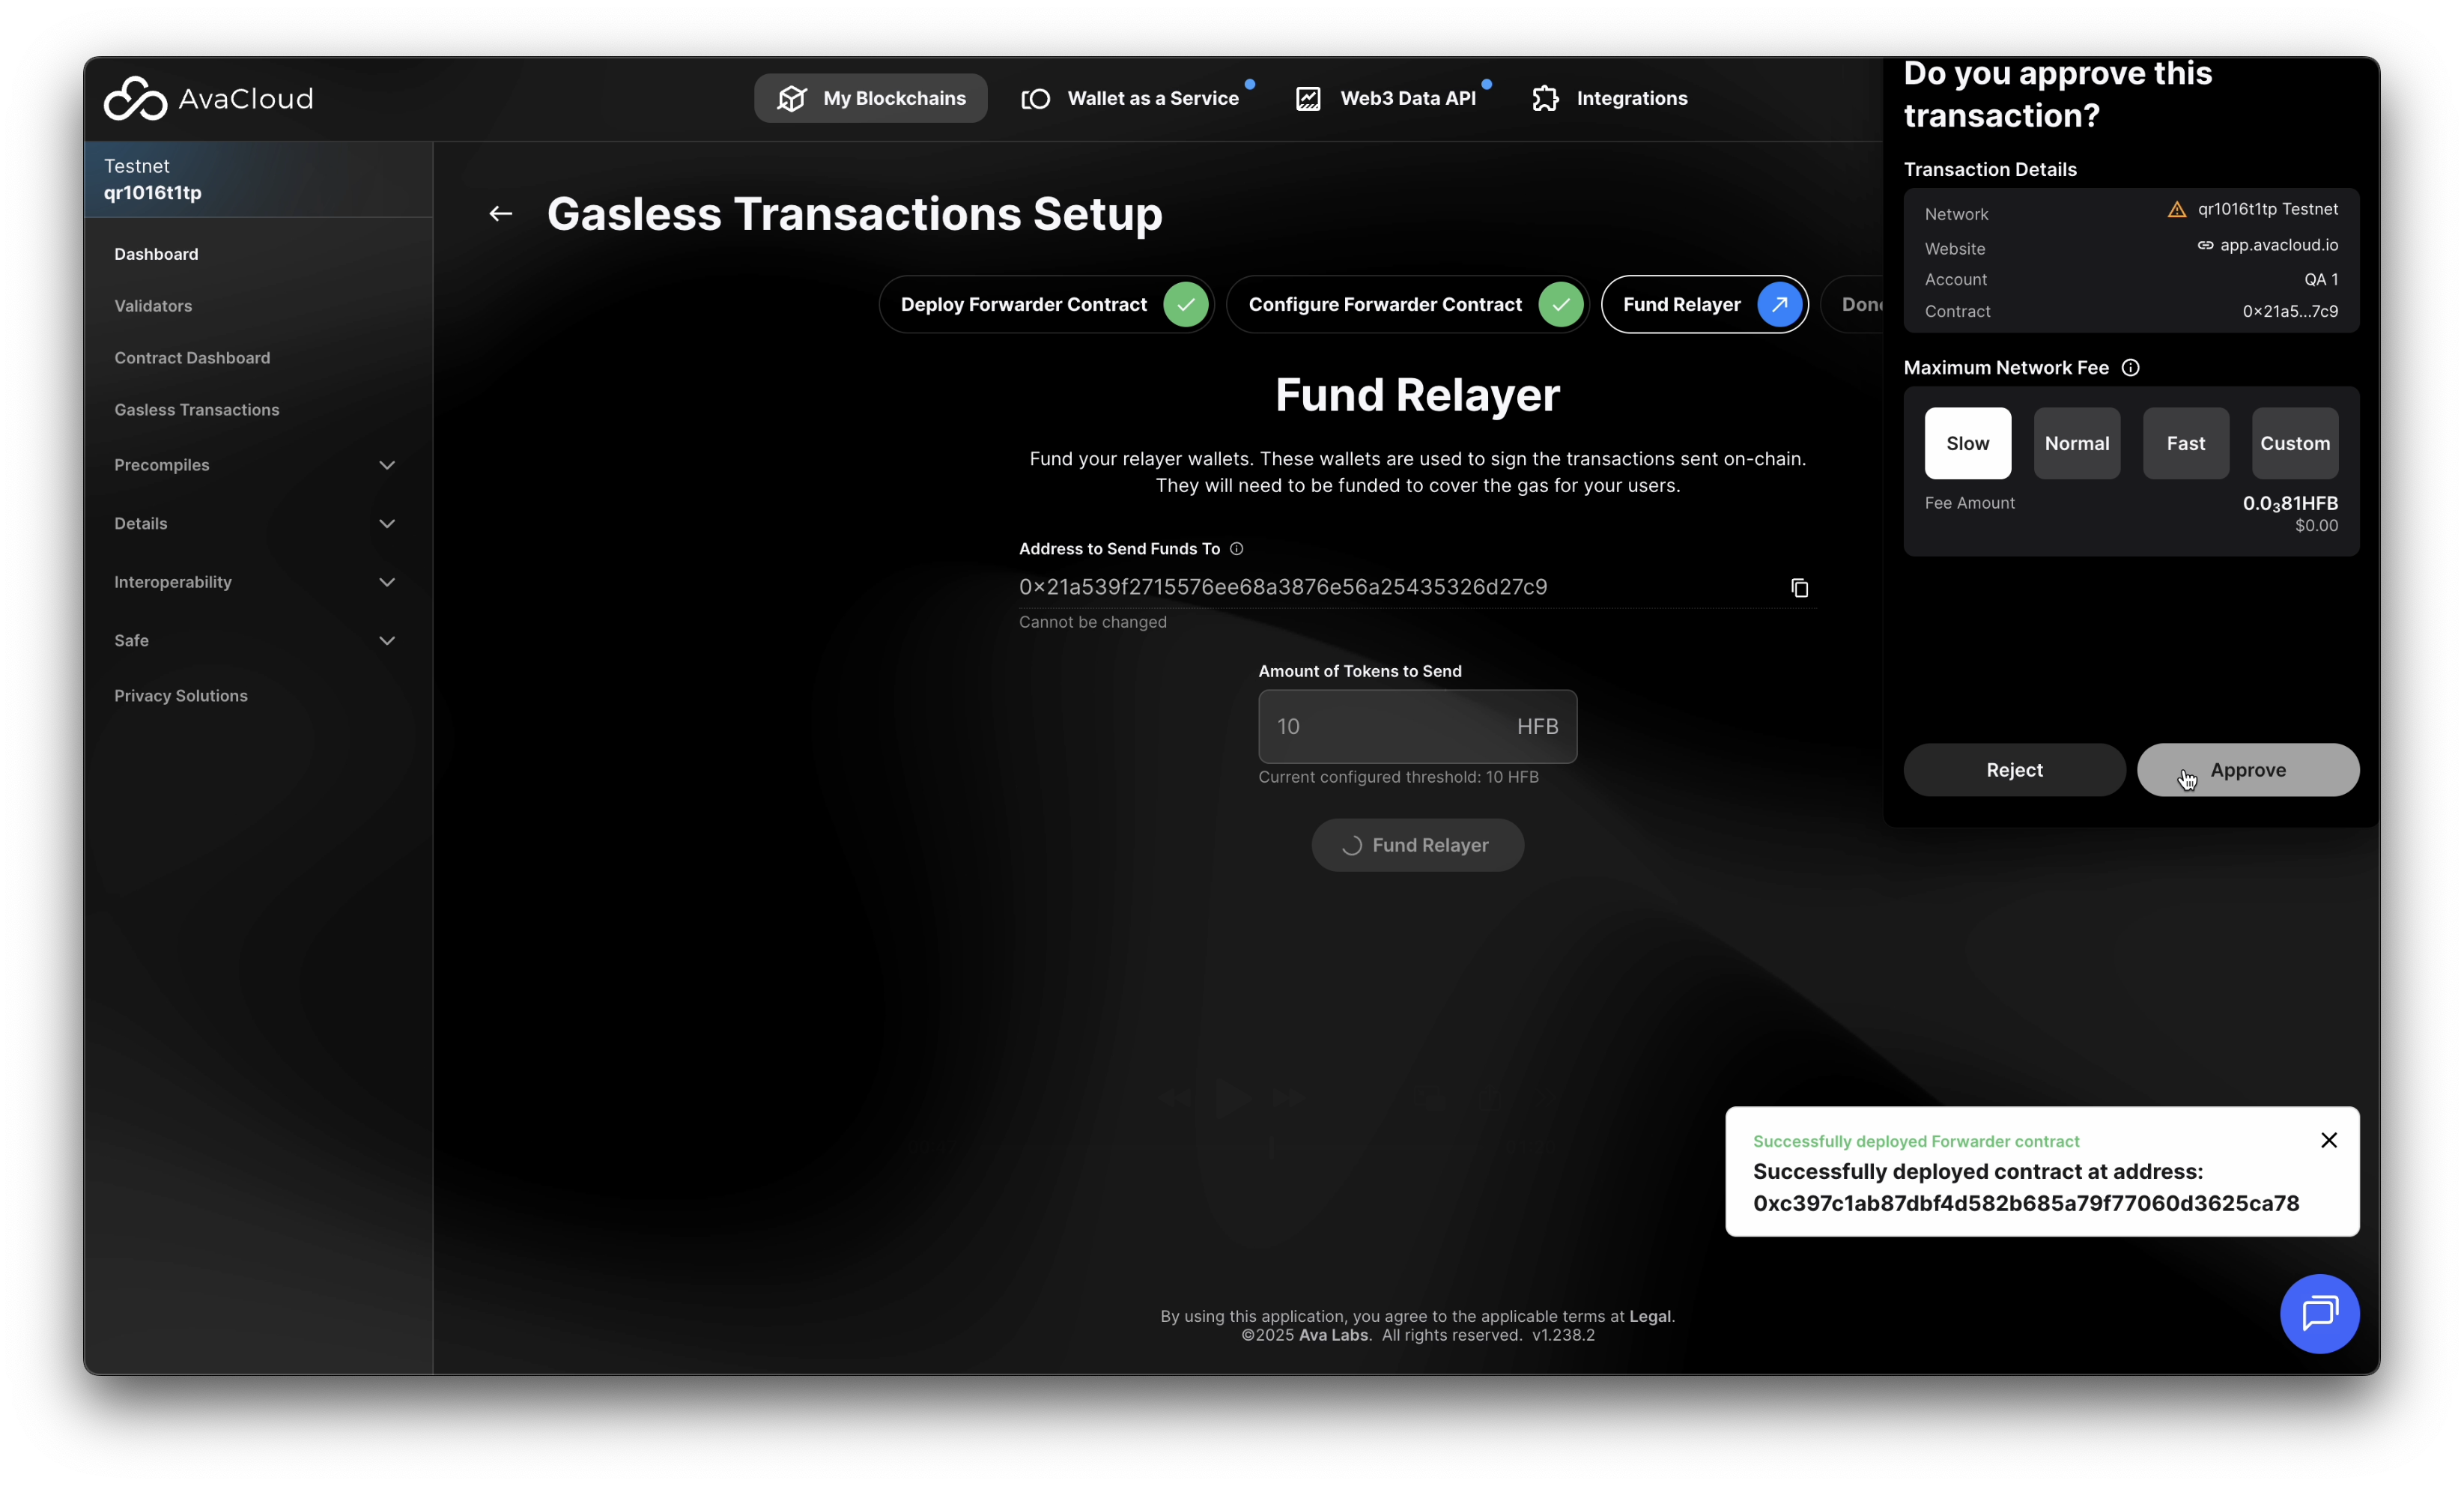
Fund the Relayer
Enter the desired amount of tokens to fund your relayer, then click
Fund Relayer.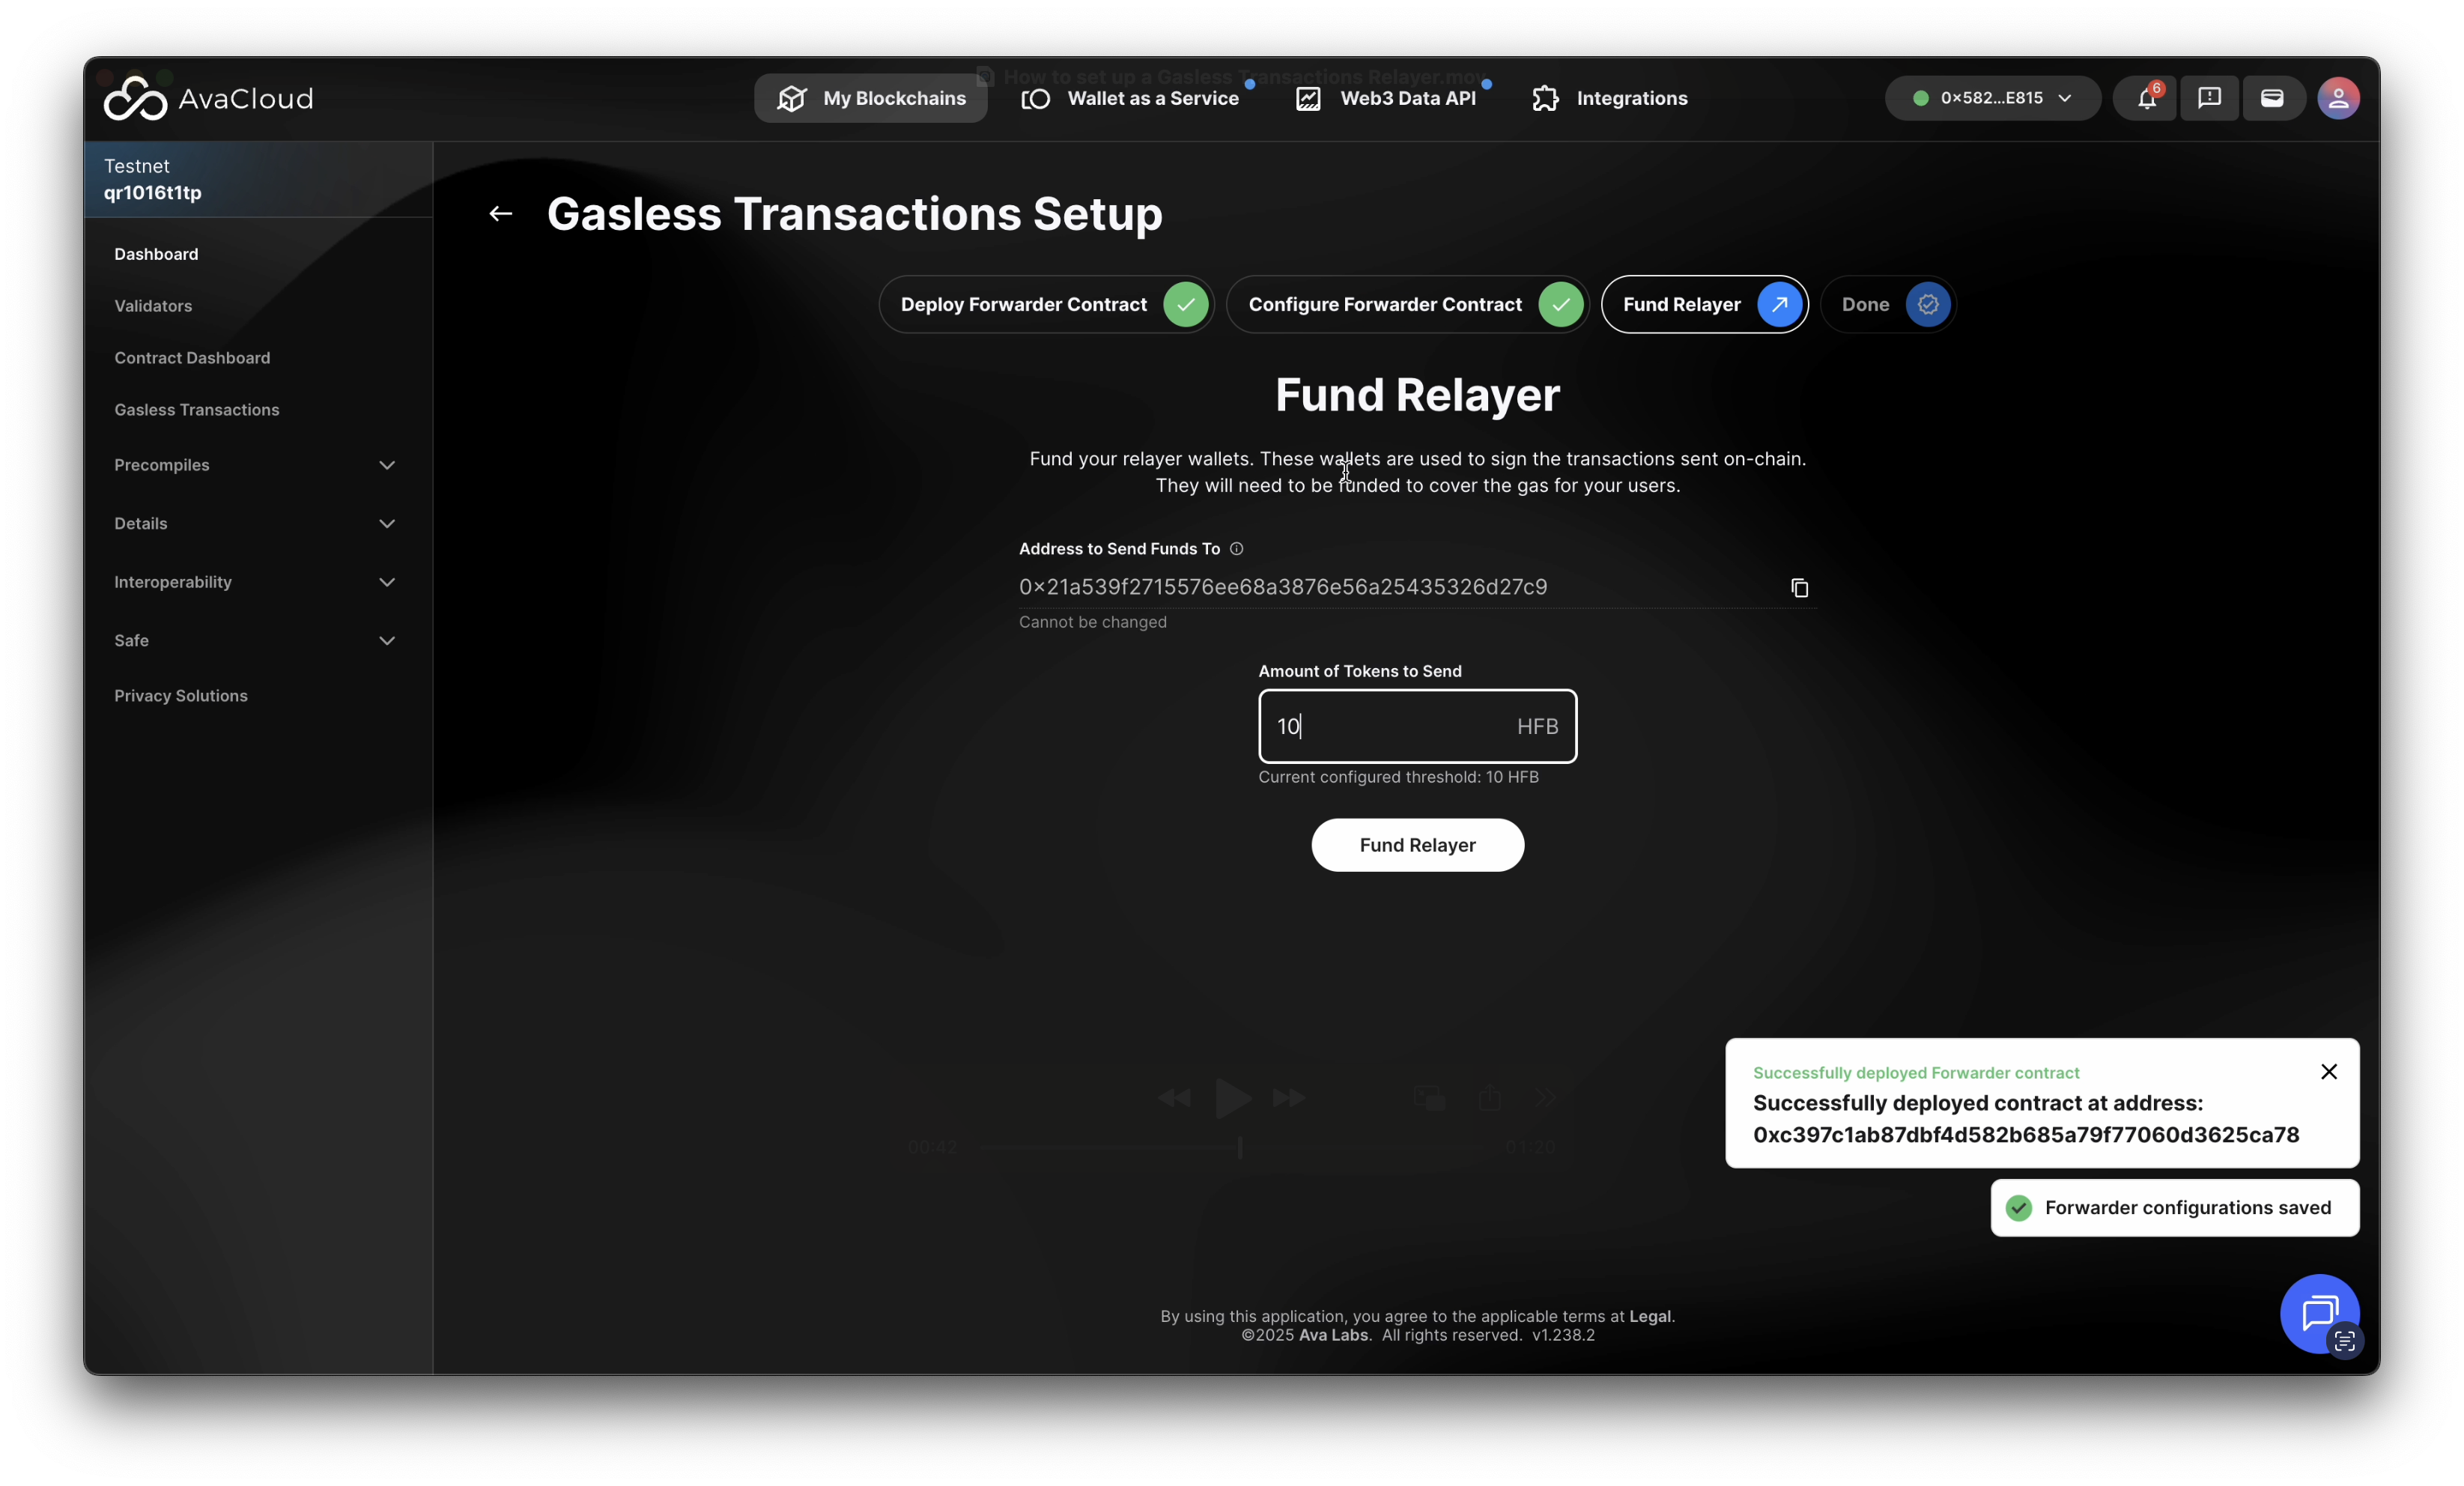
-
Deploy the Relayer
Review the information provided in the summary and click
Deploy My Relayerto finalize the setup.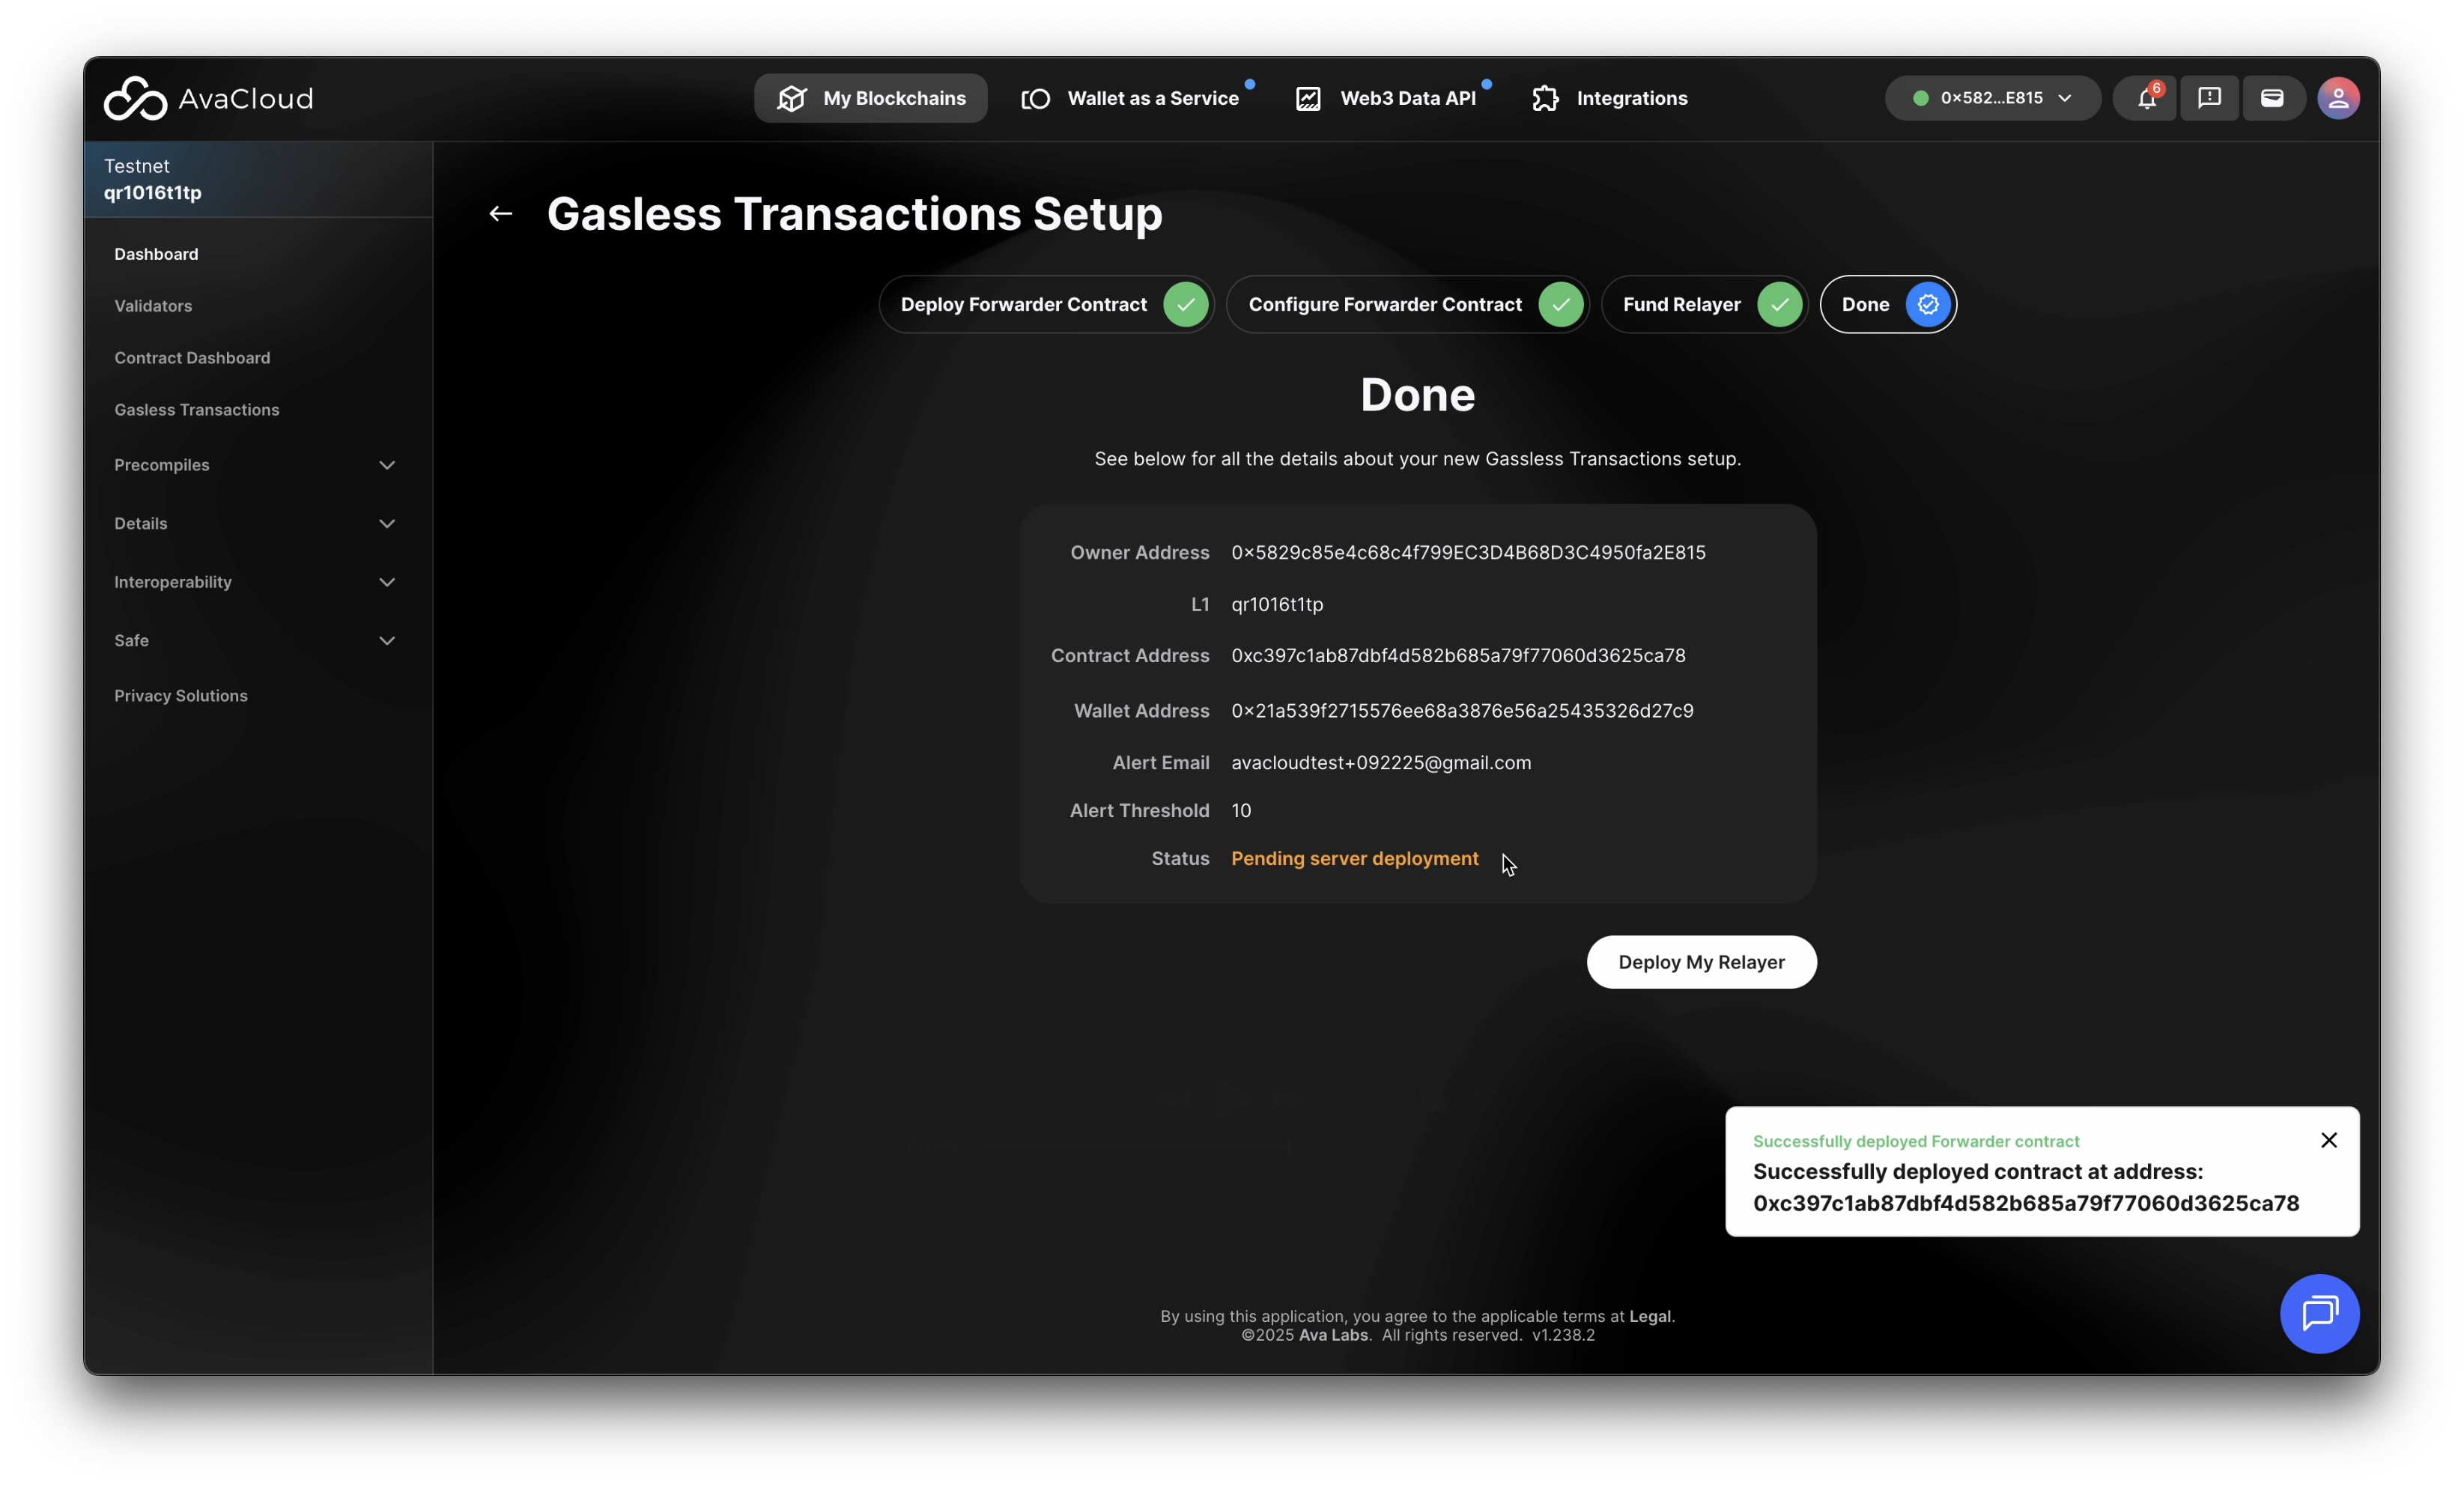
-
Access Your Relayer Dashboard
Click
Go back to Dashboardto view your relayer dashboard. Here you’ll see the current status of your relayer, which will start asPendingduring deployment, thenActiveafter completion.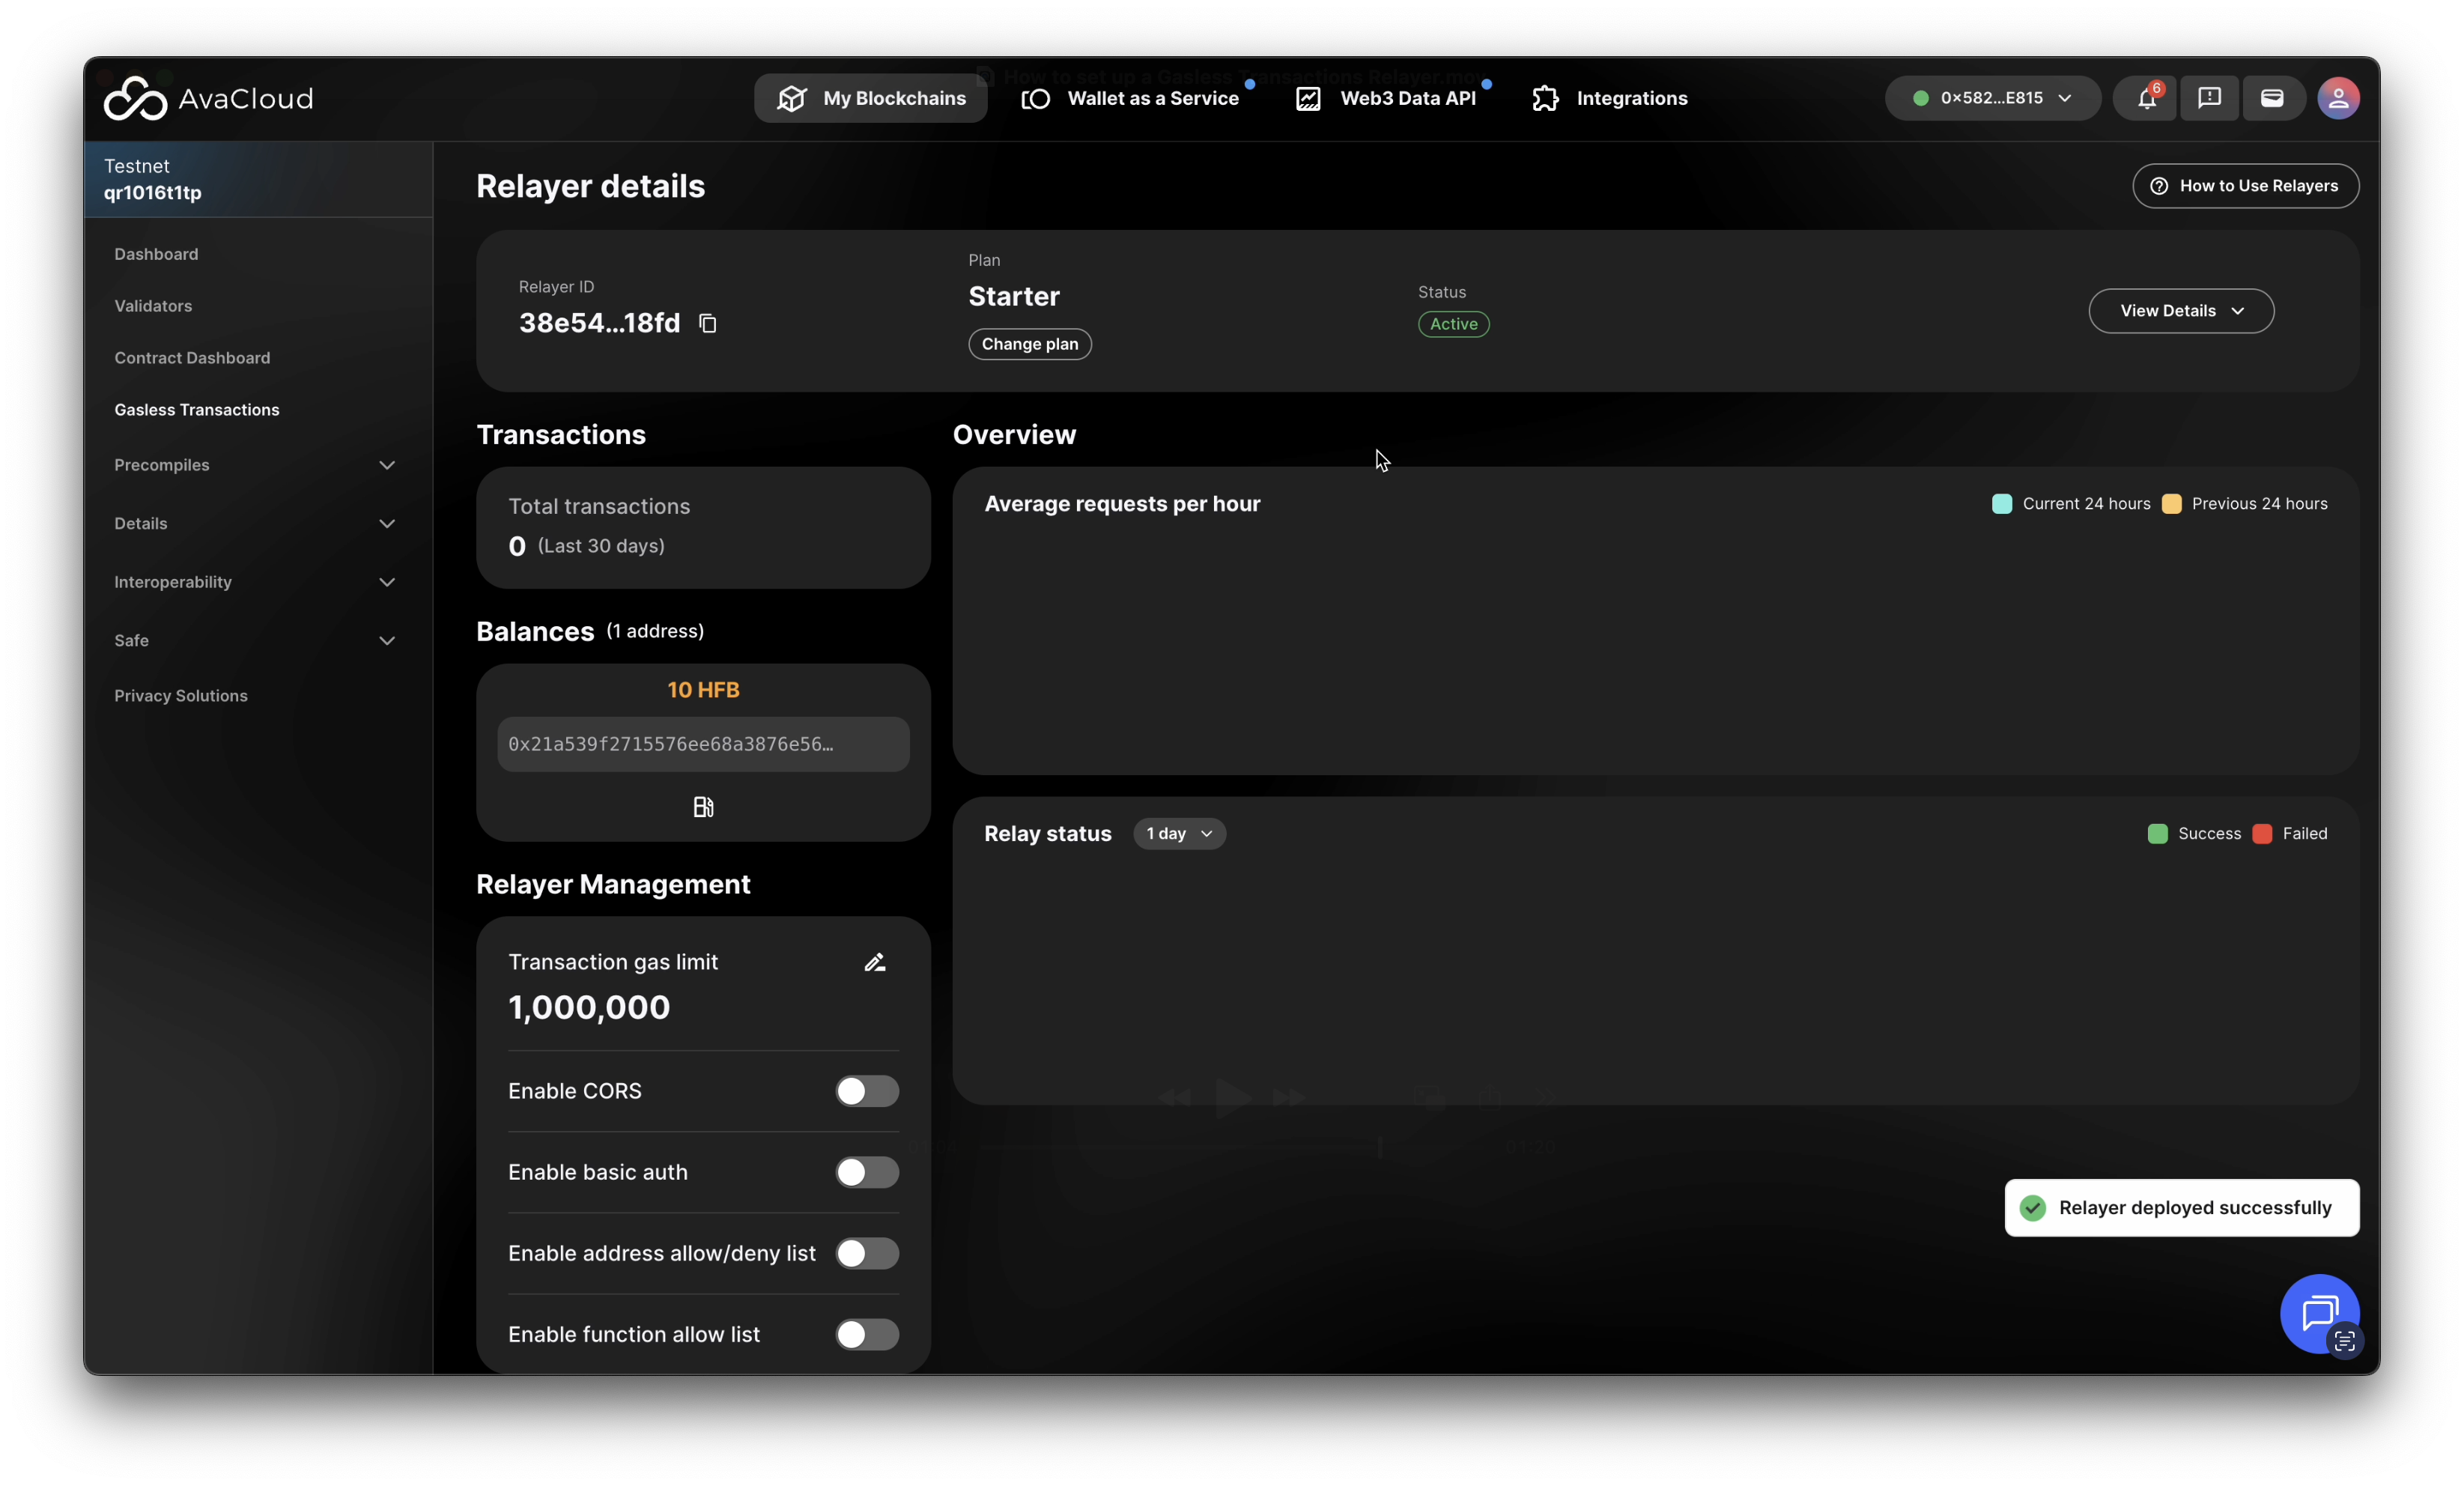
Video Walkthrough
Gasless Transactions Relayer Setup
Gasless Transactions Dashboard
If you need more help, explore our other articles or reach out to our support team via chat or email [email protected]. All examples provided are for demonstration purposes only.
Learn More About AvaCloud | Download Case Studies | Schedule an AvaCloud Demo
[Video/Screenshots last updated]: video for dashboard needed, 10/19/2025