How to verify a smart contract using the Explorer?
This document outlines the process of verifying a Smart Contract deployed on any Avalanche L1 using the official explorer.
Contract Deployment
-
Compile the smart contract using the tooling of your choice.
-
Deploy the compiled smart contract to an L1 on Avalanche Mainnet or Testnet.
-
Upon successful deployment, you will receive:
- A transaction hash
- A contract address
Contract Verification
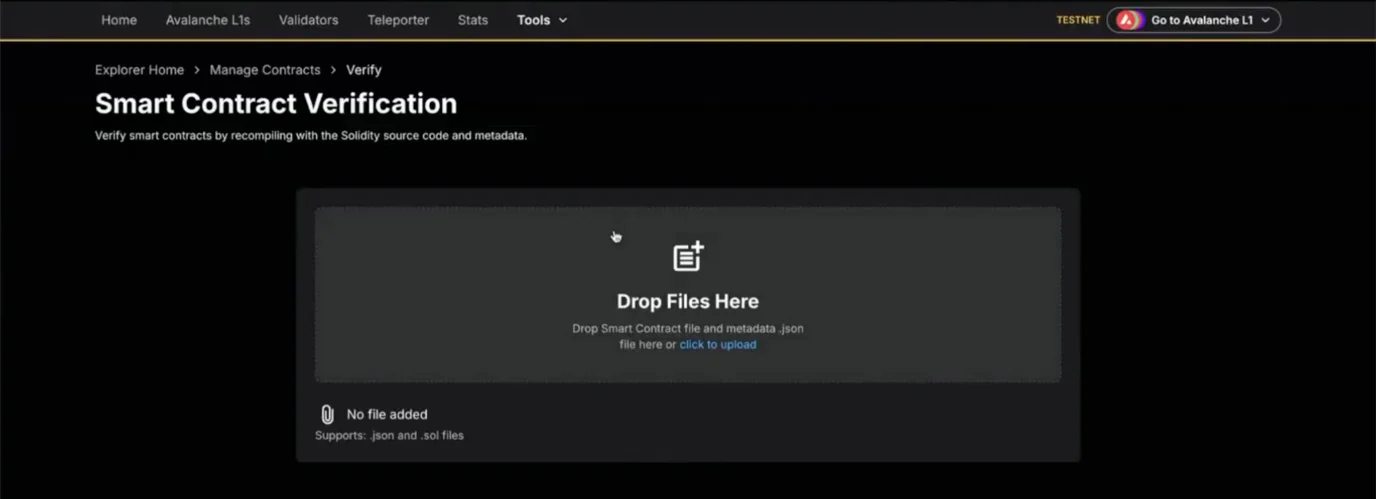
- Navigate to the official Explorer for
Mainnet or
Testnet
and click on
Toolsdropdown menu to selectSmart Contract Verificationinterface.
-
Prepare the following files:
- The contract's Solidity file (
.sol) - The
metadata.jsonfile containing the ABI and metadata
- The contract's Solidity file (
-
Upload the required files:
- Upload the contract's Solidity file
- Upload the
metadata.jsonfile
-
Enter the contract address and select the L1:
- Paste the contract address obtained from the deployment step into the designated input field.
- Pick the correct L1
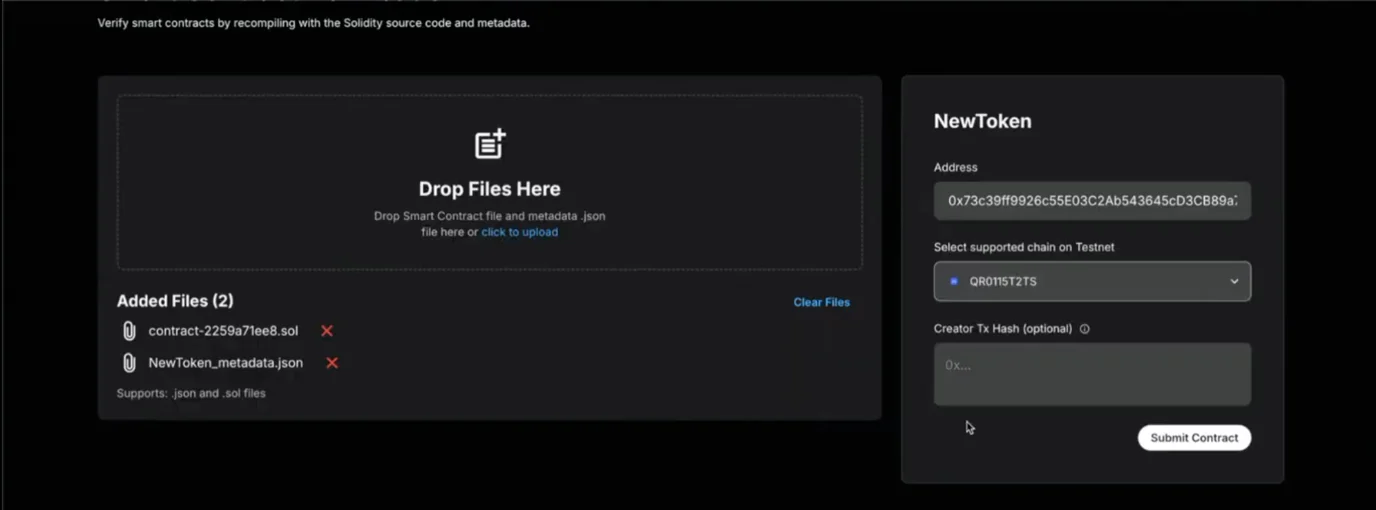
- Initiate verification:
- Click on the
Submit Contractbutton to start the verification process.
- Click on the
Next Steps
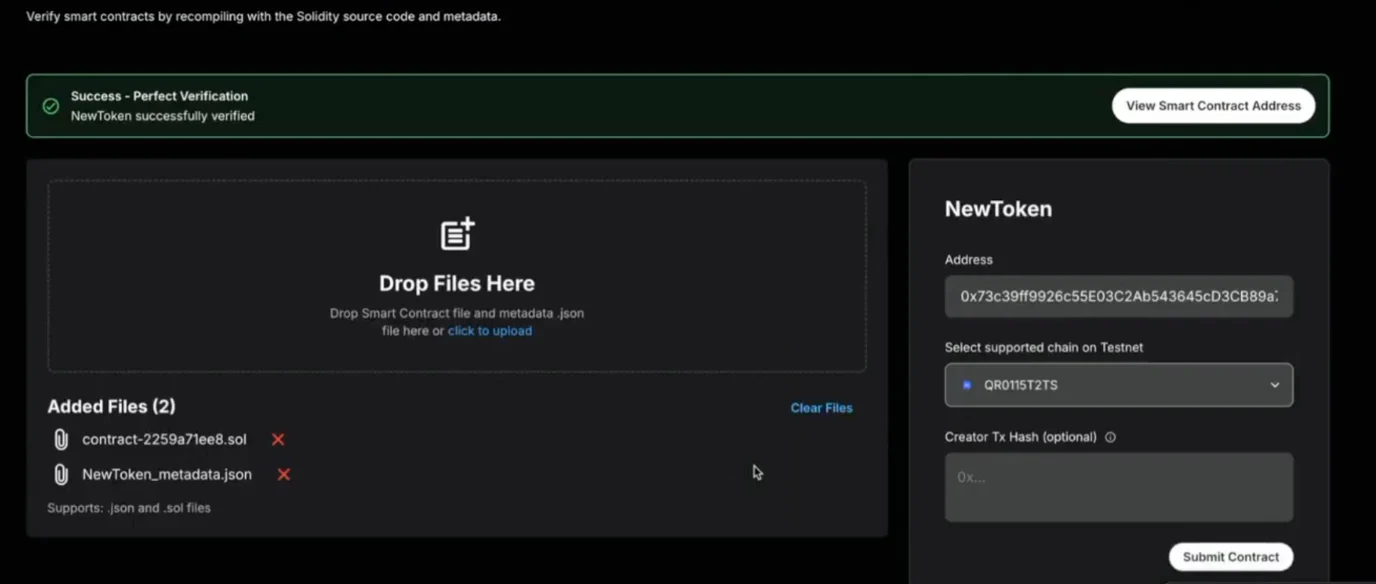
After submitting the contract for verification, your request will be processed shortly and you will see the below message.
If you need more help, explore our other articles or reach out to our support team via chat or email support@avacloud.io. All examples provided are for demonstration purposes only.
Learn More About AvaCloud | Download Case Studies | Schedule an AvaCloud Demo